Getting a New Hardwood Floor Level

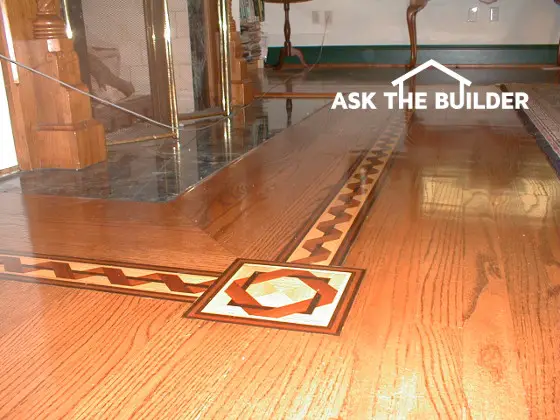
This is the hardwood floor, with decorative inlay, that was in my own home I built. The installer I hired used a straightedge and shingles to make the hardwood perfect. © 2017 Tim Carter
Getting a New Hardwood Floor Level Tips
- Screw subfloor to joist first
- Use straightedge and flashlight
- Straightedge will show humps and low spots
- Fill low spots with asphalt shingles or self-leveling compound
- CLICK HERE to Get Tim's FREE & FUNNY Newsletter!
DEAR TIM: I'm getting ready to install 3/4-inch-thick tongue and groove golden-oak hardwood flooring. I'm ready to start the job but my wood subfloor seems to have all sorts of high and low spots. I don't know where to start the job. Should I use a leveling compound to smooth the floor? Are there other tricks I can employ to make sure the finished floor is smooth as glass once finished? Gary W., Calgary, Alberta, Canada
DEAR GARY: This task is not as challenging as it might seem. You are very lucky that you discovered the flaw in the subflooring before you started the installation of the finished wood. All too often, I have seen professionally installed hardwood floors that have dips, humps and other inconsistencies in them. When I see these imperfections on the finished high-gloss surface, I know a rookie must have installed the actual flooring.

CLICK this image and listen to the first call on the podcast. I talked to Jill about how to repair wood kitchen flooring, and possibly installing an inlay border as an option. Copyright 2018 Tim Carter
CLICK HERE to get FREE & FAST BIDS from local hardwood installers.
Flat Floors Are a Must
There are wood subfloors that are very hardwood-friendly. This means the subfloors themselves are flat and smooth.
Flat and smooth doesn't mean that the floor is level. A floor doesn't have to be perfectly level to look superb covered with hardwood strips.
Wood floor systems framed with engineered wood I joists, or those made from floor trusses, often are extremely flat or in the same plane. I've worked with both types of joists and they're a dream because they produce such a flat floor.
Crowns Equal Royal Pain
Those wood floors framed with traditional solid-wood joists are the ones that can cause problems. Each joist may be slightly different in height and, to compound problems, each joist can have a different degree of crown.
The crown in a wood floor joist refers to the amount of upward curvature that exists in the framing member as you look down the length of the top edge. If the rough carpenters and lumber suppliers are very selective about the floor joists they use, a traditional wood joist system can be as perfect as a wood I-joist or floor truss system.
But this is a RARITY. What's more, modern framing lumber has been hybridized so it grows faster. To me it seems modern lumber has more crown to it than lumber I used forty years ago.
The best joists are ones with vertical grain. A vertical-grain joist is one cut from the center of the tree. It would have the small dark round center of the tree in it and the growth bands radiate out on each side until you get each end of the joist. A flat-grained joist is one that's cut from, or near the edge of the tree.
If you’re interested in learning more about cost estimates for hardwood flooring I have an article here.
Get Floor Ready
To get your wood subfloor ready, the first thing to do is to make sure the wood sheathing that is on top of the joists is securely fastened. I highly recommend installing coarse-threaded screws in addition to the nails that might already be in place. Be sure to do this in high foot-traffic areas of the room. The use of screws will prevent floor squeaks that are caused by nails that are not driven completely or that work themselves loose because of lumber shrinkage. Use screws that penetrate at least one and one quarter inch into the wood joist.
After the subflooring is screwed tightly to the joists, vacuum the floor to remove all dust and debris. Use a six-foot long straight edge and a level to find the highest spot on the floor. Although you might want the floor to end up in the same plane, it may not be a realistic goal. Your existing floor may be severely crowned. If this is the case, the hardwood floor may need a giant wedge of shims or leveling compound that extends to one or more walls in the room. This degree of correction may not be needed to get the visual goal you desire.
CLICK HERE to get FREE & FAST BIDS from local hardwood installers.
Filling Low Spots
I always use regular roofing shingles to fill in any dips or depressions in wood or concrete subfloors. The overall floor may not end up in the same plane, but if you have just one gentle hump that extends over 10 or 12 feet, the naked eye can rarely detect this imperfection. Dips or depressions in a subfloor are immediately identified using the six-foot long straightedge. Place it at the highest spot in the floor and slowly swing it around in a 360 degree circle. The low spots will be readily visible under the straightedge.
You can see all imperfections best in a darkened room. Use a flashlight held parallel with the floor and aim the beam at the straightedge. Believe me, you'll see gaps beneath the straightedge.
Use a marking crayon to outline the hollow spots and mark how deep they are.
Use as many asphalt shingles as necessary to fill the low spots. They do not have to be nailed down as the many nails used to hold the flooring in place will pass through the shingles as they are driven into the wood subfloor. You can tack the shingles in place if you desire so they do not move around as you work on the floor.
Floor Leveling Compound
The use of a floor leveling compound can achieve the same goal, however it requires a bit of skill to apply the compound evenly. Also, if you mix some leveling compounds wrong by adding too much water, there is a possibility they can break down over time and turn to powder. These compounds work great if you follow the instructions.
Always mix a TEST batch and see how it works. This is a cheap insurance policy. You want to make sure it flows and looks superb.
You want to know how THIN you can get the self-leveling compound. Some are not recommended for thin hollow spots. READ the label to find out the limitations of the compound you decide to use.
This will not happen with shingles, which is exactly why they are my weapon of choice when confronted with this task. But shingles can be hard to work with and they don't fill the entire hollow spot. There's pros and cons with each method.

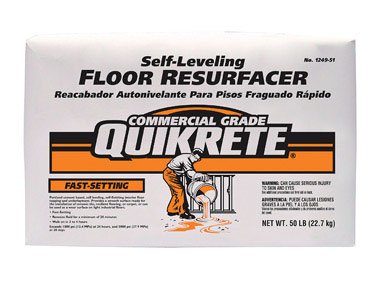
This is a great name-brand self-leveling floor compound. You just mix it with water and pour. CLICK THE IMAGE NOW TO ORDER IT.
Tongue Depression
If you fail to fill the depressions under a hardwood floor, the hardwood can flex when you walk over it. Over time, this can cause squeaks as the hardwood slides up and down the nail shafts of the nails used to install the hardwood. The subfloor doesn't have to be absolutely in the same plane to prevent squeaks, but voids of 1/8 inch or more can cause problems.
In thinner hardwood, the actual interlocking tongues can crack off if the hollow spot is too big. This is a massive problem and is why you must have the floor FLAT.
Installing hardwood flooring perpendicular to the direction of the floor joists is also critical. Finished flooring that runs parallel to the joist direction will often telegraph the slightest defects in the subflooring.
Be sure to install tar paper over both wood and concrete subfloors to minimize moisture infiltration to the underside of hardwood flooring. Tar paper is an excellent vapor retarder.
CLICK HERE to get FREE & FAST BIDS from local hardwood installers.
Column 486
39 Responses to Getting a New Hardwood Floor Level