Leaking Shower Pan – Membrane Failure
Leaking Shower Pan
DEAR TIM: A pesky leak recently developed just below the master bedroom bathroom in our eight year old home. We have traced the problem to our custom sized ceramic tile master bath shower stall. My son likes to plug up the drain with a bucket to make a shallow one inch deep pool. The water level is 2 inches below the curb. It doesn't seem to leak during a normal shower. While trying to caulk grout seams I discovered that the drywall behind the bottom row of tiles has turned to mush. How serious is the problem and what is the fix? Jackie F., Lexington, KY
DEAR JACKIE: The problem is very serious. The extent of the damage will become evident as soon as you perform a full autopsy on the shower stall walls and quite possibly the ceramic tile shower floor. In all likelihood, I think you will discover that the special waterproof membrane beneath the shower floor has a hole in it, was installed wrong, or has separated from the drain pipe.

Start the examination by removing tile from the lower portions of the walls. Use a 3 inch wide putty knife with a thin flexible blade. The tiles will pop off very easily. As you go up higher on the walls, it will become more difficult to remove tiles. I think you will discover that the wall damage will extend upwards at least two feet or more. The wall tile problem happened because the original installer did not use cement board or some other product that will absolutely not disintegrate when exposed to constant moisture.
Regular drywall and moisture resistant drywall that has a light green paper simply are not long term backing material for ceramic tile shower or bathtub installations. Water passes through ceramic tile grout and gets these products wet. Over time, the paper facing on water resistant drywall starts to fall apart and the untreated gypsum core in standard drywall simply fails. Cement board is a far better product and it will never fail even if immersed in water 24 hours a day.
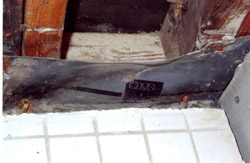
Once the drywall is off the walls, you should see the top edge of the waterproof membrane that is beneath the ceramic tile shower floor. Ideally, this membrane should extend at least 2 inches above the highest point of the curb. It should maintain this height around all of the walls. This method of construction allows the curb to become the spillway in the event your son allowed too much water to build up within the shower.
With the drywall out of the way, it is now time to recreate the leak. Plug up the drain and use a garden hose to fill the shower floor with water. Use a flashlight to inspect behind the walls to see where and when water bypasses the waterproof membrane. When water starts to leak below and you can't see anything on the side walls, this means the problem is hidden beneath the ceramic floor tile. If this is the case, it is time to take out the ceramic floor and the cement base beneath it. Once you have gone this far, simply start over and install a new membrane liner.
I have written a cool eBook about Shower Pan Liners that shows you exactly how to install a shower pan liner. The book contains many step-by-step color photos and easy-to-follow instructions. Click here to see what other homeowners such as you have to say about it!
If the leak is in the membrane above the floor, you may be able to patch it. You can weld a patch using solvents and identical membrane material. Cut a small piece off the top edge of the membrane and take it to a ceramic tile store or a plumbing supply house. They should be able to match the material with ease. Do a test patch on the back side of the membrane to make sure you have the right material and solvent.
Once you have patched the leak, let it sit for 24 hours. Plug the drain again and fill the shower floor to just below the curb. Let the water sit for several hours and see if your patch holds. Be sure all of the wood studs and sub flooring is dry and in good condition before you close up the walls with new cement board and tile.
Column 342
2 Responses to Leaking Shower Pan – Membrane Failure