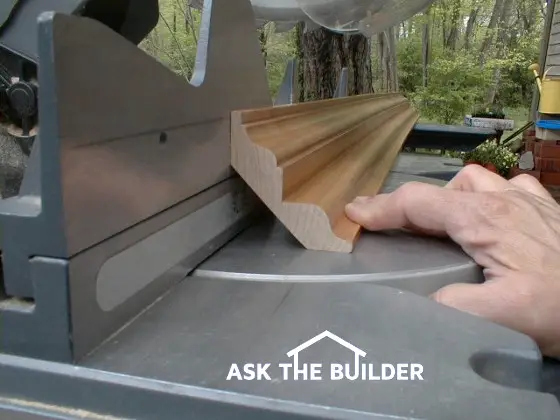
Cutting Crown Molding

Cutting Crown Molding TIPS
- Watch following videos to understand
- Cut test pieces
- WATCH the videos below!
- Coping is not required
- CLICK HERE to Get Tim's FREE & FUNNY Newsletter!
Cutting crown molding is simple once you think it through.
The easiest way to get your head around crown molding is for you to watch a few of my videos.
They're all about cutting crown molding.
Each video has one or two tips, so watch them all.
Be sure to watch the one about fancy corner cuts. That's a detail you should try because only a small percentage of people take the time to make these two extra cuts.
The fancy corners will wow all your friends, neighbors and anyone that looks up at your gorgeous molding.
CLICK HERE to get FREE and FAST BIDS from local finish carpenters who install crown molding.
Crown Molding Videos
I don't know about you but I am ready to get to work.
Test Pieces
If you want to have great success and tight miter joints, then the best thing to do is start to cut the test pieces you saw me use in the videos above.
I'd make each piece about 14 inches long.
You'll need about twelve pieces total so that means you'll need about a 16-foot piece of crown to make all of them.
Inside Corner Test Pieces
I've discovered over the years that you need to cut the inside corner test pieces at the following angles. You need one set of each, meaning a left and right side.
- 43 degrees
- 44 degrees
- 45 degrees
Outside Corner Test Pieces
The outside corner sets need to be:
- 45 degrees
- 46 degrees
- 47 degrees
Mix & Match
You'll quickly discover that both inside and outside corners are not square. It's rare that you'll get a corner to have two 45-degree cuts where the miter joint is as tight as possible.
More often than not, one side of an inside corner will be a 45 degree cut and the other side might be 43 degrees! This happens because the walls are not perfectly straight.
CLICK HERE to get FREE and FAST BIDS from local finish carpenters who install crown molding.
Coping Corners
Ever talk politics or religion with someone? There's a reason why your parents told you NOT TO DO IT.
The reason is simple. Politics and religion are core building blocks of a person's reality. It defines their inner being.
If you challenge that, the average person gets very defensive. The inner being is something that's guarded like the crown jewels.
Coping inside crown molding corners ranks number three for finish carpenters. Some carpenters SWEAR it's the only way to make a tight miter joint.
Guess What?
To make a coped joint you need to make the correct compound cut on the molding so the coping saw has a line to follow.
How do you know the right line to create? Is it 43, 44 or 45 degrees?
This is why the test-piece method that I developed is so much better.
If you have two identical rooms to put crown in, I'll have my room finished and ready for paint while the other carpenter is still working with his saw on the third coped joint.
If he doesn't use test pieces, he'll be guessing at the intersection angle.
We both have to make end cuts. I'll have mine done first time and be nailing away while he's getting ready to cope, rasp, check for fit and rasp some more.
Would you like step-by-step photos and instructions that show you how I install crown molding anywhere in a home? If so, you might want my Instant Download Crown Molding eBook.
But, if you want to actually see me install crown molding in all the same places while watching an action-packed interactive DVD that was filmed in High Definition, then you may want my Crown Molding DVD.
CLICK HERE to get FREE and FAST BIDS from local finish carpenters who install crown molding.
Column B234
One Response to Cutting Crown Molding