Ceramic Tile Repair

Ceramic Tile Repair
DEAR TIM: A plumber had to replace the shower and tub valve in our home. Unfortunately it could only be done from the tub side of the wall. We have a new valve but are left with a rough gaping hole with no tile or backer board.
How does one go about restoring the tile? How will I make the circular cuts in the tile that are needed to go around the new valve? The plumber said to just install some gypsum board and cover it with tile. Is this right? Terrell T. Memphis, TN
DEAR TERRELL: I think the plumber you used was trying to hoodoo you. Telling you to install regular gypsum board in a wet area such as a shower or bathtub is not much different than casting an evil spell upon you.
Drywall or regular gypsum board is simply not acceptable as a backer board for ceramic tile in a wet environment.
To successfully repair the gaping hole, you are going to have to do additional demolition.
The piece of replacement backer material which supports the replacement tile must extend at least three or four inches or more in every direction beyond the perfect circular hole that will be cut into the backer material to accommodate the new shower valve.
CLICK HERE to get FREE & FAST BIDS from local ceramic tile contractors.
Undoubtedly you will create a rectangular opening about 16 inches wide by approximately 16 or 18 inches high. Be sure the top and bottom seam of the new repair piece of backer board does NOT end up directly under the seam where two pieces of ceramic tile touch one another.
The left and right seams for the repair piece work best if they are centered on the wall studs that are on each side of the new shower valve.
A piece this size or larger will be strong enough after you cut the shower valve hole. If I were doing the job for you, I would try to use cement backer board.
If that material were not available, I might chose to use a fiberglass reinforced silicone-treated gypsum board product. Some of these special gypsum tile backer boards are completely waterproof.
The high gloss finish on ceramic tile is your worst enemy in this repair project. High gloss surfaces telegraph imperfections. If the surface under the tile is not in the same plane, once glued in place the tile will conform to the irregular surface.
When this happens, the humped or uneven tiles reflect light at slightly different angles. Your eye quickly sees this imperfection.
To prevent this mistake, it is best to remove tile from some of the existing backer board. Try to remove at least one full tile in each direction.
Be sure to scrape off all old adhesive from the newly exposed backer board that was not destroyed by the plumber. As you fit the new piece of backer board, use a straightedge that spans from the existing backer board across the new piece.
Be sure there are no humps or voids as the straightedge contacts the new and existing backer board. Fasten the backer board to the studs with hot-dipped galvanized nails.
CLICK HERE to get FREE & FAST BIDS from local ceramic tile contractors.
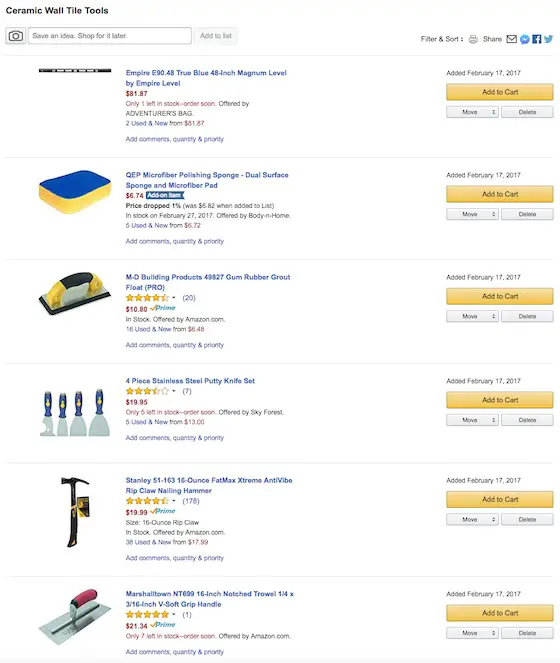
Full Tile Tool List
Here's a list of tools that I've used for years to successfully install thousands of square feet of ceramic tile.
- tape measure
- pencil
- tile cutter
- nippers
- a 1/4 by 1/4 inch v-notched trowel
- a hammer
- some 6d finish nails
- 8 lineal feet of straight 1/4 inch wood lattice strip
- putty knife
- 3-inch wide-bladed scraper
- grout sponge
- rubber grout float
- several buckets
- accurate 4 foot level
Click the image below to BUY all, or some, of the tools in the above list.
Cutting circles in ceramic tile is not too hard if you have the right tools. Small diameter holes up to 1.5 inches or so can be cut with diamond grit hole saws.
It is not uncommon to have a one piece shower valve that creates a 5 or 6-inch diameter hole. Several pieces of tile may need to be cut to produce the finished hole.
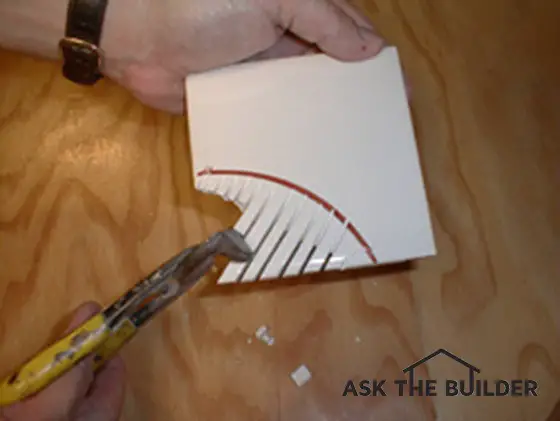
Trace the arc of the circle onto each piece of tile and make straight cuts into the tile so the cut lines touch the arc. Space the cut lines so they are about one-quarter inch apart.
Use a tile nipper to bite away at these fingers of tile. As you get close to the arc, take small bites with the nipper. A tile nipper is simply a pliers-like tool that has sharp jaws that can easily crack the tile.
Performing repairs on shower and tub valves from the wall inside the shower or tub area is a mistake. The most common cause is a lack of planning on the part of the architect or builder. If you ever stay in an older home take a look inside the closets.
Often you will discover a clever access door that allows you quick and easy access to the plumbing behind a tub or shower.
For some crazy reason, these access doors seemed to go the way of laundry chutes. Many planners and builders have forgotten how handy these amenities can be.
If this bathtub and shower does backup to a closet, you may want to install an access panel now as part of the tile repair job. It will prevent all sorts of misery for the next person who has to replace the tub and shower valve.
CLICK HERE to get FREE & FAST BIDS from local ceramic tile contractors.
Column 005
