Suspended Ceiling Installation
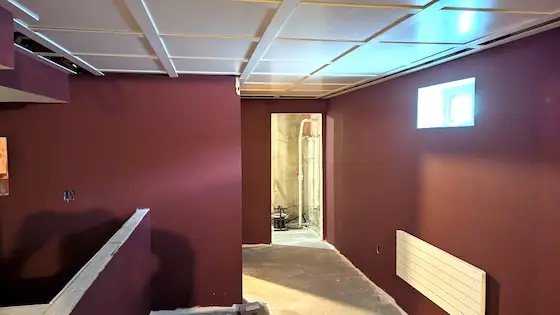
The total distance between the floor joists above and the finished ceiling surface is just 1 and 3/4 inches. Wow! Copyright 2025 Tim Carter
Suspended Ceiling Installation - Simple with the Right System
I’ve shared in a few past columns the wonderful time I’ve been having with my son. Each weekend I get to spend hours of quality time with him while we work on finishing his basement.
I’m fanatical about having access to wires, pipes, ducts, etc. that you often find in a basement ceiling. You achieve this with a suspended ceiling like you might see in an office building or your dentist’s office. My previous dentist installed colored translucent panels of wonderful nature scenes right above the chair. They helped to produce a calming effect if you didn’t like dentists drilling on your teeth.
My son didn’t want the standard plain vanilla suspended ceiling. He went hunting using the image search tool you’ll find in most search engines. Within seconds he zeroed in on a system I had never seen before.
This ingenious company decided to recreate the coffered ceiling look but compress it, keeping enough relief to provide a very interesting appearance.
We visited the company’s website and watched their installation video. I was sold within seconds. Not only was I enamored with the ease of installation, but I also loved the fact this system hugged the existing floor joists. The distance from the bottom of the floor joists to the ceiling surface you touch and see was as small as 1 and 3/4 inches!
The system consists of just five parts:
- anchors
- rails
- main crossbars
- secondary crossbars
- 1/4-inch-thick 2-foot by 2-foot panels
CLICK HERE to watch a short video showing the above components.

CLICK HERE to watch this video.
The anchors and rails work like a french cleat. Each anchor has a channel with two upward-bent grooves. The rails have two rows of parallel fins that slide into the grooves of the anchor. The extra fins on the rails allow you to do minor height adjustments should your floor joists not be in the same plane.
The anchors are screwed to the floor joists above. The rails slide into a dovetail groove in the main crossbars. You must get the main crossbars straight and they have to be parallel. The error tolerance is less than 1/16 inch so take your time. While it seems intimidating, it’s not. Once we got the hang of it, we were having a blast. It’s like working with a wonderful adult Lego toy!
The first step in the installation process is to determine the layout of the large 2x2-foot panels. You want to center them in the room and you want large cut pieces against all the walls. The best way to do this without doing complex math is to just lay out the tiles on the floor creating a 2-inch space between each one. You have only two ways to install them as you’ll discover.
Your layout decision determines the location of your first row of anchors. My son and I chalked a crisp line parallel with the primary wall in each room. We measured the width of an anchor and divided it by 2. This gave us a point where the edge of each anchor should be on the floor joist above. The anchors must be installed in a straight line. I discovered the extra minutes to do this paid off in spades later.
The main crossbars are all parallel and must be spaced with great precision. The company thought of this too. They include with each box of crossbars a spacing template. Notches in the template allow you to space the anchors exactly where they should be. I used the template to get the position of the first and last anchor of each row. I’d then chalk a new crisp line to space the rest.
There’s little to no waste with this system. Cut pieces of main crossbars are used to start the next row. The same goes for secondary crossbars. Any small pieces left over from cuts can be used to make other small crossbars.
We used a new 6-inch hole saw to cut the circles for low-profile LED recessed lights. It was simple to do. It’s best to have the saw spin slow as you make the cut.
I’m quite sure you want to know the name of this system so you don’t have to guess. I didn’t mean to tease you on purpose. The name is Embassy Ceilings. I can tell you the system is such high quality it could be installed in an embassy building in a foreign capital! Within a month I’ll have a detailed installation video ready for you at my www.AsktheBuilder.com website.
Column 1601