Saw Stand Tips and Options
DEAR TIM: I'm tired of setting my miter saw on a board balanced on two garbage cans. I'm looking for stability, safety and ease of use. What kind of saw stand do you use and why did you select it? What did you do before you had one? If you can't afford a fancy saw stand, what can you do to compromise? Oscar P., Woodbridge, VA
DEAR OSCAR: In the old days when I was a young buck carpenter, I did the same thing you did. I set my saw up on a 2x12 that was balanced between two overturned garbage cans. It was a crude method, but it worked. The hard part was creating a level platform where material being cut was at the same height as the table of the miter saw.
I've seen many different solutions to this problem over the years. Any number of carpenters have built their own platforms, tables, etc. to create a workstation at a job site. I'm sure many of these work well.
I graduated from the garbage cans to carpenter benches I used to make from scrap 2x12s. You could make these any height you wanted so they'd be comfortable, but the issue was always stability. As the bench got taller, it became very top heavy. Once you add a heavy miter saw to it, it became even more likely to tip over.
Then there was always the problem of uneven ground. If you had the carpenters benches set up on a lawn, construction site or anyplace where the ground was humpy, you constantly fought trying to keep the stand level and stable.
To cut long material, such as 16-foot lumber, you'd have to set up satellite carpenters benches that were tough to get into the same plane as the bench the saw rested on. I'm sure you can see the challenges.

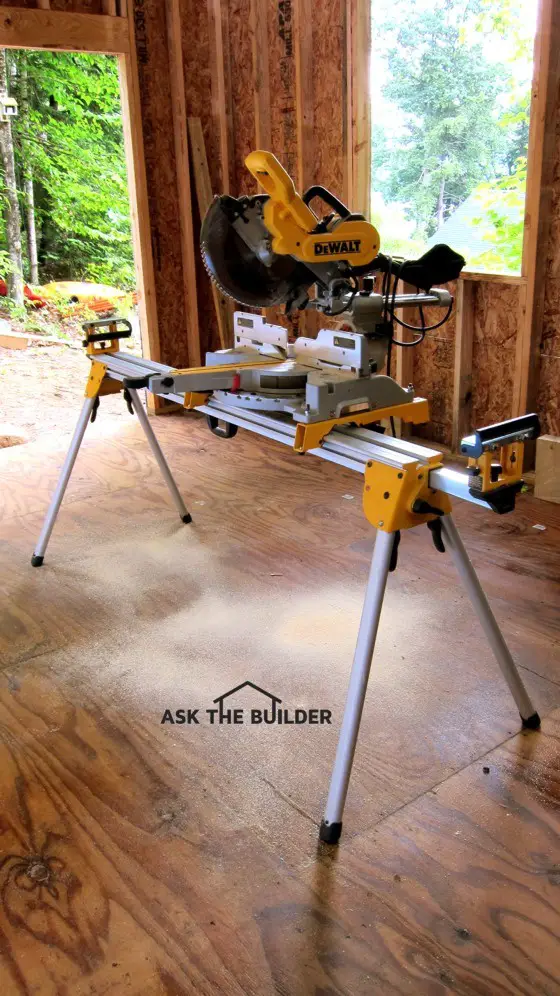
This is the ultimate saw stand. It beats out setting saws on garbage cans and makeshift platforms. Photo Credit: Tim Carter
Recently I finally switched to a manufactured saw stand that undoubtedly came out of the mind of an engineer or two that's struggled like you, I and millions of other carpenters.
The aluminum stand I use has brackets that allow you to mount just about any miter saw to the stand. That's an enormous advantage. Attaching the brackets to a saw takes but minutes. The brackets are equipped with spring-loaded clamps that allow you to place the saw at an infinite number of positions on the stand. This comes in handy when you're cutting very long material.
The sturdy folding legs open wide at the base providing astounding stability. Once the stand is set up and all four legs are in contact with the ground or a floor, the saw stand is rock solid.
Telescoping supports that slide out from each end of the stand produce the needed support when cutting long material. These have been engineered so they are in the same plane as the flat table of the miter saw. No matter how high the flat table is off the stand, you can adjust the supports so they match that height.
These telescoping supports are engineered to act as material stops as well. They have brackets that rotate up or down allowing you to adjust them to act as a small wall. You simply adjust the distance of this stop from the cutting blade and it allows you to cut multiple pieces of lumber the same length without having to measure each piece. That's an enormous time saver.
The stand I use is affordable, but if your budget won't allow it, you can mimic what it does by creating your own wood benches that are more stable than the ones I made many years ago. The biggest issue you'll discover is the benches will become heavy and they'll take up lots of room in your garage.
There's nothing wrong using modern collapsible saw horses, a 2x8-foot piece of plywood, a few 2x6's and some hardware to create a temporary workstation that acts as a fantastic saw stand. If you think about this, you could create your own system that breaks down and sets up in minutes.
Some carpenters create saw stands where the saw is lower than the flat surfaces on either side of the miter saw. There's nothing wrong with this method at all. The flat surfaces on either side of the saw make for a superb work surface to ensure cuts are square and the material being cut is always stable.
The key is to create a system that can be put up and taken down in minutes, is not cumbersome, and ideally can be done by one person.
You can watch a saw stand video that contains secret tips at www.AsktheBuilder.com. Simply type "saw stand video" into the search engine at www.AsktheBuilder.com. There are MANY ADDITIONAL wall-building tips at www.AsktheBuilder.com.
Column 946
3 Responses to Saw Stand Tips and Options