Outdoor Kitchen Countertops

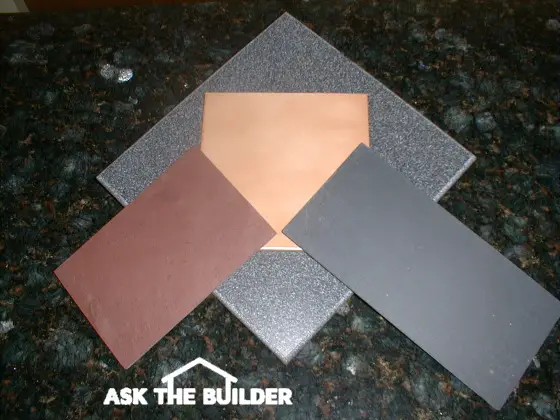
Outdoor Kitchen Countertops | All of these materials will last outdoors. The smaller pieces of material are sitting on my granite bar top. The largest of the small pieces is a piece of solid surface material. The beige square is ceramic tile. The black and red pieces are solid slate.
DEAR TIM: I need a recommendation for the finished surface of a small 42-inch-long and 20-inch-deep exterior potting bench and a somewhat larger outdoor kitchen top. I am on a limited budget and need a surface that is smooth and is more decorative than wood. My daughter would prefer pink if possible. The winters here can be bitterly cold so I want these tops to be maintenance-free if possible. John C., Hartland, WI
DEAR JOHN: You can possibly get what you want and still be within budget with at least one of the tops. The potting bench top might be resting in the boneyard scrap pile of a local solid-surface countertop fabricator. I've seen more than one pinkish-cast solid plastic countertop material that would be an ideal outdoor countertop surface. The craftspeople that make solid-surface countertops frequently end up with a variety of leftover scraps they sometimes sell for a song.
What Are the Best Outdoor Kitchen Countertops?
Actually, you have quite a few options for both of the tops. Ceramic tile, granite, marble, slate, and a few other natural stones will produce the durable surface you need, but the color and cost may burst your budget.
Pink ceramic tile will be your best bet with respect to cost and durability, but it is going to take a little work to construct a stable surface on which to install the tile. There are gorgeous pink granites and if your daughter can compromise to a deeper shade of red, slate may be the perfect material.
CLICK or TAP HERE to get FREE BIDS from local countertop contractors.
Is Concrete a Viable Choice?
Depending upon how handy you are, you can get exactly what you and your daughter want, but the tops will be made from a material you may not have even considered: concrete. You can add permanent pink powdered pigments to Portland cement, get pinkish sand, and even small pink stones for the aggregate to make the concrete. I'll wager that with a little experimentation, you will produce stunning pink countertops that will withstand countless Wisconsin winters.
Do Color Tests
Experimentation is necessary to determine the final color of the cured concrete, once it has dried for 30 to 60 days. The concrete will almost always look several shades lighter once dry than when it was first mixed. The degree of final smoothness of the finish will also affect the color.
Smooth countertops are easier to maintain and believe me, it takes some practice to learn how to wield a steel trowel like a pro. Fortunately, the cost of the raw materials to make the concrete should be minimal and if your experiments produce just one cubic foot of mixture each time, you will waste very little money.
Is Natural Stone the Way to Go?
Yes, natural stone is the best way to go. You already know that natural stone by its very nature can resist damage from ice and snow.
If you decide to use a natural stone material or ceramic tile, you need to make a base for these materials to rest upon. Indoor tops differ from outdoor tops because builders know they will stay dry. But your tops are sure to get wet and water will eventually seep under all of the countertop materials. This water and changes in humidity and temperatures can cause untreated wood to rot, swell, twist, expand and contract. This deterioration will lead to delamination of or cracks in the finished surface materials.
CLICK or TAP HERE to get FREE quotes from local companies that can build your outdoor kitchen.
What is the Best Wood to Use for a Base?
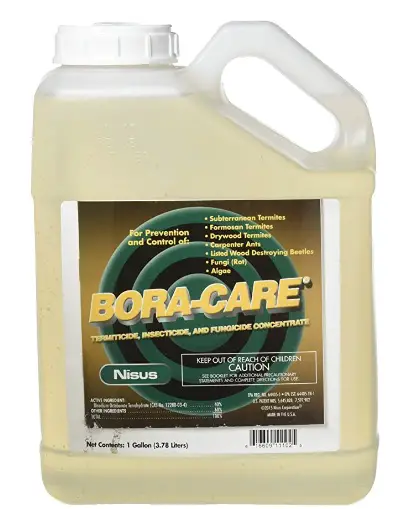
I would consider using treated plywood as the foundation for ceramic tile and natural stone tops. Chemically treated plywood will not rot if it comes into contact with liquid water. If you can't get treated plywood, buy special powdered chemicals that contain borates.

CLICK or TAP HERE to order this great BORATE wood preservative.
Dissolve these into water as directed and saturate the regular plywood with the solution. Once dry, the wood will have superb resistance against rot and decay.
What Else Can I Do to Prevent Rot?
It sounds crazy, but I would cover the wood with 15-pound felt paper and let it drape over the edges. Fold the felt paper under the plywood 6 inches on each edge and secure it with staples. I would then screw one-half inch-thick cement board to the treated plywood. The natural stone or ceramic tile will then be permanently bonded to the cement board with Portland cement-based thinset.
What Size Tile Should I Consider?
Keep in mind that the ceramic tile or natural stone products that are somewhat affordable are often found in uniform sizes such as 6 x 6 inches or even 12-inch squares. The spaces between the pieces are filled with sanded Portland cement grout that may or may not be epoxy-fortified. Regular sanded grout will work fine so long as you do not use too much water when you mix the grout and when you finish the joints. The water will dilute the cement in the grout and it will rapidly deteriorate.
Is Water the Real Enemy?
Water is indeed the fiercest opponent that outdoor countertops face, especially in cold climates. The water can freeze and blast apart the countertop. The most common damage is delamination of the finished materials from the concrete base.
How Do You Work With Thinset?
Pay attention to the directions on the thinset. Mix only as much thinset as can be used in 20 minutes. The cement board and finished countertop materials must be dust free. If you can slightly dampen them with water just before applying the thinset, you will greatly enhance the bond between the cement board and the finished materials. Once you spread the thinset onto the cement board, cover it with a piece of finished top material within three minutes if possible. If at all possible, erect a temporary shade shelter to avoid working in the sun.
2 Responses to Outdoor Kitchen Countertops