Ceramic Flooring Tile
DEAR TIM: I visited a home recently that had an interesting mosaic pattern inset into regular floor tile. I loved the look of that ceramic tile floor, as it broke up the monotony of tile after tile. Can you tell me how to install ceramic floor tile in this manner? I looked closely and the ceramic floor tile designs in each mosaic were identical. I assume these came already fabricated from a factory. Any tips you can share that will ensure success will be appreciated. Melanie W., Center Harbor, NH
DEAR MELANIE: I believe I can help. I’ve installed many ceramic tile floors in my career, and would often dream about them the night before I install them. Every aspect of the job frequently swirled around in my head.
What crazy visions to have when there are so many other things to dream about! When it happened, I believe it was a mixture of excitement about what the tile was going to look like as well as reminding myself of important steps to make sure the job lasts.

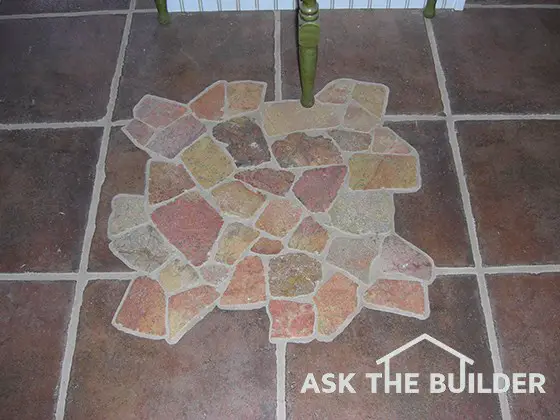
This gorgeous tile pattern repeats throughout the room. Patience and skill were required to make the field-tile cuts. ©2017 Tim Carter
Not only have I seen what you’re talking about, but I’ve also installed mosaic patterns in some of the tile jobs I’ve done in the past. It’s not hard to do, it just takes some patience, skill and adds time to the job.
The first thing you need to do is to make sure the thickness of the ceramic flooring tiles matches the thickness of the mosaic tiles you want to use.
CLICK HERE to get FREE & FAST BIDS from local ceramic tile contractors.
If they don’t match in thickness, you may have a nightmare on your hands or some extra work. At the very least, you want the mosaic tiles to be the thinner than the field tiles. The field tiles are the ones that are plain and cover the majority of the floor area.
If the mosaic tiles are thinner than the field tile, then all you have to do is put the thinset adhesive on heavier than you do for the field tile. Can you imagine how hard it would be to do just the opposite?
Trying to build up the field tiles will result in a mess and an uneven floor surface. When setting the thinner mosaic tile, use a straightedge to make sure the top surface of the tile are in the same plane as the field tile. All of this hassle is avoided if you can work with tiles all the same thickness.
The mosaic patterns you are talking about almost always come glued together in a sheet. A thin fiberglass mat holds them together allowing you to place the complete pattern on top of the full field tiles.
Doing this allows you to trace the outline of the entire mosaic pattern onto the field tile that need to be cut to fit around the pattern.
Temporarily tape the mosaic pattern on top of field tile that are placed dry set onto the floor with the proper grout spacing. Use a fine-tipped permanent marker to trace the outline of the mosaic pattern onto the field tile.
Be sure the line you trace is away from the edge of the mosaic tiles the same width as the grout lines in between field tile.
The resulting traced line will no doubt be irregular, meaning you need to use any number of tools to cut the curved, angled or irregular line. A diamond wet saw, an angle grinder with an abrasive wheel, a hand nipping tool, and even a crude carbide rod saw will all work.
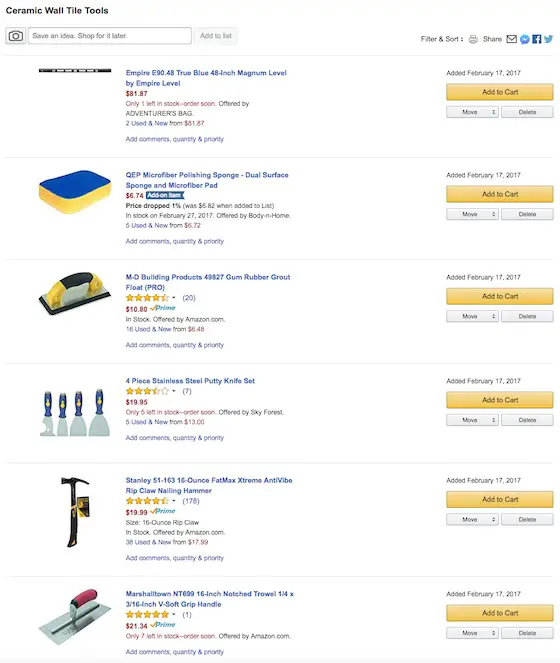
Full Tile Tool List
Here's a list of tools that I've used for years to successfully install thousands of square feet of ceramic tile.
- tape measure
- pencil
- tile cutter
- nippers
- a 1/4 by 1/4 inch v-notched trowel
- a hammer
- some 6d finish nails
- 8 lineal feet of straight 1/4 inch wood lattice strip
- putty knife
- 3-inch wide-bladed scraper
- grout sponge
- rubber grout float
- several buckets
- accurate 4 foot level
Click the image below to BUY all, or some, of the tools in the above list.
Your patience and skill at this point will determine the final look. Cut along the line very carefully removing just the line of the marker and no more.
To achieve professional results as you install ceramic tile flooring, there are several things you need to do. The floor should be as solid as possible with no spring to it. I urge you to use a decoupling membrane so the tile can move independently of the floor.
CLICK HERE to get FREE & FAST BIDS from local ceramic tile contractors.
These plastic membranes look like the bottom of a waffle iron. It’s an extra step in the process, but well worth it if you want your tile floor to be crack free for generations.
Be sure you try to get the floor in the same plane. This doesn’t mean the floor has to be level, but that would be nice. To be in the same plane means no humps, no bumps and no gaps under a long straightedge when placed on the floor. Use self-leveling floor leveling compound to help get the floor smooth.
Use the correct notched trowel that matches the tile you’re using. The tile manufacturer will often publish what the minimum notch size should be. The larger the notch in the trowel, the more thinset adhesive you use. Usually the notch size gets bigger as the tile size increases.
Do not use organic mastic to install floor tile. Organic mastic is a creamy adhesive that looks like cake icing. This adhesive works well for wall tile, but will not work well for floor tile. It will flex slightly when you apply concentrated pressure on a tile. If the adhesive moves, it will cause the tile to crack.
Thinset adhesive is just like brick mortar. When it cures after 24 - 48 hours, it’s as hard as rock and will not flex. Be sure the surfaces you’re tiling over are dust free. Only mix as much thinset as you can apply and cover with tile in an hour or less.
Never add more water to thinset in a bucket that’s starting to harden. This will weaken the thinset and may cause the tile to pop off the floor at a later date.
CLICK HERE to get FREE & FAST BIDS from local ceramic tile contractors.
Column 809
