Deck Building – Ground Level

Deck Building - Ground Level
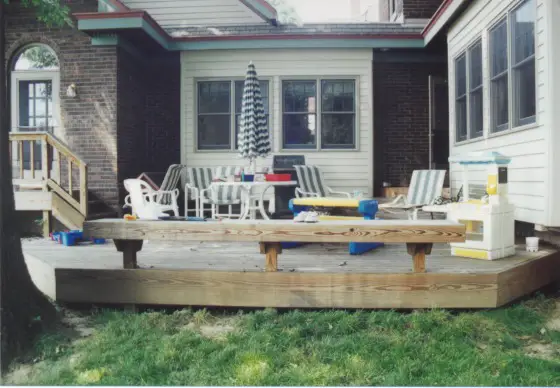
DEAR TIM: I have a problem. I want to build a deck close to the ground. In some places the joists will actually touch the soil. I realize that the joists can't just rest on the ground. How do I support them? Should I install a vapor barrier under the deck? What are the best decking fasteners to use? Steve K. Waverly, Iowa
DEAR STEVE: Ground level decks are known to stump many people. Everyone seems to have the image of the beam supported by posts stuck in their head. I have seen people who actually buried a wood beam and posts in the ground to support the deck joists. Guess what? They were on the right track. They simply took the wrong turn.
Deck joists need to have a firm support system not unlike those within your house or on a traditional deck. Beams are used for this purpose. A beam is simply a level or nearly level structural member that will support the joists with minimal or acceptable bending. Beams are most often made from wood, steel, and reinforced concrete. A ground level deck, in my opinion, can be most easily supported by using steel reinforced concrete grade beams.
Building a deck? Make the best decisions with my helpful and thorough Deck Installation & Repair Checklist. I offer a 100% Money Back Guarantee.
You will need a minimum of 2 grade beams, if your deck will not be connected to your house. The beams will be parallel with one another. They can be at the ends of the joists or they can actually be tucked under the edge of the deck for appearance sake. The beams must be at the same height and in the same plane so that the deck is level once finished. It is very wise to consult with a residential structural engineer. This qualified person will tell you exactly what you need.
 Grade beam are usually constructed by digging a trench at least 8 inches wide. A beam depth of 10 inches is generally suitable. The bottom of the beam will be supported by the soil. If you live in an area where the soil freezes each winter, you must dig piers at the bottom of the beam trench. The piers can be 10 or 12 inches in diameter and spaced no further apart than 6 feet. The bottom of the piers must extend to the frost depth in your area. Your building department will be able to tell you how deep to dig. Be sure that you flare the bottoms of the pier holes. The flared bottom serves two purposes. It increases the surface area of the pier helping to distribute weight. The flared bottom also makes it very difficult for the frost to heave the beam and the piers.
It is often necessary to use form boards at the top portion of the grade beam. The forms allow you to easily level the beams. The concrete for the piers and the beams is poured at the same time. Once the concrete is poured halfway up the height of the beam you need to install two 5/8 inch diameter steel reinforcing rods. These rods should be placed no closer than 2 inches to the side of each form board. You can immediately cover these rods with the remaining concrete. It is now time to install 8 inch long by one half inch diameter anchor bolts. Place a bolt one foot in from each end of the grade beam. Then install them on 6 foot centers along the length of the beam. Be sure that at least 2 inches sticks up in the air. These bolts will be used to hold down a treated 2 x 6 wood plate. Your joists will be attached with nails to this wood plate.
| Message from Tim:
Years ago while researching a column about cleaning decks, I discovered the wonders of Oxygen Bleach. It is perhaps the 'greenest' cleaner I know of as it uses oxygen ions to break apart stains, dirt and odor molecules. There are no harsh chemicals, and it works on just about anything that is water washable. I decided to create my own special blend using ingredients made in the USA. In fact, the raw materials in the active ingredient are food-grade quality registered with the FDA. I call my product Stain Solver. I urge you to use it to help clean your deck surfaces. You will be amazed at the results! |
Do not install a vapor barrier beneath the deck. Rain may collect on the plastic and become a breeding ground for insects. Water vapor from the soil can cause severe cupping of the decking. The underside of the decking boards readily absorb moisture that evaporates from the soil. The drying action of the sun and wind dries the top side of the decking. The dry top and wet bottom of the decking produces the internal wood stresses that cause cupping. To minimize cupping you should seal all sides and edges of the decking before you attach it to the joists. If you can afford to seal the decking on the underside with two coats, do so.
I suggest that you give serious consideration to stainless steel nails or screws for your decking. They cost a little more but they will never rust. Be sure to use nails that are ring or spiral shanked. If you decide to use stainless steel screws, look for ones that have smaller heads and a unique knurled shaft that eliminates the need for drilling pilot holes. This feature will save lots of labor.
6 Responses to Deck Building – Ground Level