How to Build a Wall
DEAR TIM: I've decided I'm going to build an outdoor shed using wood, but I've never built a wall before. It can't be that hard. Is it just a matter of banging together some studs and covering it with sheathing? What secrets can you share that will save me time and ensure that the job will get done right. The last thing I need is my wife and neighbors chortling as they see my flail around with a hammer and saw. Help me Tim, you're my only hope! Arlo E., Albany, NY
DEAR ARLO: The last thing we both need is you to be the laughing stock in your household and neighborhood. How about I transform you into a superhero? It's possible, but you need to really pay attention.
Building a wall for a shed or a house is not that hard, but then again, there are many places you can make a mistake. It's all a matter of how big your appetite is for margin of error. Some people don't care if a wall is out of square or uneven. Others, like me, expect near perfection, or as close as you can come to it working with rough lumber.

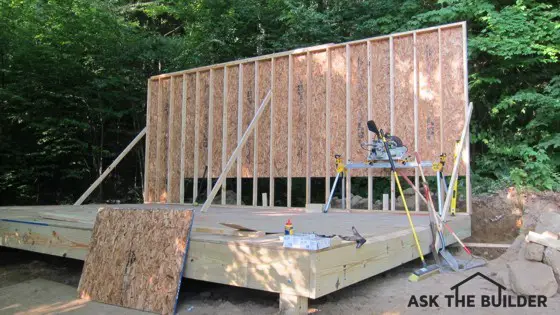
This wall was built in less than an hour by two people. But it took four to stand it up! Photo Credit: Tim Carter
Understand there are many ways to achieve your wall-building goal. You could talk with ten different master carpenters and get ten different sets of instructions. What follows are methods I've used to build walls that are square, plumb and level.
Let's talk about the basic components of a frame wall. You have a bottom plate, the actual vertical wall studs and the top plates. You may also have other larger lumber pieces used to create beams, or headers, over doors and windows.
The top and bottom plates should be lumber that's straight as possible. I prefer to build walls on the ground so I can nail through the top and bottom plates into the ends of the wall studs. If you attempt to build the wall in place, and I'll never forget watching a vocational education teacher do this at his own home, you'll be flailing and toenailing the studs into the bottom plate. Toenailing, while acceptable, is much harder to do in my opinion.
Use 16-penny sinker nails to connect the plates to the wall studs. These nails are generally 3.25-inches long and the shaft of the nail is about one-eighth inch thick.
The wall studs at each end of the wall need to be perfectly straight. Take your time and find these true studs. Using straight studs at the corners allows you to easily connect the walls together as you build your shed.
It's mission critical that the top and bottom plates be the exact same length. When I say exact, I mean it. The vertical wall studs need to be the same height. Doing this allows you to square up the wall on the ground before you begin to add sheathing to the wall.
Before you add the plywood or oriented-strand board sheathing to the wall, you must square up the wall. Failure to do this will cause you great headaches and embarrassment.
I chalk a line on the floor and then temporarily toenail the bottom plate to the floor making sure the edge of the bottom plate is just touching the chalk line. The nails must be driven through the bottom of the plate so that you can remove them after you have the wall sheathing applied to the wall.
Once the bottom plate is straight and secure, take out your tape measure and check the diagonal measurements of the wall. You do this by hooking your tape measure to the exact corner of the bottom plate at one end of the wall and stretch it to the corner of the top plate at the other end of the wall.
Undoubtedly the two diagonal measurements will be different. Gently tap the end of the top plate one way or the other until the two diagonal measurements are the same. When they are, the wall is perfectly square. Secure the top plate of the wall temporarily to the floor using a few nails. You don't want the wall to move as you apply the sheathing.
With the wall square, it now becomes easy to apply the wall sheathing. If the wall is not square, or the bottom and top plates are not straight, it becomes very problematic to apply the sheathing.
The wall sheathing is nailed to the wall studs with 8-penny nails. I prefer to use nails that are ring shanked. These have tiny ridges on the shaft of the nail which provide more surface area and create better holding power.
Once the sheathing is applied, you can remove all the temporary nails that were holding the wall to the floor. It's time to tilt the wall into position.
Be sure you have plenty of help when you tilt up the wall. It will be heavy. If it's windy, be very careful. The wind can easily blow the wall over. Brace the wall once it's raised up to prevent it being blown over by the wind!
You can watch a wall-building video that contains secret tips at www.AsktheBuilder.com. Simply type "wall building tip video" into the search engine at www.AsktheBuilder.com. There are MANY ADDITIONAL wall-building tips at www.AsktheBuilder.com.
Column 945
One Response to How to Build a Wall