Level Toilet on Tile

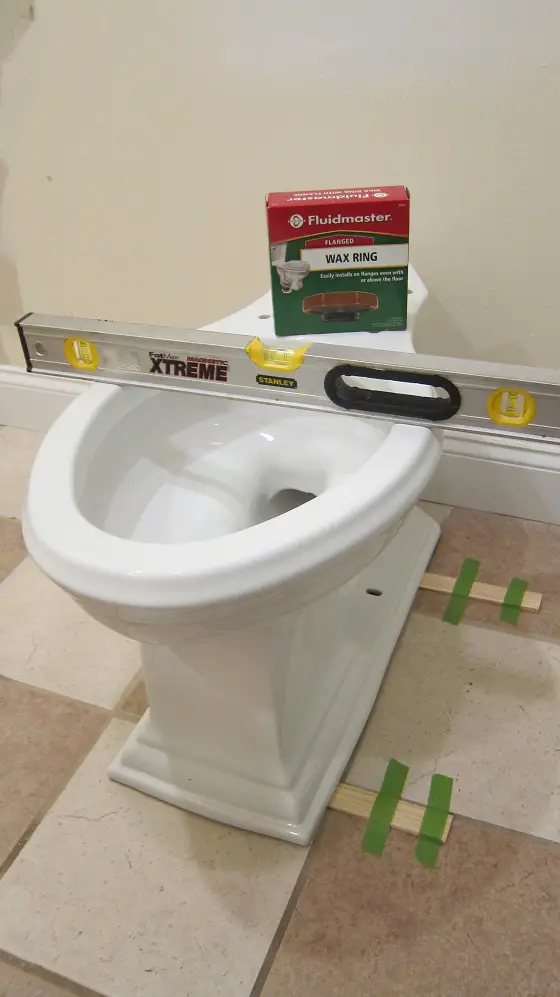
Level Toilet on Tile | It’s very important to level a toilet bowl whether it’s on tile, wood or concrete. Photo Credit: Tim Carter
Leveling a Toilet on a Tile Floor
DEAR TIM: I’m about to step outside my comfort zone. This weekend I’ve decided to delve into the depths of toilets. My current toilet is horribly stained and nothing I’ve tried seems to help. Besides, I want one of the newer toilets where the seat is higher up off the floor. That will be a blessing for my older parent who I’m caring for. I’ve never installed a toilet and it appears complex and scary. My home is only thirty years old, so it’s not ancient plumbing. There is a second toilet in the house in case I run into problems. What tips can you share so I succeed? Elizabeth W., Vancouver, BC Canada
DEAR ELIZABETH: Yoda, one of the principal characters in the Star Wars movie series, would be proud of you. His “Do or do not. There is no try.” quote resonates with me when it comes to attempting a project around the home. Most jobs are not that hard and often it’s just a matter of having the needed tools to guarantee a victory.
In your case, you often just need a few simple tools to replace a toilet. My guess is you have an adjustable wrench, a putty knife, a 2-foot level, a screwdriver and a hacksaw. This is often all you need to replace a toilet.
Turn Off The Water
The first step is to turn off the water supply to the toilet. You should have a small valve under the toilet that controls the flow of water. If not, you may have to turn off the water supply to the entire house. Check that the water is off by flushing the toilet one final time. If the water is off, no water should be entering the toilet tank.
Pour four gallons of fresh water into the toilet bowl as fast as possible to get as much water out of the toilet bowl as possible. Use the putty knife to remove the decorative caps that hide the bolts that secure the toilet bowl to the hidden toilet flange under the toilet. Disconnect the flexible water supply line from the base of the toilet tank. Remove the nuts from the toilet bolts.
You’re now ready to lift the toilet up off the floor. The odds are you may have to rock the toilet side to side to break the bond between any tile grout or caulk that should be between the toilet and the flooring. Once you have the toilet up and in the air, carry it outside with a helper. Don’t set it down on any good carpet or other finished flooring because nasty wax from the toilet seal could permanently stain whatever it touches.
Clean the Existing Toilet Flange
The next step is to clean up the existing toilet flange. If a wax gasket was used before to seal the toilet to the flange, then you should scrape off any excess wax and otherwise clean it up. Set aside about a tablespoon of the best wax. You’ll need it in a few minutes. I’d wear disposable gloves for this part of the job.

Only one change to set the toilet down on the flange!
The next steps are mission critical for a professional installation. You get but one chance to set the toilet down on the flange. You can’t, or shouldn’t move the toilet once you press it down into the fresh wax gasket. If you do monkey with the toilet trying to make adjustments, you risk breaking the all-important seal.
This means you need to dry fit the toilet bowl to the floor without the new wax gasket in place. Put the toilet on the flange and level the bowl both left and right and front to back. Place wood shims as required to get the toilet level. Tape these shims tightly to the finished floor so they don’t move when you lift the toilet back up.
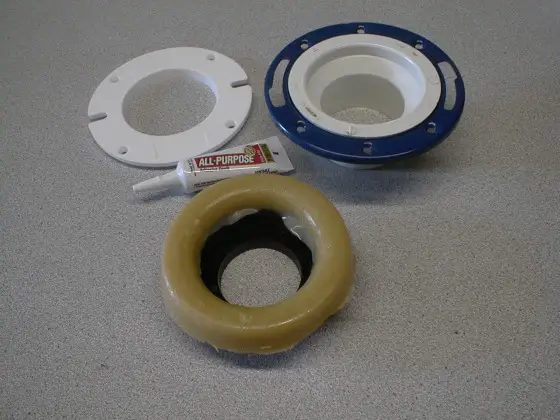
Place the wax gasket on the toilet flange. I prefer to use gaskets that come with a small plastic horn that forces the toilet water and waste down into the piping below the toilet flange. Install new toilet bolts and use some old wax from the previous flange to help hold them vertical in the toilet flange slots.
Straddle the toilet flange and with the assistance of a helper have them guide you so you lower the toilet bowl slowly so the toilet bolts line up with the holes in the base of the toilet bowl. Remember, you only get to set the toilet down one time. Be sure the toilet bowl is square to the wall so you don’t have to twist it excessively. A helper at this stage of the install is invaluable since you’re a rookie.
Be sure the toilet bowl is tight against the wood shims. Install all the new parts for the decorative toilet bowl caps and tighten the nuts. Resist the urge to apply vast amounts of force to tighten the nuts to the bolts. While the china is strong, some people have cracked the bottom of the bowl by using too much force.
Install the tank to the bowl according to the instructions and install a new water supply line. You can now test the toilet to see how well it works. Turn on the water supply valve and the toilet tank should fill with water. Flush it and see how it all works.
Finish with Grout - Not Caulk
If all is well, it’s now time to grout the toilet bowl to the floor. Do not use caulk for this. The connection between the toilet bowl and the floor needs to be a solid material like grout that will not flex when it’s dry. You want the toilet to be rock solid to the floor so it never rocks back and forth. Rocking will eventually break the seal between the toilet and the toilet flange.
Don’t let the grout touch the wood shims. After about 15 minutes, gently remove the wood shims and use the mixed grout to fill in the voids created by the missing shims. Don’t sit on the toilet for at least 8 hours so the grout has a chance to harden.
Column 1148
19 Responses to Level Toilet on Tile