Up next in 10


This is video 2 of the series. Watch the entire playlist.
Show More Show Less View Video Transcript
0:01
Okay, this is uh video number two in the
0:04
install bathroom tile uh series. All
0:07
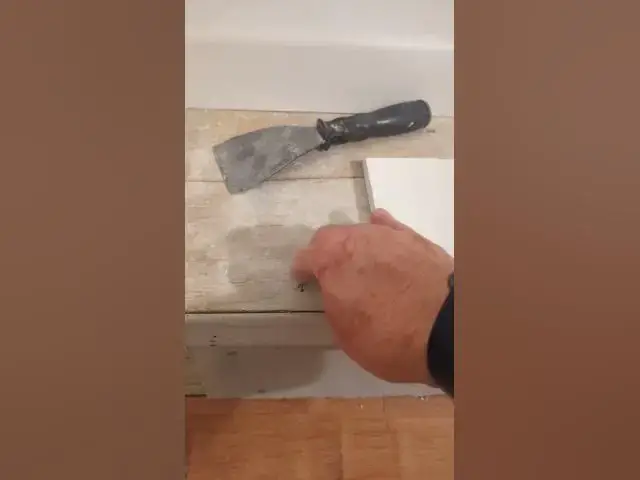
right, so here's the first piece of
0:09
cement board on/4 in uh thick. And I
0:13
want to explain a couple of things. Um I
0:15
could have put in a longer piece that's
0:17
56 in long, but on purpose I wanted to
0:21
stop it here and not make the seam here
0:25
with all of this going on here, all of
0:28
this, you know, framing. It's crazy. So,
0:30
the next piece is going to go from this
0:32
corner to here and bridge all of this.
0:35
So, those are the type of things you
0:36
need to think about. All right. Really
0:38
important. When I put this piece on, in
0:40
fact, I made sure that I cut it an
0:41
eighth of an inch less than the actual
0:43
dimension. So, you can see a a gap down
0:46
here. But when I installed it, I used
0:48
this piece of trim, which has got a nice
0:50
flat back. And I made sure that it was
0:54
flat on here and I brought the cement
0:57
board up to it to make sure that from
1:00
here to here it's perfectly flush. All
1:03
right. Really important. You know, you
1:04
don't want this cement board higher than
1:07
this. Very important. So, the next step
1:10
is I'm going to install this piece. Then
1:13
I'll install the top piece. Making sure
1:16
it's held, you know, it's flush with
1:18
this face. So, that's that's the next
1:20
step. That'll be the next video just to
1:21
show you that that's all done. And I'm
1:23
going to have to end up putting a piece
1:24
of corner bead right here to to fix
1:27
this. You you'll see that as well when
1:29
I'm finished with that video. All right,
1:31
video number three coming up
#Hobbies & Leisure
#Bathroom
#Home Improvement