Up next in 10


This is video 3 of the series.
Show More Show Less View Video Transcript
0:01
Okay, a bunch of stuff has happened
0:02
since video number two. This is video
0:04
number three of the install ceramic tile
0:08
in a bathroom series. And uh first thing
0:11
I want to say is if you you may do
0:14
things differently than I do, that's
0:16
okay. Um what I would recommend is if
0:18
you do uh record your own video and
0:21
upload it to your channel and then uh
0:23
share it here in the comments, you know,
0:25
instead of talking about it. You know
0:27
the old saying, actions speak louder
0:28
than words. All right, here's what's
0:30
happened. All the cement boards on, the
0:32
corner beads on. Um, it's going to get
0:35
joint compound up at the top here. I'm
0:37
not worried about that right now, but
0:38
I'll do it uh in the morning. And what I
0:41
want to talk about now is layout. Really
0:43
kind of important. I went ahead and I
0:46
drew a center line right here. That
0:48
first tile is right on the pencil line.
0:49
You can see it. And here's the vertical
0:52
line here.
0:53
And I just did that. That's exactly the
0:55
center point of the shower base. All
0:58
right. going left to right. And the
1:01
measurement was uh 58 1/2 in. So half of
1:04
that is 29 and a/4. All right. Now, what
1:07
I wanted to show is I went ahead and I
1:09
laid out some tiles here exactly. And
1:11
remember, they're going to be subway. So
1:13
there'll be a joint here. This is not
1:15
exactly how it's going to look, but I
1:16
just wanted to get the spacing. And it
1:18
turns out that 1 2 3 4 5 6 7 8 tiles
1:23
comes out to 12 and 1/4 in. Exactly. So
1:26
I then created a 12 and 1/4 in space
1:28
here. Put three more tiles and I ended
1:31
up with this oh like 38 of an inch gap.
1:35
So that's going to look really ugly. You
1:37
don't want to just grout that. And you
1:39
can't really easily cut a piece of tile
1:41
that narrow. So what I'm going to end up
1:44
doing to make that work out is I will
1:48
start the tile this way. This is the
1:50
kind of things you need to think about,
1:52
you know, meaning I will split the
1:54
center line of this tile will be on the
1:58
pencil mark. So that when I do that,
2:00
I'll end up with a much bigger piece of
2:02
tile down here that I can cut and it'll
2:04
look right and it'll do the same thing
2:06
on this side. All right, those are the
2:08
kind of things you need to think about.
2:09
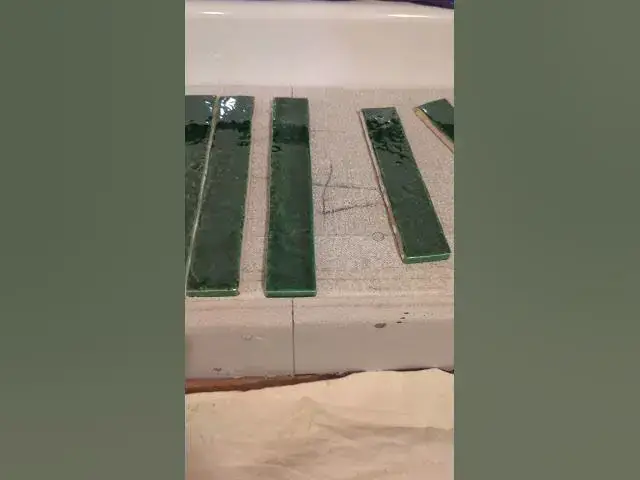
Now, what's going to happen here? So, I
2:13
went ahead and I cut off this is a piece
2:15
of tile here that's going to fit here.
2:18
And you've got two choices. This tile
2:20
comes with one end glazed. Here's a full
2:23
one. One end glazed, one end not. I can
2:27
tell you from years of experience,
2:30
um, if you put this cut end down here
2:33
and it gets wet and it's a lighter tile,
2:36
you can get a dark mark here if water
2:38
gets in there. So, I'm going to put
2:40
these tiles in with a glazed end down
2:44
when I go to do this. And of course,
2:46
this is going to come up and these tiles
2:48
here will overlap it, you know, when
2:50
it's all done. I'm trying to do it, but
2:51
and and uh show you what's going to
2:54
really happen here. You know, it's going
2:56
to look like this when it's all done.
2:58
All right. So it's come really
#Bathroom
#Home Improvement
#Flooring