0:00
I've got the first stripe of thinset down and I want to show it to you and it'll all make sense
0:11
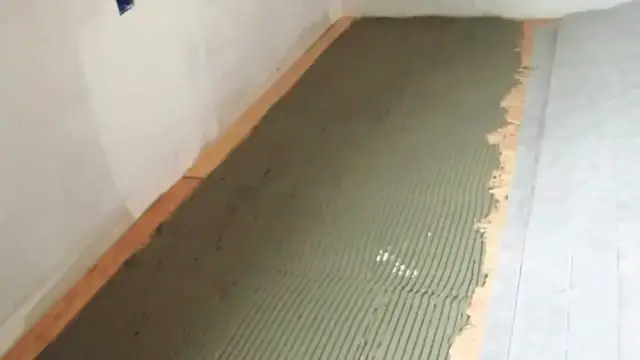
Take a look. So here you can see the thinsets down. It's about a little about two feet wide
0:16
a two foot wide strip. And you can see the lines in the thinset, you know, they kind of looks like
0:22
a plowed field. You know, it's parallel with a long 12 foot wall. And that's because as you can
0:29
see in the mat here, the lines. There's the heating cables. So now my job is to take this
0:36
edge of the mat, the entire mat, drop it against and right next to that little plywood strip
0:42
Now remember, that plywood strip that you see is higher than the subfloor. That's why
0:47
it doesn't have any thinset on top of it. And you'll figure out why I put that there
0:53
in an upcoming video but don worry about that right now You see why I got that So now let put the mat down and then we going to have to smooth the mat with another rubber float tool I got about half the mat down
1:07
half the thinset spread, and I want to show you the tool that I use to flatten
1:11
the mat into the thinset. Take a look. This is just a rubber float that you use
1:16
to grout with. Works really really well. You just take it, you know, and pat down
1:22
the mat and smooth it like you would grout making sure that there are no air bubbles or no humps in
1:29
the mat and that it's fully contacted you know with a thin set it's really that simple caveman
1:35
simple if you want to discover more home improvement tips go to askthebuilder.com