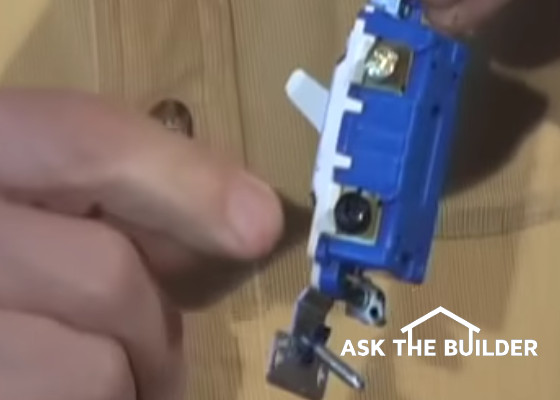
3-way switch diagram requires you to look for this all-important black screw. Copyright 2018 Tim Carter
"A 3-way switch has three screws plus the green grounding screw. The most important screw is the black one."
3 Way Switch Diagram TIPS
- continuous hot and light feed wire goes on black screw
- traveler wires go on the brass screws
- 14/3 with ground or 12/3 with ground wire best to use between switches
- WATCH all videos below for easy steps
Watch this very short 11-second video to see exactly WHAT a 3-Way switch is. Then watch the longer video below to see how to connect all the wires.
3 Way Switch Wiring Video
What is a 3 Way Switch Wiring Diagram?
A 3-way switch wiring diagram is a simple drawing showing how to connect the wires to each of the four screws on the 3-way switch.
The diagram below is based on the video you watched above.
What is the Black Screw For on a 3-Way Switch Diagram?
The black screw on a 3-way switch diagram is for the continuous hot wire that comes from the circuit panel or for the feed wire that runs up to the light fixture.
Electricians call the continuous hot wire the line wire. They often call the other black wire that goes from the other 3-way switch to the light fixture the load wire as the light bulb(s) are the actual load or thing that's using the electricity.
What Wires Go On the Brass Screws?
The traveler wires go on the brass screws. Watch the video above to see how easy it is to connect them. It makes no difference what wire goes on what screw at each switch. That's the best part.
Connecting the traveler wires is caveman simple and idiot-proof.
It's important to realize you must put the line wire on the single black screw on the one 3-way switch.
The line wire is the one that is hot all the time. The black feed wire that goes to the light fixture is connected to the single black screw on the other 3-way switch.
I show all of this in the above video. WATCH IT.
3-Way Wiring Diagram
Here's a 3-way wiring diagram I made back in the 1990s on a very crude version of Microsoft Publishing software. It's much better to watch the video above to have a realistic 3-way wiring diagram.
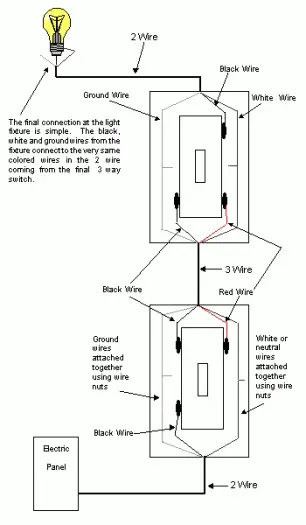
3-Way Switch Wiring Diagram
A point often overlooked is the traveler wires. These wires connect to the brass screws on the switch. It doesn't make any difference how you connect them at each switch.
The white neutral wires are wire-nutted together and do not connect to the switch. The same is true for the bare or green grounding wires.
Related Links
3 Way Switch Quick Start Guide
3 Way Switch Troubleshooting Video - For Existing Switches
Free & Fast Bids
CLICK HERE to get FREE & FAST BIDS from local electricians who will SAVE YOU.
4-Way Switch Wring Diagram
A 4-way switch is always placed in between two 3-way switches. Watch the 4-Way Switch video below and pay attention.
If you understand how to wire a 3-way switch, you'll have no issues with a 4-way switch.
You can have an indefinite number of 4-way switches in a circuit. They all must be between the two 3-way switches.
The last house I built for my family in Amberley Village, Ohio had four switches in the kitchen controlling a few lights. You can see me operate all four switches in the video below.
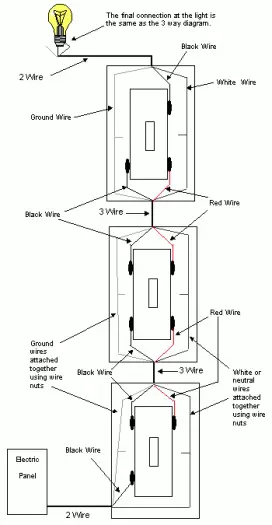
4-Way Switch Wring Diagram
CLICK HERE to get FREE & FAST BIDS from local electricians who will SAVE YOU.
Column B141