427 Silver Street Middleton NH Easement Conundrum

427 Silver Street Middleton NH private pond

This is the private pond on the 90 acres at 427 Silver Street in Middleton, NH. The house is immediately behind me. Copyright 2023 Tim Carter

427 Silver Street Middleton NH - Masterclass in Easements

My wife and I recently made an offer on a 90-acre parcel of land located at 427 Silver Street in Middleton, NH.

It has a very large private 18-acre pond on it. But the parcel of land might also have a title defect.

An Easement to Adjoining 67 Acres

The man who owns the 90 acres also owns a 67-acre parcel immediately north of the 90 acres. The 67-acre parcel is identified as 55 Jordan because it appears Jordan Road to the north ends at the property line.

427 Silver Street Middleton NH plot plan

The red lines outline the two parcels. The top of the image is north. You can see the pond outlined in blue in the lower 90-acre parcel.

The listing realtor shared with us after we made an offer that there was an easement allowing someone to traverse the 90 acres to get to the 67 acres and vice versa.

Property Lines are Infinitely Small

If you remember anything from your high school math classes, you know that there are an infinite number of points on a line between two points. This means that the lines between two different parcels of land is thinner than a thread.

If you look at the above plot plan you can see the two parcels of land and they do adjoin but at the center of the X. To physically traverse from the southern 90 acres to the 67 acres to the north, you'd have to step foot on one or both of the parcels that are east and west of the center of the X.

When asked to show the language describing the actual easements, the listing realtor declined.

We knew then it was time to step away from this purchase.

Blacktop Patching and Sealing Tips

blacktop patch using epoxy and stones

Blacktop Patching - The homeowner repaired a sinking hole in this blacktop drive using epoxy and stones. It’s time to cut it out and install real hot mix asphalt. Copyright 2023 Tim Carter ALL RIGHTS RESERVED

Blacktop Patching and Sealing Tips - Patch Then Wait 90 Days

Who’s not seen asphalt paving? I have to believe you’ve walked across it on your own driveway, crossed public streets, and/or traipsed across parking lots paved with this magic mix of liquid asphalt cement, sand, and small stone chips. The professionals call it asphaltic concrete. It’s an accurate description because regular concrete has stones, sand, Portland cement, and water to activate the cement.

Tar and Chip - The Original Blacktop

Did you know that before hot mix asphalt was invented most paved roads in the USA were created using the hot asphalt liquid cement sprayed on top of compacted gravel? Small stone chips were immediately broadcast on the black coating and compacted to create extremely durable road surfaces. In many rural areas of the USA, this tar-and-chip method of paving is still used on thousands of miles of secondary roads.

This tar and chip method of asphalt paving allows you to introduce color to your driveway depending on the color of the stones you broadcast over the liquid asphalt. I had a medium-brown driveway that used chert road metal from the Meramec River region in Missouri. You could have a red, green, or beige driveway depending on what type of durable chip gravel is available where you live. You can read all about tar and chip driveways and watch videos of the process on my www.AsktheBuilder.com website.

Do you have sunken and cracked places in your blacktop driveway? How about edges where a long crescent-shaped piece of asphalt has cracked or broken away? These defects can almost always be traced to an inferior gravel base under the blacktop. Blacktop itself is a flexible pavement because asphalt itself is a semi-solid material somewhat similar to glass. Glass succumbs to gravity over many years and asphalt can creep and deflect when compressed.

crumbling blacktop

This is crumbling blacktop that needs to be removed and patched with hot mix. The 5-gallon bucket is for scale.

If you want an asphalt driveway to last, the soil under it must be strong and the gravel base must be at least six inches thick. Eight or ten inches would be better. You must use crushed gravel that contains a variety of stone sizes including stone dust. The dust helps knit all the stones together serving the same purpose that sand does in regular concrete.

I’ve experimented in the past with the cold asphalt patching materials you can purchase at hardware or big-box retailers. Once exposed to air, the water surrounding the actual asphalt evaporates and the material does get quite hard. That said, it’s not the same as using the real deal, hot-mix asphalt made at an asphalt plant. Hot mix patching done correctly can produce a patch that lasts for decades assuming the gravel base is deep and compacted.

Patching potholes might be on your list of things to do. If so, do it the same way dentists install a filling in a tooth. Excavate the sides of the pothole so it looks like an upside-down ice cream cone. You want the bottom of the pothole to be bigger than the top. This way when the hot mix becomes solid, it can’t pop out of the hole.

If you’re going to patch larger areas in your drive, try to use a pavement saw to make clean-cut edges. Compact the gravel base and install the blacktop at least 1.5 inches thick. Two inches would be better. Be sure to dust off the sides of the saw-cut blacktop to get as good a bond as you can between the old and new.

saw cut blacktop patch

This is a great example of saw-cutting blacktop to create a nice clean edge. The only thing missing is an asphalt sealant that should be applied over the saw cut much like you tape a drywall seam with mud and paper. Copyright 2023 Tim Carter

The best way to patch potholes and patches up to 4 feet square is to use a contractor who has a special heater that heats up the existing blacktop to the same temperature it comes from the asphalt plant. This way the fresh patching asphalt mix bonds mechanically and chemically with the old asphalt. When done correctly, you can’t even see where the old hole was as there are no saw-cut lines.

Do NOT Seal New Blacktop

Whatever you do, never seal new blacktop or a blacktop patch just after you finish. The asphalt needs to cure for a minimum of 90 to 120 days. The lighter-weight oils in the asphalt need to evaporate allowing the asphalt to get hard. If you seal it before the oils evaporate, the asphalt stays soft for a very long time making it susceptible to damage from motorcycle kickstands, and tires that turn in place.

It's best to wait a few years before sealing new blacktop. If the blacktop is still jet black in appearance, it has plenty of asphalt cement still up at the surface to offer protection. Once the blacktop starts to turn gray where you see the actual color of the stones and sand, then it's time to seal it. Keep in mind the sealers are no more than paint and will wear off again.

Roadways are not sealed because the heavy vehicular traffic would wear off the sealer in a short amount of time.

new blacktop paving next to old faded blacktop

The jet-black asphalt in the cul-de-sac is just weeks old. The light-gray blacktop driveway used to look identical. But years of exposure have allowed the thin asphalt cement coating to wear off the stones and sand. It's time to seal the light-gray driveway. Copyright 2023 Tim Carter ALL RIGHTS RESERVED

If you’re installing a new blacktop drive, the best thing you can do is install the gravel base at least one foot wider than the final blacktop drive. This gives you a 6-inch-wide gravel border around the new blacktop. This shoulder provides the all-important lateral support.

Without this support, if a heavy truck or concentrated load is placed right at the edge of the driveway, you can expect the asphalt to crack as the weight causes the blacktop and gravel beneath to move sideways towards the soft soil.

Column 1511

Why Concrete Pavers Suck

concrete paver sidewalk failure

Why Concrete Pavers Suck | This is a sidewalk built using concrete paver brick. Hours before it was power washed to remove stubborn moss growth. It’s a hot mess. Copyright 2023 Tim Carter ALL RIGHTS RESERVED

Why Concrete Pavers Suck - There are So Many Reasons

It’s really important for businesses to introduce new products. Tens of thousands are introduced each year in the home improvement vertical. Once you’ve had enough trips around the sun, you can spot ones that have lots of sizzle but most likely won’t stand the test of time. I had that feeling forty years ago when I first saw colored concrete paving bricks become the belle of the ball.

It turns out my gut feeling was correct. The evidence is all around you that concrete paving brick can’t lace the boots of true clay paving brick. Here are just a few of the reasons.

You may own hundreds of concrete paving bricks or walk across them at a park or outdoor shopping mall. These bricks come in many different shapes, sizes, and colors. Several years ago my wife wanted an instant outdoor patio and I could only satisfy her desire by using large-format concrete patio stones that came in different sizes. They interlocked in a random Ashlar pattern.

The large pavers I used were made the same way as the concrete brick you may have. Concrete companies mix small stone chips, coarse sand, Portland cement, and dry pigments together with a precise amount of water. The mix is poured into molds to make the brick or larger pavers. They’re cured to gain maximum strength and the colors are rich when the products leave the manufacturing plant. The color you see is created by the ultra-thin pigmented cement paste covering the sand and gravel at the surface.

paving brick cracked in half - comparing aggregate color

I cracked the new paving brick in half. Look at how light-colored the aggregate is! Over time when the red cement paste wears off, the pavers will look different. My traditional clay paving brick patio you see below the POC concrete paver will stay red forever because the red clay is the same color throughout the entire brick. © 2023 Tim Carter ALL RIGHTS RESERVED

concrete paver brick faded color

Here is a close-up shot of a concrete paver brick from my rear sidewalk. Look at the exposed aggregate and note all the different colors. When this brick was new, it had a uniform brown color and a smoother finish at the top. You can verify this by simply removing a brick or two from the sidewalk and turning them over to inspect the underside that has not been exposed to natural or man-made erosion. Twenty harsh New Hampshire winters coupled with no less than two power-washing cleanings show you why these bricks are no match for the solid color of true clay paving brick. Copyright 2023 Tim Carter ALL RIGHTS RESERVED

Use Clay Pavers Not Concrete

Real bricks are made from clay. The clay is cut into the final brick shapes and then fired in a huge kiln. The high-temperature firing process produces a chemical change in the clay creating an artificial rock of sorts. Some clay bricks can be fired so hard they are strong enough to be used as normal street paving. You can see this in the streets of downtown Athens, Ohio.

clay paving brick

This is a real clay paving brick made by the Southern Clay Brick Company. It's 8 and 5/8ths inches long, 4 inches wide, and 3 inches thick. It was salvaged from the Old Brick Road in central Florida very close to the Bunnell-Palm Coast section of the road. Copyright 2023 Tim Carter ALL RIGHTS RESERVED

Clay paving brick doesn’t change color over time. Concrete paving brick fade and change color. That thin-colored cement paste wears off with normal wear and tear or you can blast it off using your power washer. After one or two cleanings, all of a sudden you see the color of the stone chips and sand.

clay paving brick southern brick mfg company

This is the same clay paving brick you see in the above photo. It has a chip on one corner. You can see the solid color of the clay throughout the brick. This brick will not change color over time. Copyright 2023 Tim Carter ALL RIGHTS RESERVED.

Set Bricks on Concrete Not Sand

Another issue with concrete paving bricks is the way they’re set. Almost all are set in a bed of sand. Burrowing animals can and do tunnel through the sand. The bricks can settle, tilt, and look horrible in short order. I know this because it’s happened here at my own home. Here's a video showing an animal burrow under a paving brick sidewalk.

I didn’t build the house I live in and I inherited two concrete paver brick walkways when I bought this home. One walkway looks better than the other, but both no longer are flat as they were the day they were installed.

Weeds and concrete paver bricks are like peanut butter and jelly. You can count on weeds growing up in between the bricks if you live where you get enough water to support the growth. A weed hacker can be used to trim the visible growth but days later the weeds sprout new green growth.

weeds growing in concrete paver bricks

These are normal weeds growing in between the joints of concrete paving bricks. Look at how much aggregate in the concrete is now showing. The bricks look like they're 1000 years old but they've only been in use 20 years. Don't buy them. They SUCK. Copyright 2023 Tim Carter ALL RIGHTS RESERVED

Ants love concrete paving brick. They transport the sand under the brick up to the surface as they create comfy nests under the bricks. You can broom or blow the sand away with little effort, but it’s just another nuisance to deal with.

The gaps between concrete paving bricks are typically filled with fine sand. Some pavers have tiny bumps on the sides so a wider joint between each brick is created once installed. My large-format pavers had this.

Powerwashing RUINS Concrete Pavers

Manufacturers have known for decades that people love to clean their concrete pavers with a power washer. The issue is no matter how careful you are, the high-pressure stream digs out the sand.

The manufacturers responded by inventing polymeric sand. This is just sand that comes with a water-activated adhesive. When I first saw this product, I was skeptical. I simply couldn’t believe that a water-based adhesive could withstand Mother Nature. Once again, my gut instinct was spot on.

I used polymeric sand on the new patio pavers I used to make She Who Must Be Obeyed happy knowing that it was doomed to fail. I followed the instructions to the letter and the sand looked fantastic for two years. Then it slowly succumbed to the harsh New Hampshire winters. I have weeds growing on my patio, some of the sand is missing, and it all needs to be redone.

weeds growing through polymeric sand and concrete pavers

This is the concrete paver patio I built for my lovely wife. The joints between each paver is about 1/8-inch wide. They were filled with polymeric sand. Look at the weeds growing through the sand. It's POC just like concrete pavers.

If you want a trouble-free brick patio, my suggestion is to do what I’m starting to do at my son’s house. We’re installing thin split clay paving brick on a steel-reinforced concrete slab. The space in between each brick will be filled with mortar that will test out at 12,000 pounds per square inch. Soon you’ll read an upcoming column about this project and I’ll share detailed step-by-step videos of the process.

Column 1510

DIY Tool Rental Tips

concrete power buggy pouring concrete

DIY Tool Rental Tips | Years ago it would have taken eight men with wheelbarrows to bring the concrete to the rear of this house. You can rent this machine to transport and dump the concrete exactly where you need it. Copyright 2023 Tim Carter

DIY Tool Rental Tips - You Can Save Thousands of Dollars

I do media scanning each week to keep abreast of all that has to do with building new homes, remodeling existing homes, new tools, financial news, etc. Unless you’re living under a rock and hibernating you’re surely aware that inflation is raging, interest rates are much higher than they had been, and it’s causing you to contemplate tackling projects that two years ago you would have hired out. The good news is you can rent many tools you might not realize exist.

The best news is if you get stuck on a DIY job, I can help you. I do DIY phone coaching. GO HERE to set up the phone or VIDEO call.

Here’s an example of how extreme it’s become. A month ago I was hired by a woman who lives in Florida to be her virtual general contractor for a major house renovation in the deep wilds of central Maine. This energetic woman figured that with me in her back pocket available to do video or voice calls while she’s at the job site, I could help her successfully navigate this project. She stands to save close to $100,000 by my calculations.

The good news is she has at her disposal a plethora of tools and machines she can rent that will help her, and her sub-contractors, complete the project. I want to share just a few of them here to inspire you to jump into a project that you might have backed away from thinking it took too much manpower.

A man lift is one of the most exciting machines that you might rent allowing you to work safely up high. While these are not necessarily new, the capabilities and reach of the machines have significantly improved. Imagine working from a level platform with guardrails 30 feet off the ground. Just a few days ago one-half mile from my house a fireplace contractor used one to install a stainless steel chimney on the roof of a new house. The machine allowed him to do this quickly and most importantly safely.

You can use man lifts to install windows, siding, gutters, paint house exteriors, tuck point brick chimneys, and even re-roof a steep roof that might terrify you. If you hate ladders, you’re going to love man lifts.

Do you have to pour concrete in the back of a house or up a hill? Imagine how hard it is to try to push a wheelbarrow filled with heavy concrete up even a slight grade. Why not rent a power buggy? These are powerful motorized tiny dump trucks. CLICK HERE to watch a power buggy in action. They come in different sizes but a popular one is just over four feet wide and can transport 2,200 pounds of concrete each trip. It has tracks like a bulldozer or tank so it can go just about anywhere. You can use one to transport and dump, gravel, sand, stones, brick, etc. One power buggy can easily replace up to eight men on certain jobs.

Do you need to do plumbing work and you don’t trust your soldering skills? Forget about soldering and use press fittings. You can rent a tool that crimps the exterior of slide-on fittings that create a permanent seal with a rubber O-ring. In the past, you may have taken three minutes to clean, prep, and solder a fitting on copper tubing. That same fitting can now be installed in less than ten seconds using the press tool.

Pipe scaffolding is by no means new. Masons have used it for decades to lay brick and stone on the outside of homes and commercial buildings. It’s caveman simple to assemble. You can get a wide variety of accessories such as staircases, guardrails, leveling feet, wheels for hard smooth surfaces, and working platforms.

I’ve used pipe scaffolding to paint houses as well as new and re-roofing. They allow you to work safely at the lower edge of the roof. These amazing monkey bars work well when it’s time to do rough carpentry. I’ve set up the scaffolding to install ridge beams and roof rafters. I love the stability of pipe scaffolding and it’s very inexpensive to rent a month at a time.

Do you have to break up a worn-out concrete driveway, patio, or sidewalk? Rent an electric jackhammer. These have been around for decades but you may not have known about them. They just need a normal 15-amp 120-volt circuit. These powerful tools can break up thick concrete if that’s what you need to do.

If you need to dig a trench or a hole, you can rent tiny excavators. With just a few minutes of practice using the joystick controls, you’ll be able to dig a trench with fluid movements. Skid-steer loaders have been around for at least five decades. These allow you to move vast amounts of sand and gravel and dig holes in sandy or clay soils. They’re perfect for jobs where you can’t fit a big backhoe or loader.

You can rent miniature stand-behind excavators and loaders too. These can fit in very small backyards and will allow you to dig shallow holes for new patios, sidewalks, or a driveway if need be.

As crazy as this seems, you might want to visit a tool-rental shop or surf their website to see all the tools they have for rent. You may see the perfect tool that will inspire you to become a serious DIY warrior. And remember, I’m a phone call away should you get stuck.

Column 1509

How to Plan the Perfect Patio

concrete patio form boards below steps

How to Plan the Perfect Patio | This is the shape of my son's new patio. The concrete is about to be poured. It appears small, but it's not. Copyright 2023 Tim Carter ALL RIGHTS RESERVED

How to Plan the Perfect Patio - Go Big

Just about fifty years ago I settled into my building career. My lovely wife and I purchased an FHA-repossessed house in Cincinnati, Ohio. I was twenty-two years old and a very wet-behind-the-ears builder. The hard dusty work was extremely rewarding and I recall talking to my bride about how if we were lucky enough to have kids I dreamed of working with them on their homes.

We were fortunate to have three wonderful children and my dream is now 2/3rds fulfilled. Four years ago I helped build my oldest daughter’s home by installing all the plumbing, radiant heating, and electrical wiring in her Mt. Desert Island, Maine house. While he was busy caring for my newborn granddaughter, I was able to create a deep bond with my son-in-law. He helped me for four hours each day never once complaining about the cold, snow, and hard work.

Working on My Son's New Patio

Several days ago I had the enormous pleasure to help my son achieve one of his goals. He purchased a new home last year and quickly discovered how much he missed the stunning red-brick patio he grew up with at our last home. One day last fall his mother and I were visiting and he said, “Dad, I’m finding it’s very hard to get bids for a patio and the prices I’m receiving are in the stratosphere. Do you think you and I could build a patio like we had at home?”

In an instant, I knew how much work it would be, but I didn’t hesitate to say, “Why sure we can. The first step is to discover exactly what you want.” Over the years I’ve performed countless autopsies on projects that didn’t turn out the way the homeowners wanted. In almost all cases, it came down to inadequate thought and planning before the first shovelful of dirt was turned.

Here are a few short 15-second videos showing the patio being poured!

You Must Be Able to Visualize the Patio

You might be like many past customers of mine. God has given all of us different talents and skills and you may lack the ability to see in three dimensions a finished house, room, or even a flat patio. This immediately puts you at a disadvantage. There’s a great chance you’ll not think about how the space will be used and how furniture will create what I call invisible hallways in rooms. There’s a very good chance you’ll underestimate the overall size something needs to be to function properly.

My son doesn’t have this talent so I did with him what I had done for years with past customers. Two months ago as winter slinked away back north across the Canadian border, my wife and I went to our son’s house to start the patio planning process. I was armed with a roll of colored mason’s string, some wood stakes, a 4-pound hammer, and a few tape measures.

What Will You Do on the Patio?

My first question was, “Share with me what would be the ideal weekend gathering you might have with your friends. Who will be here and what would you be doing?” He shared that he’d have four or five friends over, he’d serve smoked brisket from a smoker he had over in the grass, and after they ate they’d play a board game or just sit around engaged in relaxing conversation. He also mentioned he might like to have a small water feature that provided water for birds and created a soothing background ambiance.

This meant the patio had to have room for a table that would seat six people, additional room for his smoker, space for a portable water fountain, a place for two chairs, and maybe a few potted plants around the edge of the patio. It was time to drive stakes and stretch string.

What is the Minimum Patio Size?

Over the years I’ve found that you need a space at least 12 feet by 14 feet for a rectangular table that seats six people. A 12x12 space is required for a 4-foot round table that seats four people. This provides plenty of room to move around the table while people are seated. Think about what happens if you have to get up and go back inside the house for something.

Before we went outside to stake out the patio, we made a fast sketch on paper to get a rough idea for the overall size knowing what he wanted. Using the string and wood stakes, within minutes we had created the outline of the patio. A set of steps from the house leading to the patio controlled the overall design. A small space on one side of the steps was reserved for the smoker and the other side was the much larger seating area.

The overall length of the patio, including the steps, was 29 feet and the width ended up 15 feet. Stretching the string around the wood stakes made the shape come alive for my son. I used smaller stakes and some string to create the actual furniture to show that everything would fit and that there’d be plenty of room to walk across the patio without bumping into anyone.

concrete patio

This is my son's patio. Soon it will be covered with clay paving brick. It measures 15 feet wide and it's just under 30 feet long as it passes under the steps. The area beyond the steps is for his smoker grill.

You can do the same thing by setting patio furniture on your lawn spacing it how you want it. Then put a string around your furniture layout to determine the overall size of the patio. Trust me, that huge patio in your head will shrink in size once you place furniture on it. Always go bigger. You’ll never regret it.

Column 1508

Lithium Battery Fires

laptop tablet drill camera power pack on kitchen island

Lithium Battery Fires | These common items you may have in your home contain lithium batteries that can catch fire and explode. The danger is far greater than you might ever imagine. Copyright 2023 Tim Carter ALL RIGHTS RESERVED

Lithium Battery Fires - The Problem is Very Serious

This might be the most important column I’ve written in my 30-year career as a syndicated columnist. There’s a very high probability you have lithium-ion batteries in your home. They are now as common as ants at a summer picnic. The issue is the batteries can present a significant danger to you and your loved ones. You could have lithium battery fires in your home today or tonight.

Six months ago a home just miles from where I live almost burned down because power tool lithium-ion batteries ignited a fire. Fortunately, no one died or was seriously injured in this fire but lithium batteries are causing death and permanent injuries to many across the USA and the world. That fire caught my attention and I decided to begin to gather information for this column.

PR People Clam Up

Early in my investigation. I reached out to the public relations (PR) person of a major power tool company here in the USA. I’ve dealt with this professional for years and all of my previous requests were answered in a timely manner.

I asked to interview the top battery engineer to try to discover what might have gone wrong at my neighbor’s house. The PR professional ignored my request. I initiated a second request reaching out to a different PR professional from the company. That request was ignored.

I’ve done expert witness work in lawsuits for the past three decades and surmised the corporate attorneys had instructed the PR folks to not engage the press on battery issues. My guess is they have a three-foot-tall stack of lawsuits on their desks and any interaction with me would be discoverable evidence in a lawsuit by a plaintiff.

The power tool -company silence should stun you and cause alarm.

Early in my investigation, I set up a Google Alert using the words “lithium battery fire”. Each morning I receive links to a plethora of stories from around the world about fires caused by these power packs.

google alert screen shot lithium battery fires

Based on the information in these stories, there are quite a few common elements. Many fires happen while the battery is being charged. Many fires are traced to replacement batteries that may or may not carry the Underwriters Laboratories (UL) label. Many fires have mismatched batteries and chargers. In almost all cases, the batteries explode like a miniature bomb igniting nearby combustible materials.

I’ve watched countless videos showing batteries igniting and exploding violently. Get out of your head the image of a scented candle starting a blanket on fire. Replace that with an image of a powerful firework exploding spraying sparks, hot plasma, and flames out like a blowtorch.

Add to this that a lithium battery fire emits extremely toxic fumes. The fire can produce temperatures in excess of 1,000 degrees F in seconds. Nearby combustible materials such as furniture, carpets, bedding, etc. can ignite creating a conflagration in seconds. Look at this graph to show how fast a fire grows in seconds. This is why you should consider installing fire sprinklers wherever lithium batteries are used or stored.

graph of fire growth with and without sprinklers

This graph shows how fast a fire can grow with and without sprinklers. The red arrow points to the fire growth with no sprinkler. The green arrow points to the fire growth with a sprinkler spraying water on the fire. Graph courtesy of Waste360.com - Fair Use Doctrine usage claimed

As I was writing this column, I received my daily summary from Google and there was a video made by the UL Fire Safety Research Institute showing an explosion and fire inside a simulated residential two-car garage. The battery was in thermal runaway where the heat in the battery caused a violent explosion that blew the large garage door out into the driveway!

Fires on Airplanes!!!

Lithium battery fires on airplanes are happening more frequently. It's a SERIOUS ISSUE. Watch this video:

The fire department experts offer up these tips about how you can best protect yourself. Once a battery is charged up, unplug it. Charging a lithium battery creates heat. Avoid overnight unsupervised charging. Never charge a lithium battery in direct sunlight as the sun’s infrared rays can easily heat the battery on its own to over 150 F.

If your battery gets damaged, emits an odor, changes color, or gives off excessive heat, stop using it and do not store it near any combustible materials.

Never throw away a lithium-ion battery in the trash. Garbage truck fires are becoming more common. Fires at trash and recycling transfer stations and facilities are causing millions of dollars in damage.

You can protect yourself by using lots of common sense. Think about what you learned in high school physics class about fires, combustion, oxygen, etc.

First and foremost read and follow the instructions to the letter that come with the tool or product that has one of these batteries. Only charge your lithium batteries when you can observe them. Consider charging the batteries on non-combustible surfaces and far away from combustible materials. Store the batteries where if they ignite, they won't spread the fire to nearby combustibles.

I urge you to set up your own Google Alert. Consider installing a fire sprinkler in the area where you do store your lithium battery tools and garden implements. If a lithium battery does ignite, the sprinkler should do a great job of containing the fire until your firefighters arrive.

Column 1507

DIY PEX Water Lines

pex and copper water lines in basement

DIY PEX Water Lines -These are the hot and cold PEX water lines in my own home. I know it appears complex like spaghetti thrown on a wall, but it’s not. DIY plumbing has never been easier. Copyright 2023 Tim Carter ALL RIGHTS RESERVED

DIY PEX Water Lines - You Can Do It

Are you finding it difficult to get people to work on your home within your budget? Each day visitors to my website share horror stories about out-of-control prices being charged by workers. Inflation is raging and the economic law of supply vs. demand is in play.

I’m blessed to be able to use this column to share my knowledge. It allows me to empower you to do many jobs you might never think of doing yourself. Just this past week I saved myself about $500 by installing a new venturi fan in the bowels of my combo high-efficiency boiler. It looked intimidating once the cover was off the front of the boiler but the step-by-step instructions that came with the replacement part made the job very easy.

Allow me to share some of the forty-five years' worth of plumbing experience I have in my tiny gray cells. I’ve been a master plumber since 1981 and love to teach others how to install water lines, drain and waste pipes, and vent pipes. Just two years ago I helped Zoe over the phone. She installed all of the plumbing pipes in her new home in New Mexico. If Zoe can do plumbing work, by gosh so can you!

In the past, working with water lines required a decent amount of experience. You had to know how to solder copper tubing. I recorded a step-by-step video of this process over twenty years ago. Watch it now as it's still relevant:

The great news is you can solder with a simple torch you purchase at a big box store. If you have an expensive tool, you don’t need to solder. You can use copper press fittings that seal the joint with a rubber o-ring. Here's how easy it is to use the copper press tool:

CPVC Was the First

That said, the advent of plastic has revolutionized the installation of water lines in homes. You have lots of choices today. CPVC tubing is one option and it’s decades old. When it first hit the market, it was the belle of the ball. Not so any longer.

In my opinion, the paradigm shift in residential plumbing happened with PEX tubing. Prior to this, every time you had to change direction using copper or CPVC, you needed a fitting. Installing those required time and expertise and each fitting became a possible leak location.

PEX Installs Like Electric Cables - Easy!

PEX tubing installs just like Romex electric cables. Imagine running a 50-foot-long garden hose through the joists of your home from the mechanical room to a second-floor bathroom. PEX is flexible and you can design your system like mine where you just have a fitting at the manifold in your mechanical room and the other fitting is at the shutoff valve under the faucet. Female dogs, cats, and other animals have manifolds on their chests so lots of little animals can feed at once. Manifolds are wonderful things to have in a plumbing system.

While I’ve never done an actual side-by-side test, I’d venture to say PEX saves about 95% of the labor I’d have used to install a typical run of copper tubing from a mechanical room to a faucet.

What would you say if I told you that you can purchase the hand tool to install PEX for less than $100.00? A plumber would charge you that just to start up his truck and drive to your home!

Would you believe me if I told you I could teach you how to install PEX fittings in less than one minute? You’d probably think I fell off a ladder and hit my head. Truth be told, it’s extremely easy to do. Watch this video:

PEX can be installed very similar to an existing daisy-chain setup as is often done with copper or CPVC. In this setup, you do not use a manifold. Instead, you have lots of fittings throughout the house where you branch off a larger pipe that works its way through the house. Think of how branches extend off a tree trunk or how your blood vessels are in your own body.

I prefer installing PEX using a manifold system. This uses more PEX tubing, but it eliminates all the fittings hidden in the walls and ceilings of your home. Each hot and cold water line feeding a faucet originates in the mechanical room. On the manifold, there’s a separate shutoff valve for each line. This allows you to turn off the water to a particular faucet while water flows to all other fixtures in the house. This is a dandy feature to have, trust me.

You can mix and match if you want. Let’s say you need to add a bathroom or a kitchen. If you have copper tubing in your home and want to use PEX, you just solder in a tee with a PEX adapter. The PEX attaches to the brass fitting and away you go!

Should you decide to run PEX yourself, be sure you always put a strong piece of tape on the cut end of the PEX. This prevents dirt, sawdust, wood chips, etc. from entering the pipe as you extend the tubing through your framing.

You can purchase all sorts of metal and plastic accessories that help you terminate the PEX under all your sinks. Be sure you read the installation manual that comes with the PEX and pay attention to hole sizes.

If you plan to run PEX to a bathroom rain-head shower be sure to run dual hot and cold lines to ensure you have plenty of flow. The same goes for large tubs. Don’t forget to insulate around all the tubs so the bath water stays nice and hot long enough for you to fully relax!

Column 1506

Build a Perfect Pergola

cedar pergola benson park

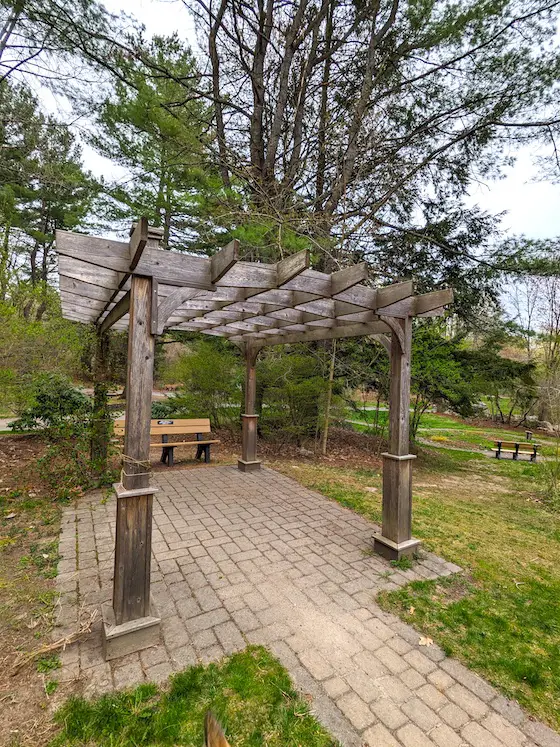
How to Build a Perfect Pergola | While this weathered pergola at Benson Park looks challenging to build, you should think of it like eating an elephant. Pachyderms are best eaten one bite at a time. Copyright 2023 Tim Carter

How to Build a Perfect Pergola - It Starts With Planning

A few days ago I took my American Dirus dog for a walk in southern New Hampshire while my wife was shopping for plants with my son. Willow and I went to Benson Park, an old zoo in Hudson, NH that’s now a marvelous city park. It was alive with the laughter of children and I could sense the excitement that hundreds of thousands, maybe millions, of people who had walked the same pathways over the past seven decades. All those years ago they were about to see camels, alligators, bears, elephants and many more exotic animals.

Click here to see exotic Willow that looks like a wolf but has NO wolf DNA in her.

american dirus dog wolfdog

This is Willow. She wears the bright vest so we can see her in the woods. Her fur coat is so well crafted and colored, it's perfect camouflage making it hard to spot her. Copyright 2023 Tim Carter

Park benches were as abundant within the park as popcorn would have been on a summer’s day. One particular one caught my eye as it was nestled under a weathered simple, yet elegant, pergola.

Rough Sawn Cedar is Exceptional

While Willow was using her nose to make a mental note of all the other dogs who had been to the same spot, I used my eyes to capture the timber eye candy. I thanked the architect or carpenter who had come up with the idea for the pergola’s interlocking 5/4 x 10 rough-sawn cedar used to create the shade screen that measured 12 by 16 feet. It was the perfect size in my opinion.

pergola interlocking roof shade screen cedar wood

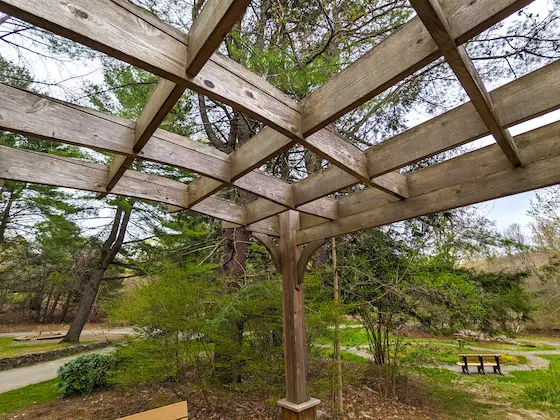
The pieces of wood that create the shade screen interlock with notches created in the top and bottom of the timbers. Think about how cardboard does the same thing to make spacers for glassware. Copyright Tim Carter 2023

As strange as it seems, the first thing that I noticed was the extra simple trim lumber that had been used to fatten the four support posts. While it was unnecessary, this small touch created both visual appeal as well as a subliminal message of strength. Think about an elephant’s lower legs compared to a gazelle’s. The elephant telegraphs sturdiness, power, and stability.

Only Paint if your Pergola is in the Atacama Desert

Fortunately, no one had ever painted this masterpiece. Painted exterior wood almost always peels. The expansion/contraction coefficient of the wood is much greater than that of most paints. To prevent paint from peeling, you need to keep it dry. This is why you rarely see painted wood inside a home peel. But put that same piece of wood outdoors where water can get on it and you'll have peeling paint in no time. The wood used for a pergola is exposed to every drop of rain. Never ever paint a pergola unless it's located in the Atacama Desert where there's been no recorded rainfall for hundreds of years.

I’m sure the Benson Park pergola had been stained at one time but that was years ago as the cedar wood now sports a distinctive gray color much like my own hair. It’s vital the park staff clean and seal the wood soon in my opinion. Water and sunlight will eventually take their toll and the majestic pergola could end up as dumpster fodder or kindling wood.

When you seal your pergola, or any outdoor wood, always try to use a penetrating sealer made with synthetic resins. You also want one with a medium color. The color pigments act like sunscreen sacrificing themselves to the ultraviolet (UV) rays that contain photons. Keep in mind penetrating wood sealers don’t peel like film-forming sealers that seem to dominate the marketplace.

Film-Forming Sealers are BAD

The cynic in me thinks the sealer manufacturers promote film-forming sealers because when they fail, your deck, pergola, or outdoor wood furniture looks horrible faster. This means you need to buy more sealer in fewer years.

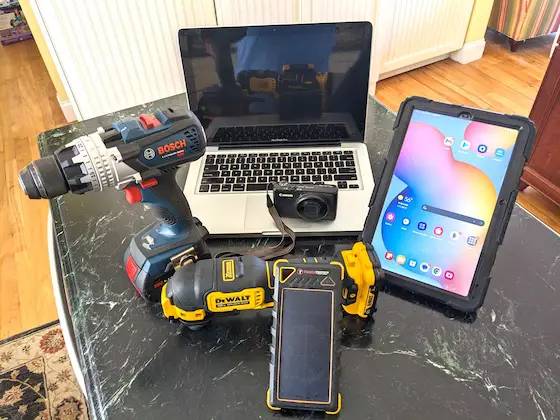
If you plan to build a pergola this summer like the one I saw at Benson Park, you only need a few tools. But before you buy any lumber, you need to visit your local zoning office to see if you’re even allowed to build one. Some cities, towns, and even HOAs have very rigid and restrictive codes that limit what you can do on your own land.

What Will Happen Under the Pergola?

Once you know you’re allowed to construct your pergola, it’s time to think about its primary purpose. Will it be simply decoration or will it be functional? What will you do under it? Sip an iced coffee, read a book, play harmonica, set up your outdoor amateur radio, or play chess? Give thought to the furniture you’ll need and make sure it fits with ease under the structure. You don’t want to be bumping into the support posts.

I can’t stress enough the importance of this planning step. All too often folks think a certain size will work because the space seems so large. But as you start to move furniture in, the large space shrinks more than a golf glove that gets soaking wet and then dries in the sun.

Stainless-Steel Fasteners are Best

Spend the extra money to use stainless-steel nails, screws, bolts, and nuts. Beware of cheap electroplated galvanized hardware. It looks great but that ultra-thin coating of zinc wears off faster than a two-week honeymoon. Once the metal begins to rust, it can permanently stain your expensive cedar or redwood.

Don’t underestimate the power of the wind. You’ll thank your lucky stars that you attached the pergola to concrete piers using hold-down anchors when you get an alert on your phone about an approaching severe storm packing wind gusts of 50 mph or more. The last thing you want is to see your pergola lift up off the ground and float or tumble into a neighbor’s yard.

I feel my best piece of advice is to go hunting for pergolas near your home. You might find them at garden centers, city or county parks, or in public gardens. Take your tape measure and notebook with you. When you spot one that makes you melt, it’s time to take measurements, photos, and even sketch it so you can re-create it in your backyard. Don’t try to reinvent the wheel, it’s better to just copy one or tweak one that you already love.

Column 1505

Top Residential Building Mistakes

attic truss for residential roof

Top Building Mistakes - You can avoid paying self-storage fees if you use these attic trusses instead of normal space-wasting ones. Copyright 2023 Tim Carter ALL RIGHTS RESERVED

Top Residential Building Mistakes - There are So Many!

Each week I have the good fortune to speak on the phone with homeowners all across the USA who ask me to solve problems at their homes. Many of these homeowners like you are facing expensive repairs because of mistakes made by the home builder. Each error is avoidable. GO HERE to arrange a coaching phone call so I can SOLVE YOUR PROBLEMS.

tim carter master plumber

Call ME now so I can help you!

This unique interactive experience allows me to observe, on a macro scale, the top mistakes made by builders, and often architects. These mistakes are avoidable and the extra money spent to build the right way pays off in spades years later.

Just last week I was on the phone with a man who was in shock. His father’s home had been built into the ground 2 feet deeper than it should have been. The builder then piled up dirt on the side of the house to hide his mistake. Years later the leaks caused wood rot that was the worst I’ve ever seen.

This mistake might have been prevented had the architect included a standard detail drawing showing exactly how high the foundation drawing should be in relation to all the ground around the house. The building code, a set of minimum standards, states that the ground around all sides of a house must have 6 inches of fall in the first ten horizontal feet of run away from the house. What’s more, a minimum of 6 inches of foundation should extend up above the ground! Remember, these are MINIMUM standards. Greater fall and more exposed foundation are better.

foundation height above grade sketch

Frequently homeowners ask me if they can alter roof trusses so they can create more storage space. The frustrated homeowners long for a traditional attic as one sees in older homes. More and more attics are transitioning from history to legend to myth as architects and builders use standard trusses.

The good news is you can purchase attic trusses or even smaller storage trusses. These install the exact same way as space-wasting normal trusses. While they cost more, the long-term savings are tremendous. Rent a small 10x15 off-site self-storage unit and after ten years you’ll have spent $18,480! Why not invest a few thousand extra dollars when building your home to have permanent full attic space?

Each summer and winter homeowners beg me over the phone to make them more comfortable. Parts of their homes are either too hot or too cold. These building problems almost always are traced to a forced-air system that was installed with little thought.

If you use forced air for heating or cooling, it’s important to realize it mimics how blood flows throughout your body. Every room in a house, except for kitchens and bathrooms, should have a return air duct as well as one, or more, supply ducts. Supply ducts should be located on outside walls and the return ducts should be on opposite interior walls. This forces the air to flow across the room and your body as it makes its way back to the furnace or AC unit.

The size of the supply ducts is critical. Think of how the blood pressure is the same at your heart as it is at the tip of your finger. Mother Nature made sure your blood vessels get smaller the farther away from your heart. Your HVAC contractor needs to do the same with the supply ducts to maintain the static pressure in the system.

return duct supply and suppl duct

Note how the duct on the left next to the beam gets smaller. The air is moving TOWARD you in the photo as it's the supply trunk line. Copyright 2023 Tim Carter

Every other week I field calls from frustrated homeowners who are tired of hearing Niagara Falls in the ceilings and walls of their homes each time someone flushes a second-floor toilet. This audio agony can be avoided by using no-hub cast iron pipes for the main vertical stack in a home. It only takes a few extra minutes to install this pipe and it provides quiet plumbing for decades.

cast iron plumbing stack

Cast Iron Plumbing Stack | Here's a 4-inch no-hub cast iron plumbing stack that branches off to two different full bathrooms. I installed this in a Bar Harbor home in 2019. Copyright 2023 Tim Carter

A month wouldn’t be complete if I didn’t have a conversation about how to modify a garage to create more space. I lay this problem at the feet of the architect in all instances. After ending the call I always wonder if the architect who drew the plans for the garage had ever parked a car in a garage. What thought entered her/his head when the car door dented the door of the other car in the garage? Did she/he grumble about squeezing between the car and the garbage cans, bikes, or lawnmowers along the side walls of the garage?

If you have a deck or patio at your home, there’s a great chance you’ve muttered disparaging comments about your home’s builder or architect each time you tried to squeeze by someone seated at a table. All too often I see decks and patios that are far too small. All one has to do to size a deck or patio is look inside a home. Is your current dining room too small? Do you have plenty of space to walk around seated family members? Or do you have to shuffle sideways past a wall or piece of furniture?

When you do the simple math, you’ll discover a deck or patio has to be 12x12 feet minimum to accommodate a table and chair set that seats four or six people. Once again, larger is better. Purchase your deck or patio furniture first before building. Set it out on the grass or driveway and test to see how much space you need behind a person seated at the table to get by. Trust me, you’ll be stunned.

Column 1504