Hardwood Repair

Hardwood Repair

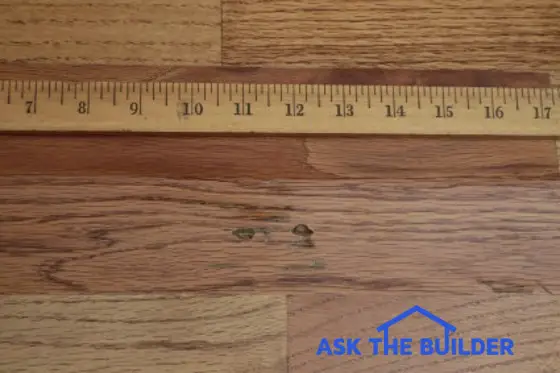
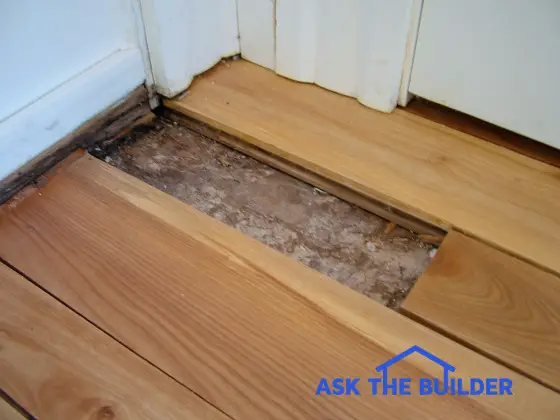
This hardwood repair is going to take some effort. The interlocking pieces of flooring need to be carefully removed. ©2017 Tim Carter

Hardwood Repair TIPS

  • Toughest repair job in the average house
  • Hire a pro to get it done correctly - very frustrating for a DIYr
  • Cut out center of damaged piece carefully
  • Stain and finish challenges face you after difficult repair!
  • CLICK HERE to Get Tim's FREE & FUNNY Newsletter!

DEAR TIM: I'm faced with a hardwood floor repair. Water seeped under my front door and caused the floor to warp. What's involved in a hardwood-floor-repair job like this?

I'm usually not too timid when it comes to home repair issues, but I'm feeling out of my comfort zone. I realize the hardwood floor is made up of interlocking pieces, and for the life of me I can't figure out how to remove single pieces much less install new ones. Dan B., San Jose, CA

DEAR DAN: I'll tell you what's involved in a hardwood repair like this, lot's of frustration and pain.

Very Tough Job

This is a task that's often best left to a hardwood-flooring professional. You can probably work your way through the job, but a professional will probably be able to complete the task and be on the road to the next job while you are still futzing around with the wood chisel.

AsktheBuilder Podcast

CLICK this image and listen to the first call on the podcast. I talked to Jill about how to repair wood kitchen flooring, and possibly installing an inlay border as an option. Copyright 2018 Tim Carter

Interlocking Pieces of Wood

Hardwood-floor repair is difficult because of the shape of each piece of hardwood flooring. Full-size pieces of hardwood flooring are typically three-quarter-inch thick and they have either a tongue or groove profile on each of the four side edges. The tongue interlocks into the corresponding groove on an adjacent piece of hardwood flooring. This means you can't just pry up a piece of flooring as you might pull up a board on your outdoor deck.

CLICK HERE to get FREE & FAST BIDS from local hardwood floor installers who can do this repair.

Remove Center Carefully

Different hardwood-flooring professionals may have different techniques for removing a single flooring board, but just about every one of the pros will start by carefully removing the center one-third or so of the damaged floor board. By doing this, you can pull the remaining two pieces sideways away from the adjacent flooring towards the center of the space.

If you try to pry up the pieces of flooring, you can crack off the tongue and or groove of the good pieces of flooring you're trying to salvage.

Frustration Guaranteed

You'll become extremely frustrated early in the hardwood-repair process. You'll probably use a circular saw to start the process of removing the center of the damaged piece of hardwood flooring. Carefully set the depth of the blade so it cuts the hardwood flooring only and not into the subfloor beneath the hardwood.

Vibrating Multi-Tool

Because the saw blade is circular, it will not be able to cut full depth to the outer edges of the hardwood strip flooring. You'll have to finish that task carefully with a router or a wood chisel. You may also decide to use a vibrating multi-tool equipped with a wood blade.

This operation will require extreme patience, skill and precision as you can't touch the adjacent pieces of finished hardwood flooring with the tools. If you do, then you'll be replacing multiple pieces of hardwood flooring.

Exact Size Required

Once you've got the old piece of ruined flooring out, it's time to conjure up every ounce of master-finish-carpentry skill you have. You have to produce a piece of new hardwood flooring that is the exact size of the one you removed. Your tolerance for error is perhaps the thickness of a piece of paper.

CLICK HERE to get FREE & FAST BIDS from local hardwood floor installers who can do this repair.

Cut Off Bottom Groove

But note that you have to get the new piece of flooring into a rectangle that has two tongues and two grooves. The only way you can do this is to cut off the tongue on the short edge and cut off the bottoms of the two grooves on your replacement piece of hardwood flooring.

Even with these advantages, it can be a tremendous challenge to insert the new piece of hardwood flooring without damaging the tender edges of the new piece as well as the adjacent pieces you are working against. This stage of the project will require every bit of patience and skill you possess.

Face Nail

Once you have the new piece of hardwood flooring nested into position, it needs to be face nailed. Because you've worked so hard to get to this point, don't ruin the wood by splitting it. I recommend drilling pilot holes that are slightly smaller than the diameter of the special blunt point finish nails you need to use.

Special Blunt Nail

Don't use regular finish nails. There are special finish nails that have a tip that is fairly blunt. You can get these from a real hardware store or from a professional that regularly installs hardwood flooring. While you are picking them up from the pro, be sure to ask him if he has an opening in his schedule to bail you out. My money says you will be calling him to finish what you start.

Hardest Repair Job Ever

Hardwood floor repair ranks as one of the hardest repair jobs I know of in the typical house. It's so technically challenging, you simply can't believe it until you try it. The margin for error is razor thin.

Stain & Finish Challenges

Even if you succeed at getting the new piece of hardwood flooring in, you now have to get the stain and finish to match the adjacent pieces. This is sometimes even harder to do than getting the wood strip into place! It's a true gift the talents a pro finisher has in matching the stain color and level of sheen on the floor finish. If you succeed at doing this yourself, you either have great skills or you should immediately go purchase a lottery ticket.

DIY Refinish Product

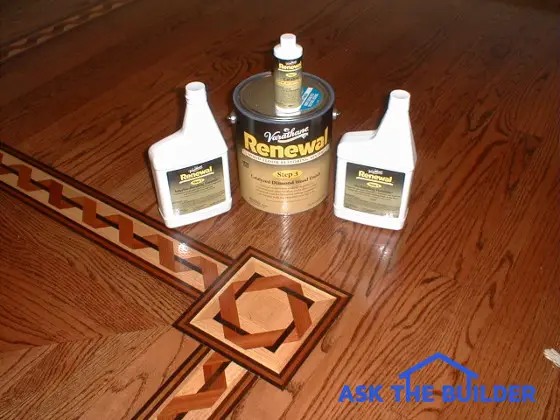
If you want to refinish the floor around the repair, here's a NO SANDING method. It's all liquid. Magic in a bottle.

floor refinishing system

This is the wonderful DIY floor refinishing system. It's not hard to do. Just be sure the floor is CLEAN first. Use Stain Solver to clean the floor. CLICK THE IMAGE TO BUY this refinish system.

CLICK HERE to get FREE & FAST BIDS from local hardwood floor installers who can do this repair.

Column 747

Hardwood Flooring Over Radiant Heated Concrete

Hardwood Over Radiant Heating TIPS

  • Wood is hygroscopic - be sure concrete slab is dry
  • Control humidity - allow hardwood to acclimate
  • Use high-performance vapor barrier under concrete - SEE BELOW
  • Narrow wood strips are best over radiant heat
  • CLICK HERE to Get Tim's FREE & FUNNY Newsletter!

DEAR TIM: I am designing a home that will have a monolithic concrete slab foundation. My radiant heating system will be an integral part of this slab.

Is it possible to install hardwood flooring over the concrete, or will I be forced to use ceramic tile? What needs to be done to make sure the wood floor will not develop cracks from the radiant heat?

Am I pushing the envelope by installing wood in this situation? Brian D., Albuquerque, NM

DEAR BRIAN: You are not pushing the envelope hard at all.

Plan Ahead

Hardwood flooring and concrete slabs can get along just fine if you make sure your builder follows some easy, but important, guidelines at various stages as your home is being built. Concrete slabs that contain radiant heating can limit the style of wood floors that you have to choose from, but all in all, I feel you can create a dazzling look in your new home by mixing a few wood species and being creative with the actual layout of the hardwood flooring.

CLICK HERE to get FREE & FAST BIDS from local hardwood floor installers who can put wood over radiant heating.

Many people love the look of hardwood floors but have concrete slabs. You can install hardwood over concrete if you follow certain guidelines. Image by: Hardwood Council

Many people love the look of hardwood floors but have concrete slabs. You can install hardwood over concrete if you follow certain guidelines. Image by: Hardwood Council

Wood Is Hygroscopic

Hardwood flooring and wood in general are hygroscopic materials. Liquid water and water vapor can enter wood which causes it to swell and change its shape and size. If and when the water leaves the wood, the wood can and does shrink, but not always to its original size and condition.

It may warp, develop small check cracks in the surface, twist, bow or even develop cups or dips within each piece of lumber. Cracks in between pieces of wood may open up as the wood dries. In other words, if you want a wood floor to look very good for many years, you need to keep the wood in a state of dynamic equilibrium with respect to the indoor humidity and temperature.

Control Humidity

Controlling indoor humidity and temperature is easier to do in some areas more than others. In my opinion, you happen to live in one of the most user-friendly parts of the nation for hardwood flooring.

The overall year-round humidity of the air in the Southwest is often very dry. Once wood acclimates to the dry air, it retains it shape and size very well. If, on the other hand, your new home was in the humid Midwest, the hardwood flooring might shrink and swell two or more times a year as humid summer air is replaced by dry winter air.

AC Helps

Air conditioning helps stabilize hardwood flooring by keeping the indoor humidity levels close to winter levels.

Concrete Must Be Dry

In your case, you need to make sure the concrete slab is fully cured and has released as much moisture to the atmosphere as possible before the flooring is installed. Ask the builder to keep as much air flowing through the house as possible during construction to aid in this drying process.

Simple Moisture Test

You can check moisture content of slabs by taping a piece of 15-inch square clear plastic to the slab. Tape all four edges with packing tape that is moisture resistant. Wait 24 hours and inspect the plastic. If it is clear with no visible fog or water droplets, the slab is dry enough to proceed.

CLICK HERE to get FREE & FAST BIDS from local hardwood floor installers who can put wood over radiant heating.

High-Quality Vapor Barrier

A high quality vapor retarder must be installed under the concrete slab and preferably over the concrete slab just before the flooring is installed. The vapor retarder should meet the fairly new ASTM standard E 1745. These vapor retarders are the best and offer the highest level of protection.

special vapor barrier

This is the special vapor barrier that meets the ASTM standard. CLICK THE IMAGE TO ORDER IT.

CLICK HERE to order this amazing vapor barrier now and it can be delivered to your home. The addition of the second layer over the top of the slab is an insurance policy against any rogue water vapor that tries to exit the slab at a later date.

Use Narrow Pieces

The radiant heat that emits through the slab can wreak havoc on hardwood flooring pieces that are greater than 2.25 inches wide. Some installers will say it is safe to install widths up to 3 inches, but smaller widths will have less overall movement in response to the radiant heating.

Try to stay with wood widths as close to 2.25 inches if at all possible. The heating system needs to be turned on for several weeks before the wood is installed. The actual hardwood must be stored in the house where it can acclimate for seven to 10 days for the best overall results.

Stable Hardwood Species

Use wood species that offer the greatest stability. White and Red Oak, Teak, American Walnut, Mesquite and American Cherry are excellent choices. Adding an accent border of walnut or cherry in an oak floor is gorgeous. If you are lucky enough to find a creative hardwood installer, he will show you many options.

Coordinate Subcontractors

Be sure your builder coordinates a meeting between the radiant heating contractor and the hardwood flooring installer before the slab is poured. These two sub-contractors need to tell each other what they need to make each of their systems work flawlessly for years. All too often these meetings happen after a hardwood flooring nail is pulled from a leaking radiant heating tube.

Use Seasoned Pros

Installing hardwood flooring over concrete is more difficult than installing it over a wood flooring system. Smart homeowners and builders only work with flooring installers who can demonstrate that they know how to do it.

DIY Floor Refinish Product

Here's a great product to do hardwood refinishing with NO SANDING. All liquid method. Magic!

DIY floor refinishing system

This is the wonderful DIY floor refinishing system. It's not hard to do. Just be sure the floor is CLEAN first. Use Stain Solver to clean the floor. CLICK THE IMAGE TO BUY this refinish system.

CLICK HERE to get FREE & FAST BIDS from local hardwood floor installers who can put wood over radiant heating.

Column 482

Replacing Single Pieces of Warped Hardwood Floor

Replace Warped Hardwood Floor TIPS

  • Hardwood floor board can be replaced
  • Extremely hard job - no room for mistakes
  • Professional is best equipped to do this job
  • Furniture repairman can fix other defects without removal of wood
  • CLICK HERE to Get Tim's FREE & FUNNY Newsletter!

Tom P. who lives down south, who has the patience of Job, emailed me just before Christmas, 2013:

"I have something I need to fix.  We bought our house 2 1/2 yrs ago and it was built in 2005.  Our entry way and dining area have hardwood floors, suspended of course because we live in North Mississippi and the houses are built on slabs.

I have one board, in the middle of the floor by the front door that is, well, warping and raising.  All of the boards all the way around it are fine.  My first thought was moisture, but all the boards around it look fine and there are some surface areas where II can poke my finger into some small holes.  I think it is just a bad board and needs to be changed."

CLICK HERE to get FREE & FAST BIDS from local hardwood floor repair companies.

Here's a photo of the problem:

Replace Warped Hardwood Floor

It's tough to see the warping, so we need to believe it's there. Photo credit: Tom P.

AsktheBuilder Podcast

CLICK this image and listen to the first call on the podcast. I talked to Jill about how to repair wood kitchen flooring, and possibly installing an inlay border as an option. Copyright 2018 Tim Carter

Here's my answer to Tom:

Tom, it's absolutely possible to take out an interlocked piece of tongue and groove hardwood flooring. With respect to making such a repair completely invisible once done, I'd say this job's degree of difficulty is about 9.8 on a scale of 1 to 10.

Professional Required

In other words, you're deep in professional territory, and not just any professional, a true hardwood floor craftsman who has years and years of experience doing such repair work.

Cut Out Center Carefully

Cutting out the bad piece of flooring requires you to cut away the center core of the damaged piece of flooring without harming any of the adjacent pieces of flooring. This is very tough to do and requires great lighting, sharp tools and deft hand-eye coordination.

With the center of the wood out of the way, you can then start to get out the long pieces, one of which will be nailed to the subfloor. In your case I imagine they have wood sleepers on top of your concrete slab.

CLICK HERE to get FREE & FAST BIDS from local hardwood floor repair companies.

Exact Fit - No Room For Error

Once the bad piece is out, then you have to install a new piece that's the exact size of the old one in width, length and height. Remember, your existing floor was sanded and the new piece you install must be the same height. Good luck with that. You can't sand it in place or you'll ruin the adjacent pieces.

Cut Off Bottom Groove

To install the new piece, you need to cut off the bottom of the groove along the two grooved edges. You also need to cut off the small tongue on the narrow edge.

Once installed, you need to secure the piece of wood. You can glue it to the subfloor or glue and face nail it with small finish nails.

Are you discouraged yet?

Stain & Finish Challenges

If you successfully have it installed, now you have to match the stain color and clear finish.

This will really test your skills.

DIY Floor Refinish Kit - No Sanding

Use this kit to refinish the floor around the repair area. No doubt you probably screwed it up. No sanding required!!

DIY floor refinishing system

This is the wonderful DIY floor refinishing system. It's not hard to do. Just be sure the floor is CLEAN first. Use Stain Solver to clean the floor. CLICK THE IMAGE TO BUY this refinish system.

Bottom Line: The warped piece will probably look ten times better than any repair you initiate yourself. My guess is you're the only one who knows the defect is there. Any visitors would probably think the wood appearance is normal.

I'd leave it alone if it were me.

CLICK HERE to get FREE & FAST BIDS from local hardwood floor repair companies.

Restoring Hardwood Floors With No Dust

Restoring Hardwood Floors

These simple liquids may save you time and money when restoring hardwood floors. They also extend the useful life of the wood floor. ©2017 Tim Carter

Restoring Hardwood Floors TIPS

  • Two methods - traditional screening or multi-step DIY liquids
  • Refinish before you wear through clear finishes to bare wood
  • Deep gouges need a professional sander
  • Change color of floor adding pigments to finish
  • CLICK HERE to Get Tim's FREE & FUNNY Newsletter!

DEAR TIM: I have a significant amount of gorgeous hardwood flooring in a home I just purchased. Some of it is in perfect condition and other places that receive heavy foot traffic have some minor scratches and the finish is dull.

How can I make the floors look like new? Do they have to be sanded and refinished? Is there an easier way? I dread the thought of clouds of dust rolling through my home. Cathy F., Fort Worth, TX

DEAR CATHY: I absolutely understand why you want to restore the hardwood flooring.

Wood Is The Best

Wood flooring is one of my personal favorites. It is warm, durable, appealing to the eye and it adds value to your home. What's more, it is a very environmentally friendly building material. The hardwood tree forests are abundant and growing, and we actually have more trees today in North America than we did just 25 years ago!

AsktheBuilder Podcast

CLICK HERE to get FREE & FAST BIDS from local hardwood floor refinishing companies.

Not Walking On Wood

When a hardwood floor is sanded and coated with layers of protective urethane or varnish, it can withstand a considerable amount of abuse. You actually walk on the clear finish, not the wood.

Dust & Grit = Bad

Dust and small dirt and grit particles are a floor finishes' worst enemy. As you walk across a hardwood floor that is slightly dirty your feet act as sanding pads. If the grit particles are large enough, you will actually scratch the finish.

Over time, normal foot traffic can and will erode the layers of clear finish exposing bare wood. This is to be avoided at all costs if possible.

DIY Restoration Possible

The good news is that you can restore the hardwood floor. The even better news is that dust can be kept to a minimum and possibly eliminated completely.

Because the clear finish on your floors has yet to wear through to the wood, you have two choices. The traditional method used for many years by professional hardwood floor refinishers is screening. You can also choose a no-sand method using simple DIY liquids.

DIY floor refinishing system

This is the wonderful DIY floor refinishing system. It's not hard to do. Just be sure the floor is CLEAN first. Use Stain Solver to clean the floor. CLICK THE IMAGE TO BUY this refinish system.

Low-Speed Buffer

A low speed buffing machine, equipped with a special pad, lightly scuffs the clear coat. The scuffing removes minor imperfections and prepares the floor so the new coat of urethane will adhere.

Once the floor is scuffed, the small amount of dust is vacuumed and any remaining dust is removed with a rag soaked in mineral spirits. The professional then applies a new coat of urethane with a lamb's wool pad or squeegee and you can walk on the floor the next day. After three to seven days, the new finish will have cured so that it can accept heavy traffic.

CLICK HERE to get FREE & FAST BIDS from local hardwood floor refinishing companies.

Special DIY Products Fast 

The floor restoration industry has introduced some wonderful new products that allow a professional or a do-it-yourselfer to renew a hardwood floor finish without creating any dust. A three-part system allows you to use a liquid to chemically sand the existing finish. Once this step is complete you then apply a bonding formulation followed by an environmentally friendly water-based clear coat that can be walked on in just eight hours. An average size room that contains a little over 200 square feet of floor area can be completely restored using this dust-free method in less than three hours.

Here's the liquid system I'm talking about just below.

DIY floor refinishing system

This is the wonderful DIY floor refinishing system. It's not hard to do. Just be sure the floor is CLEAN first. Use Stain Solver to clean the floor. CLICK THE IMAGE TO BUY this refinish system.


Restoration too tough? Install a new hardwood floor using my Hardwood Flooring Installation / Refinishing Checklist and avoid costly mistakes. I offer a 100% Money Back Guarantee.


Hire A Pro

If you have a professional come into your home to do a traditional screening or use the no-dust chemical method, expect to pay hundreds of dollars for an average-sized room. The cost can be higher or lower depending upon the size of the room or rooms to be restored.

DIY Possible With Practice

If you are inclined to try the job yourself, you can find the chemical system at some home centers or hardwood floor stores. With practice a semi-skilled homeowner can achieve nearly professional results. The biggest challenge is learning how to apply the final clear coat. Often the rookie will apply this too thinly.

Magic Color Trick 

If you want to change the color tone of your floors it is sometimes possible without refinishing the floor. A light floor can be made slightly darker by adding color pigments to the clear urethane. Oil based urethane accepts nearly all pigments.

If you use water-based urethane, be sure that the pigments are compatible. If you decide to colorize the urethane keep in mind that a second coat with no pigment needs to be applied over the color coat. This extra step gives added protection to the wood and it is well worth it if you want to change the look of your gorgeous wood floors.

CLICK HERE to get FREE & FAST BIDS from local hardwood floor re-finishing companies.

An important reminder was given in the September 16, 2009 newsletter. Be sure to check it out.

Column 334

Cork Flooring Video

CLICK HERE to get FREE & FAST BIDS from local contractors who can install cork flooring in your home.

Glue-Down Cork

When installing a glue-down cork floor, you must first seal the surface. The liquid sealer is good on either concrete or wood.

Paint it on with a paint brush or a roller. In about 45 minutes, it will be ready to use.

Apply the glue next. Some are light blue in color, but dry clear. Once the glue has dried, it is time to lay the cork flooring squares.

The glue works just like contact cement.

Different Patterns And Thicknesses

The cork flooring comes in a variety of patterns and sizes. It is easy to cut using a standard razor knife. Once the flooring is down, you can coat it with a urethane wood finish.

Three Coats Of Urethane

A clear, water based urethane will dry in as little as an hour. So you can apply multiple coats in a single day.

Cork flooring is durable, easy to maintain and if the urethane coating wears, just put another coat on. This flooring is easy to clean and hides dirt well.

Best Urethane

Use water-based urethane like this one so the color doesn't yellow.

Polyurethane Paint

SECRET TIP is to coat the drywall BEFORE finishing with this amazing urethane product. It WILL STOP water from penetrating into the paper of the drywall. CLICK IMAGE TO ORDER IT NOW.

CLICK HERE to get FREE & FAST BIDS from local contractors who can install cork flooring in your home.

Porch Steps Rise Run

Porch Steps Rise Run

These steps are unsafe because of the sloped added concrete at the bottom. They should be torn out and rebuilt. (C) Copyright 2017 Tim Carter

Porch Steps Rise Run TIPS

DEAR TIM: I asked a contractor to build a set of porch steps using name-brand materials. He made a mess of it and when you step off the last step you trip on a sloped piece of concrete he added.

I know you can’t tell me how to build steps in a short column, but what can you tell me about the rise and run of porch steps? I know you’re a master carpenter and how do you create steps so they are easy to go up and down with no tripping hazard?

What other tricks can you share to make safe steps? Wanda SG., Bremerton, WA

DEAR WANDA: Oh my, your photograph makes me cringe!

Bad Carpenter Ruins Expensive Material

I’ve seen quite a few botched jobs in my time, but yours may be in the top ten. I can see at least six mistakes the carpenter made. I hope you didn’t pay him for this work. The sad thing is how he butchered the high-priced materials not to mention the unacceptable serious trip hazard.

Step-By-Step = Book

You’re correct in recognizing that I can’t give you a step-by-step set of how-to instructions about how to build steps like this. To do a great job of that, it would turn into a small book.

CLICK HERE to get FREE & FAST BIDS from local contractors who specialize in building stairs and railings.

Rise & Run Relationship

Let’s talk about the rise and run for steps. Steps are very interesting things. As crazy as this sounds, you can build safe steps that don’t come close to satisfying the requirements set forth in modern building codes for residential stairs.

I was lucky enough to be a guest for two days aboard the USS George Washington CVN-73 as she carved a crescent-shaped course off the North Carolina coast a few years ago. New fighter pilots were in the process of getting qualified landing on her deck. CLICK HERE to read my aircraft carrier story.

While touring this grand ship, I went up and down countless sets of steep steps the thousands of sailors use twenty-four hours a day. Believe me, these help keep the crew in great physical shape. The reason these steps are safe to use is a combination of the proper dual handrails and the critical relationship of the narrow treads to the taller risers.

Long Tread = Stubby Riser

You can find the exact opposite of this if you visit the Hearst Castle on the central California coast. While there last December with my daughter, it was fascinating to see how Julia Morgan knew about the special relationship of rise and run with outdoor terrace steps.

To make those safe, all one does is make the treads very wide and the risers not so tall. It’s all about creating a safe gait while lifting your foot to get to each tread.

stair rise and run

These outdoor steps make a bold statement with small pieces of trim tile. ©2017 Tim Carter

Old Code Had Better Standard

When it comes to steps you and I use each day, architects and builders discovered long ago a magical relationship between the rise and run of steps. This used to be in the building code years ago, but for some odd reason it was removed from the modern building code builders now use.

Years ago, the building code allowed a stair builder to build any set of steps he wanted. The only requirement was the sum of two risers and one tread had to be no less than 24 inches and no greater than 26 inches. Any total in between those two numbers was also acceptable.

7.5-Inch Riser & 10-Inch Tread = Magic

If you’re curious you might wonder how these two numbers were selected. If you could ask long-dead architects and builders about the safest steps they ever built, I feel a majority would say the risers should be 7 and one-half inches and the treads 10 inches.

Do the math and you’ll discover this combination adds up to 25 inches, exactly halfway in between the allowed range as prescribed by the past code. Whenever I had a chance to control what the rise and run would be for a set of steps, they would always be 7.5-inch risers and 10-inch treads.

CLICK HERE to get FREE & FAST BIDS from local contractors who specialize in building stairs and railings.

7.5-Inch Multiples Is The Answer

In your case, all your builder had to do was make sure the vertical distance between the top of your porch and the landing under the last step was some multiple of 7.5 inches. If this means he has to modify your landing at the bottom, so be it. In your case he tried to make the modification in a short distance creating a small ramp that’s extremely dangerous.

Anchored Cleat

One of the biggest mistakes an inexperienced carpenter can make is not securing the set of steps to prevent them from sliding away from the porch. The combined weight of a set of wood steps is substantial. Often they can weigh many hundreds of pounds. Gravity is tugging at them and they want to slide out across the bottom landing. If this happens and you’re going up or down the steps, injury or death is a given.

steps concrete landing pad

The treated lumber 2x4 bolted to the massive concrete landing pad prevents the stairs from sliding forward once you notch the base of the stringer like I did. Copyright 2017 Tim Carter ALL RIGHTS RESERVED

When I build a new set of steps, I make sure a flat piece of treated lumber is bolted to the masonry landing. I then notch the wood stair stringers so they lock into this flat horizontal piece of lumber. When the steps are complete, you can’t see this flat piece of lumber as it sits under the first tread above the masonry landing.

For the stairs to slide, they’d have to rip the anchor bolts out of the masonry landing and shear off the piece of lumber. The odds of that happening are about the same as me winning the Powerball lottery.

Through Bolts For Railings

It’s very important to through bolt railing posts to the stair stringers. Never use lag bolts as these can be overtightened stripping the wood resulting in a weak connection. The height of the railing above the tips of the stair treads is very important.

Here's the cleat before a stringer is notched. The metal Simpson Strong-Tie post bases are also bolted to the thick concrete landing. The bottom railing posts will the through-bolted through the two holes in the post base. Copyright 2017 Tim Carter ALL RIGHTS RESERVED

Refer to the current building code to see what the height should be. You can get this information in minutes by calling your local building department on the phone.

CLICK HERE to get FREE & FAST BIDS from local contractors who specialize in building stairs and railings.

Column 1189

March 26, 2017 AsktheBuilder Newsletter

It's a gorgeous sunny Sunday morning here in central New Hampshire. It's also very frosty.

I've still got piles of snow around my driveway that are 8 feet tall. The average height down around the parking apron is about 4 feet.

But warmer WX is on the way.

Snow-Be-Gone Contest

I've decided to have another fun contest where you guess when the snow will be gone from my land.

My Davinci Roofscapes synthetic slate roof has a number of positive qualities. One of them is it requires NO roof raking. The snow slides right off.

CLICK HERE to see a video of this amazing roof.

On my side yard lots of it funnels to one spot and a month ago it was 8 feet tall and climbing. Had it snowed a lot during January I know it would have been 13 feet tall.

This side of my house faces north and the pile of snow in the photo you're about to see is always in the shade. Here's a shot from a spy satellite showing you where the pile is. The red arrow is pointing at the exact spot.

See how all the snow from the three roofs is concentrated to this spot?

Your job is to look at the weather almanac and historical data and try to guess when all the snow at that spot will be gone.

I live in Meredith, New Hampshire, if you're going to study the past WX data.

If it all melts and then it snows AGAIN, the date it all melted is what counts. Remember, we can still get snow through April here.

The WINNER of the contest gets a 4.5-pound container of Stain Solver which happens to be ON SALE right now - more on that below.

If more than one person selects the right day, I'll use a random number generator to determine the winner.

CLICK HERE to see a photo of the pile of snow and to GUESS WHEN the snow will be gone. It's just over 5 feet tall at this point.

I'll provide weekly update photos for you.

Good luck and there's a funny TRICK question that's part of the game. You don't have to answer the trick question.

Brad's CLOGGED Kitchen Sink

I just got a text as I was typing all the stuff about the snow contest.

It was from a neighbor named Brad. He was frantic.

He sold his house and tomorrow morning is the house inspection! The issue is his kitchen sink decided yesterday was the day to get clogged. He's been snaking it for hours with no luck.

I've been a master plumber since before I was 30 years old, and knew exactly what was causing the clog:

Grease

Kitchen sink drain lines are notorious for getting slowly choked off with grease.

Have you ever noticed how your kitchen sink starts to drain slower and slower? Sometimes it happens so slow you don't realize it's draining slow.

When drain lines are wide open and you fill your sink to the top with water to TEST IT (hint: you do this once every three months, don't you?????), water leaving a sink usually goes very fast and finishes with a slurp sound.

If you haven't heard the slurp in months, your drain line is coated with grease.

Once clogged, chlorine bleach - or my Stain Solver - will almost always do a fantastic job of breaking open the clog. But it can take hours.

I told Brad to put the trap back on and then pour as much bleach as he could into the sink until the bleach reached the bottom of the sink basket strainer. You don't ever want chlorine bleach to sit on stainless steel. I assumed he had a stainless-steel sink.

This amount of liquid creates a hydrostatic head of bleach in the clogged drain line. The weight of the liquid helps force it down any small passageways in the grease eating it up as it goes.

Brad didn't have any Stain Solver - SHAME ON HIM - and so he had to use chlorine bleach.

If he had Stain Solver, I would have told him to pour a half-cup of the powder down into the drain. Then I would have had him mix up one gallon of BOILING HOT water with a cup of Stain Solver.

You mix the powder with the boiling water to get it to dissolve. Then you carefully pour this into the sink. The hot water helps dissolve the other powder you poured in first and we all know that hot water helps melt grease.

In most cases, the drain will open up in a few hours. It's NOT A GUARANTEE, but this is a cheaper thing to TRY rather than calling in a drain-cleaning plumber at the tune of $200 or more.

Stain Solver Sale UPDATE

I told you on Friday about the Stain Solver Sale.

Are you a new subscriber? Kathy and I started Stain Solver back in 1996.

CLICK HERE to see what Stain Solver will clean.

It's a certified organic Oxygen Bleach. It's NON TOXIC, color and fabric-safe and simply full of goodness.

Remember the LIMITED QUANTITIES of the product I mentioned on Friday?

We've sold so much in the past 48 hours that two sizes are getting DANGEROUSLY LOW.

If you want to get the size you prefer, or a BIGGER SIZE so you won't run out, NOW IS THE TIME TO ORDER.

I mean NOW.

CLICK HERE TO ORDER.

You get a 10% discount and FREE SHIPPING to any place in the lower 48 states.

Use this promo code:

Spring1710

The sale will end in a few days so GO BUY NOW.

You enter the promo code on the LAST SCREEN of the checkout process, so don't freak out if you don't see the box right away.

After ordering the Stain Solver, go back up and play the Snow-Be-Gone Contest.

That's enough for a Sunday morning. If your kitchen drain is SLOW, take action now to keep it open. Pour 5 gallons of boiling water down the drain.

Manana.

Tim Carter
Founder - www.AsktheBuilder.com

Do It Right, Not Over!

Room Addition

Room Addition TIPS

DEAR TIM: I'm pregnant with my third child. My husband and I know we need more room. We're thinking about adding two rooms to our 1,100 square foot home but don't have a clue where to start the process.

We're afraid of getting ripped-off by contractors and have no clue how much this might cost. What should we do? Judith S., Boise, ID

DEAR JUDITH: Congratulations on your expanding family!

Make More Space

Doing the math, I agree that you are a prime candidate for a room addition project. I can sympathize with you as the house I grew up in was small. It had a total of 980 square feet that four of us shared. But I survived and must say that as a child I didn't feel cramped for space. If you have to put the project off for any reason, I don't think your kids will mind one bit.

Small But Complex
Room AdditionAlthough a room addition project may seem somewhat insignificant than building a new home, they are nearly identical in complexity. In many respects, building a room addition requires far greater skill.

CLICK HERE to get FREE & FAST BIDS from local room addition contractors.

Not only do you have to make sure the room addition matches the existing home that may be out of square and not level, but the workers must work around you and your family. This takes extra time and all sorts of extra work needs to happen to control dust and other disruptions

Bathrobes and Bad Hair

When building a new home, the workers don't have to deal with you wandering around in your bathrobe, fuzzy slippers and your bad hair each morning. It's hard for both you and the workers who are invading your space and privacy.

Creating A Budget

You must determine what you can afford. When interest rates are low you can borrow more money for a given monthly payment. It may make sense to refinance your entire home at this time and get a lower overall rate for both your current mortgage and the money you'll need for the room addition.

Visit with your banker, savings and loan or credit union and get prequalified. The banker will look at your existing finances and tell you how much you can borrow. This is a very important step.

I can't tell you how many past customers of mine went to all the trouble to get bids for their projects only to discover later they couldn't borrow the money.

Zoning Issues?

After you leave the bank, visit your local zoning office. Take with you several photos of your house taken from all angles. In addition, make a quick sketch showing your lot and where your house sits on your lot.

Use a tape measure to determine how far away the front, side and rear walls of your home are away from the respective property lines. With your photos and sketch, the local zoning officials should be able to tell you the maximum-sized room addition you can build within the current zoning laws.

Variances - Prove Hardship

If you need to build a larger addition, you can sometimes file an appeal with the zoning board. If you can prove practical difficulty or a significant hardship, you may be granted a variance.

I was a volunteer planning board and zoning commissioner in my own town for eight years. The law required us to only grant variances to homeowners after they proved a hardship. You need to craft your application in such a way as to show exactly what the hardship is.

An example of a hardship is having to move a garden shed closer to a property line so you don't have to cut down a giant tree that provides shade and value to the property. I had to get a variance myself for just this reason and it was a valid hardship.

Room Addition

This is my Queen Anne Victorian garden storage shed. You can see the giant tree I had to build it next to. If I had not received a variance, it would have meant no shed or cut down the huge tree! ©2017 Tim Carter

Talk With Top Realtors

A visit with several top real estate agents may be in order. Ask them if houses with room additions in your neighborhood are attractive to buyers. Ask what amenities within the room additions seem to appeal to the current buyers.

The real estate agent may be able to point you to homes in your area that have room additions. Driving by these places may stimulate ideas in your own mind. Most importantly, ask what things turn buyers off. The advice you receive may be very helpful years from now.

Create Basic Plan

Try to envision what space you really need. Draw a basic floor plan with actual dimensions. Use your existing room sizes to guide you. Soon you will know if you need 250 or 600 extra square feet.

Get FREE & FAST BIDS!

Once you have a simple plan, call several remodeling contractors. Many good ones have a feel for pricing.

CLICK HERE to get FREE & FAST BIDS from local room addition contractors.

In other words, they know that certain room additions cost so many dollars per square foot. It is not uncommon for a room addition to cost more per square foot than building a new home.

Cost Multiplier

The cost multiplier can be as much as 1.4 to 1.8 times the cost of building new. Get a minimum of three bids and compare prices. They'll be higher than you might be expecting in most cases. If the room addition has a new kitchen or bathroom, add even more money.

Complete Plans & Specifications

To get accurate bids from qualified contractors, be sure they fill out a detailed checklist. These forms ask pointed questions and force the bidding contractors to fill out a detailed cost breakdown. This cost breakdown allows you to see if each contractor has included all cost items.

CLICK HERE TO BUY MY CHECKLIST.

The Checklist also puts each contractor on a level playing field. Believe me, non-professional contractors run from these forms like vampires from sunlight. Be sure to use a Checklist!

CLICK HERE to get FREE & FAST BIDS from local room addition contractors.

Related Articles:  DIY Room Addition in 7 Weeks, Room Additions, Room Addition Task Timing

Column 436

A DIY Room Addition in 7+ Weeks?

DIY Room Addition

DIY Room Addition TIPS

DEAR TIM: I want to build a modest 25 x 20 foot single story room addition. It will contain a new family room with a half bath. After watching countless home improvement TV shows and reading many books, I am convinced I can tackle this project.

I have accumulated 7 weeks of vacation time. My wife thinks I am insane. Is it possible for me to get a good head start on this job and then finish it up over several weekends?

Is there something I missed while watching the shows and reading the books? Greg W., Hagerstown, MD

DEAR GREG: If you aren't already insane, you very likely will be at the end of your seven-week vacation period.

Cable TV Shows Are Fantasy

Based upon the TV home improvement shows I've watched, I feel many of the problems, difficulties, nightmares, and hard work of projects end up on the floor in the editing room. I can't tell you how many times at lunch my subcontractors and I would howl with laughter as we discussed what we saw on different shows.

CLICK HERE to get FREE & FAST BIDS from local room-addition contractors.

Books can also be deceiving. Just because you read the best medical text books, do you think you can operate successfully on yourself?

Many Small Tasks Add Up

The average room addition project can be broken down to no less than forty major tasks beginning with the initial foundation stakeout and ending with lawn restoration and landscaping. Some of these tasks can be completed in a day or two while others can last for several days or a week.

Pros Have The Tools

Residential contractors and sub contractors have a distinct advantage that you possibly do not possess. If I were to show up to help you, on any given day my truck would be stocked with nearly $15,000 worth of transits, levels, saws, masonry tools, drills, ladders, scaffolding, etc.

Many of these tools - such as my pneumatic nail guns and the compressor that powers them - are huge labor-saving devices. Renting tools like this can be expensive. Trips to and from the tool rental shop will eat into your valuable time.

Room Addition Framing Tips Videos

Watch a few of these videos. You need lots of this knowledge to have success.


More Than Two Hands

Extra helpers and laborers are a must. How many concrete foundation block do you think you will lay in a day if you have to constantly stop and mix mortar and restock the block?

Who will help you hold the addition walls plumb while you brace them? Setting roof trusses can be done by one person but three people make the job go five times faster.

Experienced Helpers

I used to tackle projects like yours with two experienced laborers. At the conclusion of the first week, we'd be right on schedule if the foundation was complete and backfilled.

Weather conditions must be perfect, concrete trucks and building inspectors must show up on time, and productivity must be high to achieve this goal. Depending upon the degree of difficulty in connecting the roof of the addition to the roof of the house, the three of us would complete the rough framing and roofing by the end of week two.

Marching Along Week After Week

Weeks three and four find multiple contractors and inspectors on site. Plumbers, HVAC mechanics, electricians, insulators are all working like well-oiled machines if the scheduling is perfect. If you do this work yourself and fail your inspections, you'll spend extra time and money redoing work already in place.

CLICK HERE to get FREE & FAST BIDS from local room-addition contractors.

Drywall Is Tough

Week five is generally reserved by the drywall contractor. Even a job as small as yours will consume five days to hang, tape, finish, and sand the drywall. You can possibly shave two days off this if you use rapid-setting-type joint compounds. Beware! - setting type joint compounds are not rookie friendly.

Weeks six and seven on my job would find myself and my crew, the tile setter, flooring people, and the painter all trying to work in unison to bring the job to a close. Invariably work would stretch into the eighth week.

Add Up The Days

Do the math. You'll quickly see that a typical room addition project can consume well over 1,000 hours of work when you add up all the workers' time cards. Even if you work at peak productivity for 60 hours a week, you'll fall short by nearly 800 hours! Go give your wife a hug and get that wild look out of your eyes!

Work Alone?

Okay, okay. I know, some of you still want to try to do the room addition yourself. Here is a great book that may help you! Working Alone is a unique book packed with more than 50 innovative tips and techniques.

workalone

In this book, you'll learn how to handle nearly every aspect of home construction alone, from foundation layout to raising walls to building decks. You won't have to wait for a helper or pass up a job that seems too difficult to do alone. ORDER this book NOW, it is a must have!

CLICK HERE to get FREE & FAST BIDS from local room-addition contractors.

Related Articles:  Room Additions, Room Addition Task Timing, Room Addition

This was the Mystery Link in the November 24, 2015 AsktheBuilder Newsletter.

Column 220

Spring Exterior Home Maintenance

Home Maintenance - problem areas

This house may look like it’s ready for another year, but there could be some problem areas. (C) Copyright 2017 Tim Carter

Spring Exterior Home Maintenance TIPS

DEAR TIM: I’ve live in a quaint Cape Cod-style home and try to keep it in great shape. I’ve seen lots of checklists for spring exterior home maintenance and most just have the same old advice.

I thought you might have some extra things to look at that others overlook. Imagine I were to hire you to do an exhaustive walk-around of my house after Old Man Winter had gone back north.

What are the small things you’d be looking for that could cause massive headaches down the road? John J., Decatur, GA

DEAR JOHN: I’ve seen those standardized spring checklists over the years and sort of chuckle at many of them.

Great Intentions

I realize the authors have good intentions, but I often wonder if they’ve ever done any hands-on repair work for paying customers. If they had, then they’d probably add a few other items to their lists.

CLICK HERE to get FREE & FAST BIDS from local roofers who can look at your chimney and roof safely.

Ho-Hum Normal Items

Here’s the normal things I see on the checklists. Often they lack detail as to what to really look for. For that reason, I feel the lists are of not much value. You’ll see things like: check the roof for shingle damage, caulk cracks around windows and doors, repair chipped paint, check windows and doors, check chimneys, etc.

Water and UV Biggest Dangers

Water and ultraviolet (UV) light are the two big things that cause problems to homes, so I suggest we focus on these.

I suggest we start at the top and work our way to the bottom.

Chimney Inspection

Chimneys are very important. If you can’t safely get on your roof to inspect it, hire a chimney sweep. The most important thing to look at is the chimney crown or cap. It’s the roof of your chimney.

Most of the ones I’ve seen have been installed incorrectly and they crack. You don’t want water getting into a crack in the crown. There are special mastics made that can coat the crown and they perform quite well.

Check for missing mortar and replace as necessary using hydrated lime and volcanic ash with sand for the strongest and longest-lasting mortar.

Inspect Roof Flashings

Look at your roofing materials and pay close attention to the flashings. The most common flashings are step flashings and plumbing vent-pipe flashings. The step flashings are interlaced into the shingles and are up against chimneys and where roofs but up against taller walls of the house.

Look at this photo of a BAD SET of step flashings on a chimney I saw in NH. They just barely work, but far too much of the flashing is exposed than needs be. Each successive row of shingles is supposed to sit on top of the step flashing that in on top of the shingle below it.

Here it's quite possible the idiot roofer just butt the shingles into the chimney and then put in the step flashings on top of them. It's hard to know without getting up on the roof and peeking up under the step flashing to see what he did.

Normally you'd never see the flashings. That's why I took this photo because you can see them here!

Home Maintenance chimney flashing

The step flashing overlap one another and are to be laced into the shingles. The idiot roofer here didn't install them at the right angle. Rain, especially wind-driven rain, can blow under the upper left corner of each piece you see. Copyright 2017 Tim Carter

Look for excessive shingle granule loss in small patches, cracks in shingles and any slight curling at the shingle tips. Replace these damaged shingles as necessary.

CLICK HERE to get FREE & FAST BIDS from local roofers who can look at your chimney and roof safely.

Plumbing Vent Pipe

One common trouble spot are the cheap aluminum and rubber flashings around plumbing vent pipes. The black rubber boot tends to crack over time where it touches the vent pipe allowing water to leak into your home. The best plumbing vent flashings I’ve seen are the ones that have a special siliconized-rubber compound that stands up against the harsh UV light from the sun.

Best Plumbing Vent Pipe Flashing Video

Watch this video to see the only flashing I'd use on my plumbing vent pipes. CLICK HERE to order this flashing now. You'll need to know the diameter of your vent pipe. Normally it's 3 inches, but it could be 4.

Downspouts and Gutters

If your home has gutters and downspouts, be sure they’re clean. Spring is the worst time of year for gutters as the flowers from deciduous trees and the winter buildup of bark, twigs and other debris can choke gutters with an organic smorgasbord. After the gutters are clean, do a water test with a garden hose.

Test to see if there are any leaks in the system. There are special caulks meant to seal the seams in aluminum gutters and they’re available online.

Pipe Roof Water AWAY From House

Be sure the water from downspouts is piped to the lowest part of your yard or connected to approved storm drains in urban areas. Water dumping out on the ground next to your foundation on splash blocks is a very bad thing as the water just enters the soil next to your home.

If you have a basement or crawlspace, this water will almost always cause nightmares.

Don't Caulk Vinyl Siding!

Don’t just go around caulking cracks around windows and doors willy nilly. Your home may have vinyl siding and the j-channel around doors and windows shouldn’t be caulked. It needs to expand and contract.

Inspect Decks Closely

Decks are big problem spots. Many people ignore their decks. You need to inspect the railings closely to ensure they’re sturdy and will not fail if lots of outward pressure is applied.

Get under the deck and look at all the galvanized metal connectors. Look for corrosion. If the corrosion is severe with lots of rust, you may have to replace a connector.

Copper and Zinc Don't Play Well

Look at the fasteners used to install the metal connectors. Are they corroded or have they pulled out? Each time water enters a crack in treated wood, it has the tendency to make the crack bigger because the water gets deeper into the wood causing it to swell.

Important structural nails can pull out. Consider replacing all nails with special exterior screws meant for the newer treated lumber that contains lots of copper.

Proper Soil Slope

I’d take a good look at the soil around your home. Be sure you have excellent positive drainage. You want the soil to slope away from your foundation.

It’s best to have at least 6 inches of foundation exposed above the soil line. Don’t add mulch to garden beds creating a moat around your foundation. Don’t allow water to be trapped between the foundation and the mulch.

grade level drawing

I made this drawing. You can see the foundation wall with a typical sill plate and floor joist. The red line is the lot before the excavator shows up. The top of the foundation should end up 18 inches ABOVE the red line. Use the dirt from the hole to create the slope away from the foundation. (C) Copyright 2017 Tim Carter ALL RIGHTS RESERVED

Concrete and Blacktop Repairs

Look for damage to any concrete or blacktop pavement, sidewalks and patios. Cracks in concrete can be repaired with special epoxies that are applied with a common caulk gun you probably own. You can use this same epoxy to repair cracks in blacktop disguising the compound with small rocks and sand you press into the fresh epoxy.

CLICK HERE to watch a video and SEE THE EXACT Epoxy I'm talking about.

If the surface of concrete has flaked off, you can make up a stucco mix with Portland cement and sand to repair it. To get a fantastic bond, be sure to paint the old concrete with cement paint before applying the stucco. Cement paint is made by mixing Portland cement with fresh water. It’s a secret trick taught to me years ago by an old mason.

CLICK HERE to get FREE & FAST BIDS from local roofers who can look at your chimney and roof safely.

Column 1188