Long Lasting Concrete Patch

salt damage to concrete

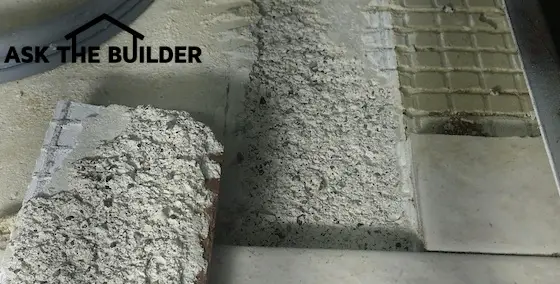
Concrete like this can be patched. It's easy to transform the rough surface to smooth. Copyright 2018 Tim Carter

Long Lasting Concrete Patch TIPS

Permanent concrete repairs are possible, well, nearly permanent. It's possible to expect a 20 - 30 year life expectancy from a properly executed repair. That isn't so bad if you ask me.

The trick to a long-lasting concrete repair lies in bonding the new material to the old material. Many people think that the new patching material will magically stick to the old concrete.

You need to understand the process of bonding.

CLICK HERE to get FREE & FAST BIDS from local concrete repair contractors.

The Magic Crystals

The concrete that makes up your steps, driveway, sidewalk, etc. is usually comprised of four basic ingredients: water, sand, gravel, and Portland cement. The cement is the glue that holds the sand and gravel together.

It does this my reacting chemically with the water that you add to the mixture.

Hydration

As soon as you add water to cement powder, a chemical reaction begins to happen. It's called hydration. Very tiny crystals begin to form. These crystals interlock with one another and lock into and onto any irregularities of the sand and gravel particles.

This chemical reaction is what's responsible for transforming the plastic mixture of concrete that resembles thick applesauce to solid rock hours later.

The more crystals that form, the stronger the bond will be. This means you don't want to add the minimum amount of Portland cement to your concrete that you're mixing for your repair.

Concrete Glue

Have you ever seen those home repair shows on TV? Some show the fairy-tale couple who mix a concrete batch up and pour it into a hole.

If we could go back and do an autopsy of the patch, we'd probably see lots of stones from the new mix that are touching the old concrete. A piece of stone aggregate is not going to bond to the old concrete.

It's very important to have a uniform amount of cement paste coating the old concrete. This is the primary reason for most concrete patch failures.

Secret Cement Paint

The old method of securing a patch involves simply mixing up a cement paint. I was lucky enough to be taught this trade secret by an old concrete mason when I was a young man.

Nothing could be simpler. You take Portland cement, add water until you have a paint consistency.

In the first three minutes of this video I show you how to mix up a batch of cement paint:

This cement paint is then brushed onto the old concrete surfaces where the new concrete material will touch it.

Great Concrete Patch Mix Video

Watch this video to see what the concrete mix should look like right before you pour it or use it as a patching material. I was mixing it to use to make large in-ground piers for a large shed. 

It doesn't matter. I would have mixed it the SAME if I was doing a small repair.

Clean, Dust-Free and Damp

The area to be patched must be free of all loose stones and grit, free of all dust, and finally slightly damp.

Just before you're ready to install the concrete patching compound, you simply paint a thin coat of the cement paint onto the clean, solid, damp old concrete.

Immediately cover the cement paint with the patching compound. Never allow the cement paint to dry. It can dry rapidly if you're working in the sun on a hot day.

CLICK HERE to get FREE & FAST BIDS from local concrete repair contractors.

Bonding Agents

If you chose not to use cement paint, you can use many of the acrylic bonding agents that are available. These chemicals are not much different than the resins used in paints.

UGL bonding agent concrete

Here's a great bonding agent for concrete. It's affordable and works well. CLICK THE IMAGE NOW TO ORDER IT.

There are bonding agents that you add to the patching compound, and there are bonding agents that you paint onto the old concrete. You can actually use both, if you wish. These compounds work very well if you follow instructions to the letter.

Some of the bonding agents you paint on the old concrete must cure slightly before you add the patching compound. They are usually a milky white color when you paint them on.

Depending upon the temperature, wind, and humidity, they then become clear. When the agent turns clear you can then add the patching compound.
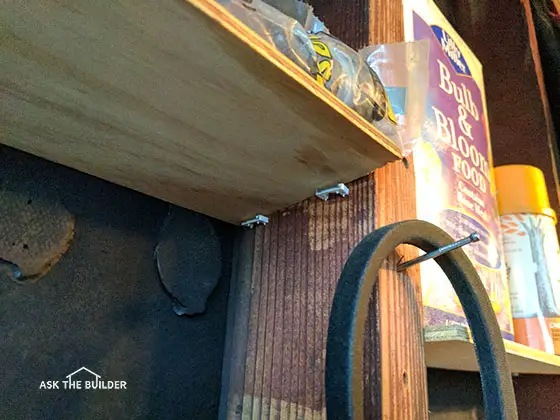
Pin the Patch

Large concrete patches such as a step, corner of a driveway, sidewalk, or patio must be attached to the old concrete with a mechanical pin. The cement glue or additives will not do the job on their own.

I've successfully employed standard reinforcing steel bars for years. They're inexpensive, easily obtainable, and the new concrete readily grabs onto the bumps and knobs on the reinforcing steel.

The rough profile of the bar also is an advantage when you drive it into the old concrete. As long as you drill the right sized hole for the rod it is virtually impossible to remove the rod. In fact, as you drive the rod into the old concrete it will feel tighter than when you drive a nail into wood.

Smaller galvanized nails can be used for pins as well for small repairs. Just size the pin for the amount of concrete you're installing. You want at least an inch of concrete to surround a pin.

Concrete Pins VIDEO

Watch this video below please to see what I'm talking about with respect to pins to hold one concrete patch to another.

This video is number five of a seven-part series about putting in a trench drain. In the video I wanted to show a homeowner how to deal with a situation where they ran out of concrete and how to hold the old to the new.

In this particular case, there was no need for the cement paint because the second layer of concrete I was adding was going around the entire drain.

Pay attention in the video how the pins are at opposing angles so they act like anchors once the new concrete hardens around them.

Installing the Pins

I've had the best luck in my repair work when I used 1/2 inch reinforcing steel driven into a 1/2 inch hole. Hammer drills quickly drill holes into old concrete.

If you don't own one, they can be rented at any tool rental shop. You can buy one if you plan to do lots of work. It will pay for itself.

Bosch Cordless Drill

I own this hammer drill and it's a top performer. The lithium-ion batteries provide all sorts of power. CLICK THE IMAGE to BUY IT NOW.

I prefer to drill at least a 3-4 inch-deep hole when possible. Try to stay away from the edges of the old concrete.

You want to drill directly into the center of the old concrete. Use a four-pound, or heavier, hammer to drive the steel pin.

The length of the pin should be predetermined. In other words, don't cut off the steel after it has been driven into the old concrete. Always try to maintain a 1 inch or better coverage of patching material over the pin.

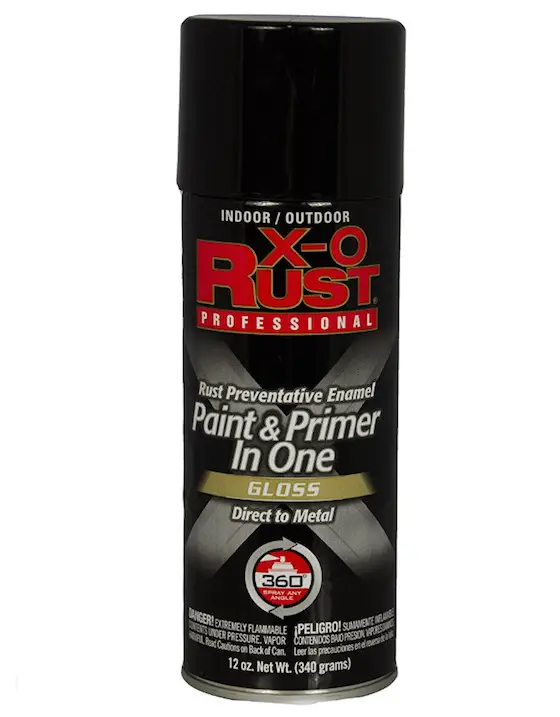
If you have the time, I would also recommend that you paint the pin with a good metal primer. Rebars can and will rust within your concrete patch. If it gets bad enough, the rusting pin will expand and actually crack the patch! The extra time spent painting the steel pins is worth it.

X-0 Rust Paint

Here's an exceptional paint to use to paint steel rebar. It already has a primer in it so you can use it on bare steel.

It comes in spray cans, quarts or gallons depending on how much you need. CLICK HERE to get X-0 Rust paint.

X-O Rust Paint and Primer spray can

Here's a spray paint that's great for steel beams and columns. It contains a metal primer. This brand also is available in quart or gallon cans if you have LOTS of steel to paint. CLICK THE IMAGE TO ORDER IT NOW.

Concrete Repairs in General

Loose paving bricks, flagstone, marble, sandstone, etc. can be successfully repaired. Keep in mind the earlier points concerning concrete paint, dust, and a rich patching compound.

CLICK HERE to get FREE & FAST BIDS from local concrete repair contractors.

Best Repair Weather

Weather is also important. How many people think that hot or warm, dry, breezy weather is the best time to repair concrete? Raise your hands now.

This is the worst time to do these repairs! Hot sun and wind take the water out of concrete too fast. Water needs to be retained by the concrete for weeks so the magic crystals grow and grow.

Temperatures around 60 F with overcast skies and no rain forecast are the best conditions to do any concrete work.

Hydration Water

Remember earlier, when I said the cement needs water to start the chemical reaction that starts the crystals growing? The cement also needs water to maintain the chemical reaction.

How long? Well, let's say for 2 - 3 months or so. In actuality, it's really longer.

If you mix up a patching compound batch, install it in hot breezy weather, the water may leave the mix before enough crystal have grown. The patch will be very weak. It will crumble.

Has happened to you? Now you know why.

Dampen the Old Concrete

Take the time to dampen the area to be patched. Concrete absorbs water. You want to pre-load the old concrete with water so it doesn't suck too much water out of the cement paint and the repair compound.

Cure the Concrete

Take the time to cover your work with plastic after you are finished. You can also spray the patch with water after it has become stiff. Do this for 4 - 7 days and you will be amazed at how strong your patch will be!

If the patch is out in the open, try to shade it from the hot sun as well. You can do this by covering the patch with a piece of plywood or OSB that creates nice shade.

Mixing - Easy as 3 - 2 - 1 (Well maybe 1.5)!

Concrete patching material can be purchased two ways: premixed in bags or raw materials that you have to mix. The raw material route is almost always cheaper by a long shot. Plus, you'll have the necessary pure Portland cement on hand.

You need the Portland cement to make the cement paint.

Gravel Size

One thing you always need to keep in mind is the size of the gravel you need. If you're patching a deep hole, say 3 inches or deeper, you can use 1-inch gravel. This gravel has pieces of stone ranging in size from large grapes to small green peas.

Common sense would tell you that a shallow hole just can't be patched effectively with a mix containing large gravel. Shallow patches will require pea gravel or coarse sand!

Mix Formula

When you do use gravel in your mix, use these proportions:

3 parts gravel

2 parts coarse sand

1.5 parts cement

0.5 parts hydrated mason's lime

The old rule of thumb was always 3 - 2 - 1. However, since the cement is the glue and you only want to do the patch once, why not add a little extra cement?

Hydrated Lime - Secret Ingredient

Do you recall the great book written by J.R.R. Tolkien - The Fellowship of the Ring? In it was a powerful quote by the character Galadriel, 

“And some things that should not have been forgotten were lost. History became legend. Legend became myth. And for two and a half thousand years, the ring passed out of all knowledge.”

This applies directly to hydrated lime. It's rapidly becoming a myth in the building industry. Hydrated lime is an amazing material that makes concrete stickier and it has mystical self-repair capabilities of micro-cracks that might develop in the concrete

I always mix hydrated lime in my repair mixes to boost the holding power of the mix.

hydrated lime

This is excellent hydrated lime. It's a fine white powder and it's going to look great on your home. CLICK THE IMAGE TO ORDER SOME RIGHT NOW.

Thin Patches

If you're doing a stucco patch or replacing a flagstone, brick etc., you will not use gravel. Then mix:

  • 2.5 parts medium sand
  • 1 part cement
  • 0.5 parts hydrated lime

Add just enough water to make the mix like stiff applesauce.

This will be a great mix. The patching compound should be at least 3/8 inch thick after it's applied.

Finishing Concrete

Finishing concrete is easy. It takes two things - a little time and some patience. Decent tools are recommended, but aren't always necessary.

Believe it or not, a simple block of wood will produce excellent results. I've done it on many occasions.

Sand to the Surface

To achieve a nice sand finish (the easiest), you need to drive the gravel pieces at least 1/4 inch below the surface. This can be done by rubbing a board across the top of the concrete patch back and forth in a seesaw fashion. You can also lightly pat the concrete just after it's poured or put into the patch form.

Do this several times after you initially pour the concrete. This board removes excess concrete and brings sand and cement to the surface.

Patience

Now you must be patient. Remember the magic crystals?

Every minute that passes, more and more grow. The only issue is the air temperature. The hotter it is and if the sun is beating on your concrete, the faster the crystals will form.

If it's cold out and the materials and mixing water were cold to start with, it can take hours and hours for the concrete to start to get firm enough to finish.

Pro Results

To achieve really nice finish results, enough crystals must form so that the surface of the concrete is firm but plastic. It's hard to describe.

But watch this video to get an idea of how firm the concrete must be so you can trowel it:

When you initially pour the concrete, the mix is fluid. This is no good, as your tool makes marks.

But if you wait too long, the concrete will get too hard and you'll have problems.

You simply need to watch over and experiment. Temperature and humidity play a big part in the set time. Watch yourself in hot weather. The concrete can get away from you!

No Added Water

NEVER trowel back in bleed water which will in many cases appear at the surface. Bleed water is what makes the concrete look as if it is sweating.

Bleed water happens because water is the lightest of the four ingredients in concrete.

Leave this water alone! It will evaporate quickly in most cases. Troweling it into the surface will weaken the surface of the concrete. You're diluting the cement! This is the primary cause of concrete scaling!

This is the same reason you don't want to add too much water to your concrete mix making it easy to install. Too much water weakens the concrete.

Smooth Steel-Trowel Finish

If you desire a smooth, steel trowel finish, you must first finish the surface and achieve a sand finish. This is done by gently swirling a wood float, block, or magnesium trowel over the stiffening concrete.

Once a few more crystals grow, the concrete can be finished with a steel trowel. This trowel and skilled workmanship bring the cement paste to the surface. As this hardens, you can get a surface as slick as glass. It's truly and art form. Don't expect perfect results your first try.

CLICK HERE to get FREE & FAST BIDS from local concrete repair contractors.

Column B123

Efflorescence on Masonry

Efflorescence

This wall has a bad case of efflorescence. The white minerals leaching from the mortar have seriously stained both the stone and the mortar.

Efflorescence on Masonry Tips


DEAR TIM: I feel our new home has some serious problems but our builder disagrees. The house is less than 6 months old but we have ugly white deposits that are leaching out of our chimney, a wing wall that juts from a corner of our home and a retaining wall

I feel there must be something wrong for this to happen. The more I scrub the worse the problem gets. What's wrong and what can be done to fix the problem? Andrew M., Loveland, OH

DEAR ANDREW: Don't put the noose around the builder's neck just yet. The white deposits you are seeing are probably not his fault, although there might have been some things he could have done during construction to minimize the presence of the powder.

No Harm No Foul

The first thing to realize is that these mineral deposits are just an aesthetic problem. They don't compromise the structural integrity of any of the masonry in and about your new home, but chronic water that gets into masonry can cause problems over time.

CLICK HERE to get FREE & FAST BIDS from local painters that can apply the sealers to stop efflorescence.

Source is Salts

The white powder you see is efflorescence. The brick, stone, concrete block, mortar etc. contain water soluble salts that are the source of the white deposits. Soil behind retaining walls can also contain these same salts.

These trapped salts are set into motion when water enters masonry. The water dissolves the salts and carries them through the masonry towards the surface. Sunlight and wind draw the water to the surface but as the water evaporates, the salts are left behind.

Years to Wear Out

The salts contained in the brick, mortar, stone, concrete block eventually exhaust themselves and the white mineral deposits simply go away. But salts within soil can persist for decades.

This is why efflorescence on the face of a retaining wall is almost impossible to cure unless you remove the backfill, clean the wall and apply an asphalt waterproofing compound on the back of the wall.

IMPORTANT TIP:  Do NOT try to wash off the powder deposits with water or an acid-water solution.

Each time you try to wash the chimney and wall surfaces to remove the salts, you actually compound the problem. The water you use dissolves the salts again and carries them back into the mortar or the masonry.

The surfaces typically look fantastic when wet and you think you've solved your problem, but the white powder appears again when the surfaces dry within hours or days.

How To Stop It

To stop the efflorescence now, you must stop all water from entering the masonry surfaces. This is somewhat easy to do at the chimney and any exterior masonry walls, but far more difficult to do with the retaining wall.

If you stop the water, there is no transport medium to carry the soluble salts to the surface where you'll see them.

Efflorescence Video

Watch this video to grasp what you're up against.

Silane Siloxane Water Repellents

Your chimney and wing wall can be treated with a great silane-siloxane water repellent. This is a clear liquid you apply with a garden hand-pump sprayer. They'll travel deep into the masonry if you have a helper using a backpack leaf blower.

As you spray the wall with the clear liquid, the helper blasts the wall with the air from the blower. This air pushes the sealer deep into the masonry.

silane - siloxane water repellent

This is a magnificent silane - siloxane water repellent that soaks into concrete. CLICK THIS IMAGE NOW TO ORDER IT.

CLICK HERE to get FREE & FAST BIDS from local painters that can apply the sealers to stop efflorescence.

Efflorescence

Here is classic efflorescence. This brick is at my daughter's school and is only 2-years old. This is a small wing wall and the top of it can get wet. Efflorescence is very common on new brick and stonework.

Retaining Wall Woes

The retaining wall that's backfilled with dirt should have been treated as it was built. The back side of the wall where the dirt touches it needs to be coated with an asphalt waterproofing compound.

If the wall builder had done this, even if it was just liquid asphalt, that would have stopped water infiltration into the wall.

Remove The Fill

It's very hard to do now as the fill behind the wall will have to be removed, the wall cleaned and allowed to dry and finally the back side of the wall can be waterproofed. Too bad this wasn't done when the wall was built.

It would have taken hours instead of the days it will now take to stop the efflorescence.

Mild Weather

I would not try to do any remedial work until the weather moderates. You want days where the temperature rises to 65 F or above to get excellent results from the sealants and water repellents.

Be sure to inspect the chimney crown for cracks that might allow water to enter the chimney's masonry core. If you discover cracks, you need a different elastomeric coating for the chimney crown.

Efflorescence

The one stone in the center bottom of this photograph is completely covered with a thick layer of minerals. It is perhaps the worst case of efflorescence I have ever seen other than deposits in a cave.

Tough Love Talk

I think you should have a discussion with your builder to see if he will help you out with the retaining wall fix. Perhaps he can excavate the fill and clean the wall and you apply the waterproofing compound. The builder can then backfill since he has access to equipment that can do it rapidly and easily.

Can You Wait?

Efflorescence happens. It is part of building new things. It eventually goes away on its own, but this process can take years, even decades. When possible, it's best to just let the problem diminish on its own.

Stopping water from entering masonry is the best way to make efflorescence stop. But it is not as easy as one might think. Water can enter masonry and travel up, down and sideways!

Rising Damp

You can actually get efflorescence on masonry walls caused by moisture in the soil that wicks up a wall. In Europe this is called the rising damp. It's almost impossible to cure this defect.

Efflorescence

Efflorescence growing in the mortar of a brick fireplace. PHOTO CREDIT: Michael Hannum

Companion Articles:  Efflorescence, Efflorescence on Masonry Surfaces, Efflorescence Removal, Efflorescence Publications

Over the years, I've seen many different spellings of efflorescence. Here's my growing list: effervesce, effervescence, effervescent, effleresants, effloreflance, efflorescence, efflorressance, effluorescence, eflorescence, eflorescents, ellforesce and ifflorescence.

CLICK HERE to get FREE & FAST BIDS from local painters that can apply the sealers to stop efflorescence.

Column 499

Tar Paper Facts and Tips


Tar paper

Tar paper has a proven track record of success. It will keep this shed dry for hundreds of years if the shed is maintained. (C) Copyright 2017 Tim Carter
CLICK HERE or THE IMAGE NOW TO BUY TAR PAPER

Tar Paper TIPS

DEAR TIM: I'm building a room addition, and as I demolished my outside wall, I discovered tar paper was in the wall. I thought tar paper was just used on roofs.

Why did they use tar paper in the wall? Should I use it on the walls of my room addition? What about all the new fancy products I see that were developed to replace tar paper? It's all very confusing. Rob R., Lebanon, OH

DEAR ROB: I'd wager that hundreds of thousands of houses here in the USA, and possibly millions across the world, are still standing because smart builders of old used tar paper as a weather barrier.

You're correct that it's been used under roofing for years to help keep wood dry. It does the same thing on walls if given the chance.

Demolition Proves Tap Paper Works Well

I've also had the pleasure of tearing apart many an old exterior wall. On just about every one that was wood-framed, I found tar paper under the exterior siding material.

The tar paper had become brittle in almost all situations, but it still worked. You could put water on the black paper, the water beaded up and didn't penetrate to the wood behind.

Old-Growth Lumber

I don't know what builders of old used before tar paper, but I can only assume that once crude oil was discovered and then refined for it's many current uses, builders immediately saw the benefits of a waterproof product made from oil that could be applied in sheets.

One reason homes built before the 1900's didn't rot at the alarming rate you see lumber rot today is the old homes use old-growth timber.

This timber has a much more equal ratio of hard, dense summer wood to the less-dense spring wood. Summer wood is the dark band you see at the end of a cut log. Springwood is the light-colored band.

The spring wood is added to the tree in the spring when water is usually abundant. Come July, the wood that's added is much denser because it's usually dry that time of year. The summer wood, by it's very nature, is very rot resistant.

How Tar Paper is Made

Tar paper used to be made by soaking a porous paper made from cotton rag scraps with thinned liquid asphalt. Asphalt, of course, is one of the final products that comes out of a catalytic convertor that's used to refine crude oil.

The paper comes in different weights. The most common weights are 15-pound and 30-pound tar paper. The 30-pound tar paper is heavier and has much more asphalt in it.

Not the Same

While impossible to know unless you do an expensive analysis, the asphalt used to make modern tar paper contains much more oxygen than it should. 

The tar paper made between 1900 and 1980 probably will last far longer than the tar paper made today.

Fiberglass Mats

Much of today's tar paper is made using multiple fiberglass mats as the cotton rag industry has declined significantly over the past few decades. This is just part of the reason why fiberglass shingles were introduced. There simply was a shortage of cotton scrap to make the mats that are the foundation of shingles.

The big reason fiberglass pushed aside cotton-fiber mats was they could run the giant mills three times faster than if they used cotton. This means more profits for the asphalt shingle manufacturers.

UV Damage

Since felt paper gets covered with something not long after it's installed, there's little chance it will degrade. The ultraviolet rays from the sun attack the exposed asphalt and cause it to oxidize and cross link with adjacent asphalt molecules. This cross linking makes the asphalt brittle.

Tar Paper is Time Tested

Using tar paper to protect wood sheathing and wood framing members on houses, room additions or outdoor sheds is a fantastic idea. This time-tested product is affordable, it's easy to work with and it's readily available.

Tar Paper Video

Watch this video to show you tar paper being installed on a large shed I built in the summer of 2013.

Overlap Correctly

The trick is to make sure you install it so it overlaps correctly. You want each piece to overlap the piece below it. Feathers on birds, fur on animals and shingles on a roof use this same method to stop water penetration.

It's all about shedding water. There are pre-printed lines on the tar paper that help show you where to end the overlap. Usually 2 inches is plenty on a horizontal seam. If you have a vertical seam where one piece ends and another starts, make the overlap at least 6 inches.

Overlap the Top of Your Foundation

Another great installation tip is to make sure the first strip of tar paper is installed so it overlaps the top of the foundation at least an inch. You want any water that does get behind the siding to run down and never be allowed to get near any wood. Many homeowners and builders fail to create this mission-critical overlap at the foundation.

New Weather Barriers

The newer weather barriers made from synthetic fabrics are great products. I've used them as well as tar paper. Some of the new products come in tall 10-foot-wide rolls that allow you to cover a typical one-story house with only one vertical overlap seam!

synthetic water barrier

Here's a typical synthetic water barrier that takes the place of tar paper. This material is 4-feet wide and 250-feet long! CLICK THE IMAGE NOW TO BUY IT.

It's not uncommon to have a roll that's over 100 feet long, if not longer.

You surely can't do that with tar paper as it usually only comes in rolls 3-feet wide. This means you'll have at least four horizontal overlap seams in a typical single-story home.

More Labor

Tar paper will take more labor to install than the newer wider synthetic weather barriers, but if you're doing the work, it costs you just your time. You just need to do the math to see what material will save you money.

Drainage Channels

Some of the newer weather barriers have great drainage channels built into them. These channels help direct water quickly down and away from the exterior siding material. They also promote quick drying allowing air to get behind any siding. This is a good thing.

Tar paper does not offer this. Siding applied directly over tar paper creates a sandwich effect and can trap water between the siding material and the tar paper.

If you want vertical drainage with tar paper, you have to add treated lumber strips on top of the tar paper. This is a time-intensive process and requires all sorts of skill.

I don't add vertical drainage strips on my jobs when using tar paper because I take the time to install the siding so that water will have a very tough time getting to the tar paper. Just use the best practices when installing siding and you'll get the same results.

February 2, 2017 AsktheBuilder Newsletter

Column 950

Tunnel Under Sidewalks and Driveways

Tunneling Tips for Sidewalks and Driveways

Editor's Note: Trisha, from Hartford, WI, asked on the Happenings Radio Show about filing a void under her sidewalk. Read about it in the September 13, 2020 Newsletter.

DEAR TIM: I'm installing some low-voltage lighting in the planting beds in front of my home. But a sidewalk is blocking me from running the cable from bed to bed.

I don't want to have to break apart the concrete or saw cut a small groove through it. Is there an easy way to go under the sidewalk with disturbing it? Surely you had to do this once or twice as a builder and can share your secret tools and tricks. Mike S, Kalamazoo, MI

DEAR MIKE: How right you are. I can't think of the number of times I had to extend a drain pipe, cable, irrigation line, gas line, etc. under a driveway, sidewalk or retaining wall without disturbing the finished surface material.

Sometimes, the task was easy; other times it was a nightmare. But you're correct in thinking, I learned some creative solutions to the different challenges.

CLICK HERE to get FREE & FAST BIDS from local handymen that can create a tunnel for you.

Giant Pushed Pipe

My first inspiration for creating invisible pathways came from my fantastic backhoe operator Jimmy Rolfes, Sr. We had to extend a pipe under a six-foot-wide sidewalk and digging a tunnel by hand with a duckbill shovel gave me a headache just thinking about it much less from doing it.

Jimmy showed up at the job site with a large 16-foot-long six-inch diameter steel pipe that had a coned-shaped metal end. He dug a two-foot deep trench perpendicular to the sidewalk and laid the pipe into the trench with the pointed end towards the sidewalk.

He positioned his backhoe and used the hydraulic power of the machine to push the pipe under the sidewalk. The entire operation took about five minutes.

Sleeve It

After he pulled the long pipe back out with a chain, a perfect 6-inch-diameter hole was there under the sidewalk. I immediately installed a 4-inch PVC pipe that extended on either side of the sidewalk about 6 inches.

This sleeve would allow someone in the future to get more cables under the sidewalk. I marked the location of the sleeve on the edge of the sidewalk with a grinder cut.

Smaller Secret

You don't need this type of machine or tool to solve your problem, but the point is, there are creative ways to tunnel under the surface. I learned another fantastic trick from a fellow plumber that might work for you.

We had to extend a new 4-inch diameter sewer line from an existing house to a new detached garage / pool house that was seven feet away. There was a sidewalk between the house and the new room addition that could not be disturbed.

We drilled a six-inch diameter hole through the concrete foundation of the house so a 4-inch PVC pipe could be inserted and tilted at a slight upward angle for drainage purposes.

4-Inch PVC Hypodermic Needle

This plumber used a reciprocating saw to cut a chisel point on a scrap piece of 4-inch PVC pipe. The tip of the pipe looked like a giant hypodermic needle.

tunneling under sidewalk

This is what the end of the PVC pipe looked liked before we started to tap it in the ground under the sidewalk. It worked GREAT. © 2017 Tim Carter

We inserted the pipe into the hole and tapped a block of wood fitted against the end of the pipe with a sledge hammer until it pierced into the clay soil about 4 inches.

Using a large pipe wrench we rotated the pipe so that the chisel point end cut out a soil plug. We pulled the pipe back into the basement, removed the soil from the inside and repeated the operation.

Within an hour, we had a perfect pathway created that passed from the existing basement under the footer of the new building.

CLICK HERE to get FREE & FAST BIDS from local handymen that can create a tunnel for you.

1 1/2-Inch PVC Works

You can do this exact same thing to create your pathway, but use a smaller one and one-half inch diameter PVC pipe. You'll have to hand dig a trench as my backhoe operator did so that the pipe you are using is parallel with the top surface of the sidewalk.

If your soil is rocky, you'll probably have to use a steel pipe with the chisel cut instead of the more-fragile plastic piping.

PVC Tunnel Tool Video

Watch this video showing how to use a small-diameter PVC pipe to create one of these magic tunnels.

Use Water

Another ingenious method that's somewhat messy, yet effective, is cutting a pathway using a pressure washer. If your wand has a 0 degree tip, you'll be in business.

A 0 degree tip creates a powerful narrow stream of water not much wider than a pipe cleaner. You'll have to dig a similar trench perpendicular to the sidewalk so you can get the wand parallel with the top surface of the sidewalk.

pressure washer

Here's a pressure washer and the wand has a 0-degree tip. You also can see the business end of a duck-billed trenching shovel. © 2017 Tim Carter

Protect Your Eyes

Wear goggles as the high-pressure stream of water will blast out mud, small stones, etc. back towards you as you point the wand directly into the dirt. This method is very effective and depending upon your soil type, you can create a pathway in a matter of minutes.

Stop the spray every few minutes to inspect the size of the pathway you are creating. A 2-inch diameter pathway one foot under the sidewalk should not create any type of structural problem for the sidewalk.

Sleeve It Same Time

If you use a pressure washer, you can actually use a pipe to help control the size of the tunnel. As you start to cut the soil with the water insert a pipe that is a little longer than the sidewalk is wide.

Slide the pressure washing wand into the pipe and start to tap the pipe under the sidewalk as the water cuts the channel. As you remove mud and rocks, tap the end of the pipe with a sledge hammer to drive the pipe. Do this every two inches or so. Protect the end of the pipe with a block of wood to prevent cracking it with the sledge hammer.

If the end of the pipe is always in contact with the soil as the water blasts away, you'll only remove as much soil as the outer diameter of the pipe that is surrounding the wand. Leave the pipe in place once the pathway is created to eliminate settlement problems.

Always Sleeve It

Once your tunnel is created, always install some sort of PVC sleeve. You'll never regret doing this in case you need to run another cable or irrigation line at a future time. Be sure to mark where the sleeve is.

If you want to minimize or eliminate any settlement problems, fill the cavity with sand after the electric cable is installed. Pour sand into the hole and use water from a garden hose to help move it under the sidewalk.

Hand Dig

You can dig pathways by hand with a special duck-billed shovel. These tools have 16-inch long narrow blades that will create a 6 or 7-inch diameter hole.

But the limit of the digging is limited to about half the length of the shovel. It's also very hard to drive the shovel into soil when you're on your knees or twisted like a pretzel in a larger trench.

PVC Needles The Best

The chisel-point pipe method works very well if your soil is primarily clay or a sandy clay. The twisting motion of the pipe cuts a crisp soil plug each time. Use a smaller diameter pipe shoved into the pointed pipe to remove the soil plug.

CLICK HERE to get FREE & FAST BIDS from local handymen that can create a tunnel for you.

Column 524

Bathroom Exhaust Fans

bathroom exhaust fan attic

The off-white, overweight flying saucer is really a quiet bathroom exhaust fan. You can see the flexible insulated exhaust pipe that prevents condensation. The humid bath air goes out the roof. © 2017 Tim Carter

Bathroom Exhaust Fan TIPS

DEAR TIM: I have several inexpensive builder-grade exhaust fans in my home. They're noisy, and I don't feel they do a good job of getting rid of the moist air produced while showering.

Is it possible to get high-performance ventilation with little or no noise? I'd like a bathroom exhaust fan with a light.  How about a fan that has a light and bluetooth speakers?

Can you tell me how to install a bathroom fan so I do not cause any damage to my home? Faith F., Mt. Crawford, VA

DEAR FAITH: Bathroom fans are a critical part of a home-ventilation system. A bathroom exhaust fan, improperly installed, can create all sorts of hidden damage to a home.

All too often, installers just let the moist air escape into an attic space. This moist air can condense on the cooler surfaces in the attic. This liquid water on the wood surfaces creates mold and can lead to serious wood rot.

CLICK HERE to get FREE & FAST BIDS from local bathroom exhaust-fan contractors.

Great Fans

The good news for you is that the exact fan you are looking for is available. It's been around for years, but many builders choose to install cheaper fans to try to make their houses more affordable.

The trouble is, I've discovered many consumers would gladly pay a slight up-charge if they were given the option of having great ventilation and less noise while in the bathroom. It's my hope that builders start to learn to offer home buyers more choices.

But I feel that day may never come, as builders will argue that more choices equate to more problems for them.

Up In The Attic

I've had fantastic luck installing bathroom exhaust fans that are actually located in the attic space. They resemble central vacuum systems inasmuch as the fan motor is located perhaps 8 or 10 feet away from the bathroom. Most builder-grade fan motors are just inches away from the bathroom ceiling. This is one reason why they're so noisy. Refer to the photograph at the top of the column.

Flexible Insulated Pipe

These remote bathroom exhaust fans have insulated flexible duct pipe that extends from the fan motor to small exhaust inlet boxes that are attached to the framing members in your bathroom ceiling. The box extends up into your attic, and all you see on the bathroom ceiling is a sleek round inlet cover.

The powerful fans can slurp up massive amounts of moist humid air that rises to the ceilings as you shower. This air is ducted through the roof of your home in a special roof vent cap that is easy to install.

Vent Through Roof

I've found that it is often best to vent fans and dryers through the roof. I'd only recommend this in areas that get very little snow in the winter. If you live where snow can be heavy in the winter, then vent your bath fan out a side wall well away from a roof overhang.

IMPORTANT TIP: NEVER vent a bath fan into an attic space or under a roof overhang. Both of these situations will produce vast amounts of black mold in the attic.

CLICK HERE to get FREE & FAST BIDS from local bathroom exhaust-fan contractors.

Roof Bath Fan Flashing Video

Watch the video just below to see how easy it is to install the correct vent-cap flashing on a roof. Have no fear - if done right you will have no roof leaks.

Insulate Exhaust Pipe

The flexible insulated ducting that extends from the roof to the remote attic exhaust fan, and then to your bathroom ceiling, does two important jobs:

  • Suppresses noise from the fan
  • Prevents condensation from forming inside the flexible piping

False Fan Leaks

Many people complain about water that drips down from their bathroom fan in the winter. They think they have a roof leak.

If it were a roof leak, the water would drip all year every time it rained.

If you have a winter-only leak like this, then it's not a roof leak but condensate water that forms inside of uninsulated exhaust piping and flows down the piping into the bathroom.

LED Lights and Fans

The bathroom exhaust fans I use come with or without lights. The ones with lights use brilliant compact halogen or LED bulbs that fit into the center of the small circular vent covers.

exhaust fan setup

Here's a typical Fantech bath exhaust fan setup. The odd cone-shaped metal thing is the fan. The two boxes that have the round white covers are place up in the ceiling joists of the bathrooms. All you see are the sleek round white covers. They come with and without lights! I LOVED these in my last house. CLICK THE IMAGE TO BUY the SET NOW.

Two Outlets Per Bath

I always place two of these inlets with lights in each bathroom, one immediately adjacent to the shower area and the other toward the center of the bathroom. These lights produce good overall lighting for the average bathroom.

You'll need additional lighting above or on the sides of any mirror.

Bluetooth Music Exhaust Fans

How would you like to listen to your favorite music while in the shower or otherwise occupied in your bathroom? While the whisper-quiet fan is vacuuming air out of the bath, music plays from great speakers under the decorative trim.

It's all done with the magic of bluetooth radio waves. CLICK HERE to get the Broan Bluetooth fan I've got in my own basement bathroom.

underside of the rough fan housing

This is the underside of the rough fan housing. It looks ugly. See that odd squat U-shaped thing at the bottom? Those are two powerful stereo speakers. You'll love this fan. CLICK THE IMAGE NOW TO ORDER ONE.

Read Instructions

To avoid damage to your home while installing a bathroom fan, always follow the written instructions that come with the fan. If you're not comfortable working with high-voltage electric wire so it will pass inspection, then hire a competent electrician to connect the fan.

The most important aspect is to duct the air from the bathroom to the exterior of the house. You should do this through the roof so long as you don't get lots of snow on your roof.

Never Soffits

Avoid the temptation of venting your fan through the horizontal soffit that can be found in many roof overhangs. All too often the moist air billows up under the soffit and is sucked into the attic. If this happens, mildew and wood rot up in the hidden spaces of your attic is a certainty.

Down-the-Road Defects

Problems with bathroom exhaust fans can happen years later. The connections between the flexible duct pipe, the fan, inlet boxes and the roof vent cap must be permanent. Never rely on duct tape to secure these connections.

The high heat and humidity in attics can cause duct tape to fail. It is better to use metal band clamps that are nearly identical to traditional automotive radiator hose clamps. These inexpensive clamps can be found at hardware stores, ductwork shops and some home centers.

Once the band clamp is connected, then use tape as directed by the fan manufacturer.

If you use solid galvanized pipe to duct your fan, then use self-tapping screws to connect the sections of pipe.

No Kinks

Be sure there are no kinks in the flexible duct pipe. Also be sure to install a makeup air duct in your home that allows an equal amount of fresh air to enter your home for every bit of air the exhaust fan is expelling.

If you don't have this critical makeup air, you could cause "backdrafting" to occur. This means poisonous gases are drawn into your home through furnace or water heater exhaust pipes.

CLICK HERE to get FREE & FAST BIDS from local bathroom exhaust-fan contractors.

Sandra emailed me and asked an interesting question about her bathroom exhaust fan. CLICK HERE to read her question and the answer.

Column 665

January 29, 2017 AsktheBuilder Newsletter

This afternoon I'm going on a hike with my youngest daughter Kelly. We're doing a fairly easy hike up to the top of Rattlesnake Mountain just north of Squam Lake.

It's really more like a big hill. It should be a good time and my guess is it will be crowded as it's a fairly popular low-impact hike and the WX today is perfect for a winter hike.

Serious hikers chortle at this challenge because it's like going to hiking kindergarten. We shall see.

I've done the much harder mountain just across the street at the end of a harsh winter.

CLICK HERE to read all about my adventure that day up to the top of Mt. Major. The vista was stunning once up there. GREAT PHOTOS in that story.

Something New

If you're a new subscriber in the past few days, three weeks ago I embarked on a year-long project. In reality, I feel it's going to run about 18 months.

I'm going back to each old article of mine and doing the following:

  • creating top tips bullet list
  • adding new photos
  • adding new fresh content
  • adding photos / links to best products
  • adding photos / links to best tools

Last night, I had an idea I want to try out to encourage you to look at each revised column.

Let's try it now. Let me know if you like the teasers you see below and if they persuaded you to peer at all the goodness I've created for you

Install a New Front Door - You Can Do It

You might think it's beyond your skill set to install a new front door. Don't sell yourself short. CLICK HERE.

Foundation Soil Grade Tips - Higher Please!

Many modern homes have the top of the foundation walls too close to the soil. What do you think is the minimum height a foundation wall should stick up out of the ground? GREAT original hand drawing by me here! CLICK TO SEE IT.

Best Cast / Poured Concrete Wall Thickness

Did you know you can order your foundation walls a different thickness? How do you know what is the best thing to do? CLICK HERE and discover new information.

STOP Crawlspace Dankness and Smell

Do you have a nasty crawlspace that is damp, dingy and yucky? Do you think those vents in the foundation really work?
CLICK HERE and discover what you can do to make your crawlspace nice and bright.

Block or Poured Concrete Foundation - Best One?

Do you think it's possible for a concrete block foundation to be better than a cast, or poured, concrete foundation? Are you laughing at me? CLICK HERE smarty pants.

Secret Excess Grout Removal Trick

You did a DIY tile job and messed up the grout leaving too much on the tile. Can you get it off? How? Is there some magic solution, (not acid!!!) that you can put on the grout and grout haze? CLICK HERE and be amazed.

Vent For Washing Machine Drain

I know you don't have your master plumbing license like I do, but you feel compelled to install a washing machine drain. Well, go look at my awesome full-color rough-in diagram so you don't have sewer gas choking you to death. CLICK HERE NOW.

Connect a New Foundation to an Old One

What's the magic method we builders use to connect a new room addition foundation to an existing foundation? GREAT VIDEOS here. CLICK HERE now to tickle your gray matter.

Bathroom Remodel Task Sequence - Don't Goof Up!

You'd be surprised how many people do different tasks out of order. When do you do what to save time and money? Well, CLICK HERE and see if you got them right.

Mold and Mildew on Lumber - How to Remove Safely

You're building a new home or room addition and the lumber's getting wet. You see black mold and mildew. Should you torch the place and start over? No. CLICK HERE to see what I'd do.

Tape Measure Lines - NEW Friendly Tape!

Have you struggled with all those darn tiny lines on a tape measure? What about the mystery black diamond!!!!???? GREAT VIDEO HERE. CLICK HERE for best tape.

Removing Ceramic Tile Without Tactical Nukes

What do you think is the best way to remove ceramic floor or wall tile? CLICK HERE to see if you should start your own demolition company.

Stair Trim Secret Ninja Tricks - DON'T SHARE THESE!!!!!

Have you ever tried to install that cool molding on top of stair stringers only to throw your angle finder into the closest tree like a tomahawk? CLICK HERE to become a master carpenter in ten minutes!

Best Brick Water Repellents

If you own a brick veneer house, you need to CLICK HERE NOW. Period.

Column and Beam Construction 101

How many beams are in your home? More than you'd ever imagine. How are the sizes determined? Can you get rid of all those HORRIBLE steel columns in your basement? CLICK HERE and discover the depths of your structural ignorance. Dr. Caster made me say that. Blame him. CLICK HERE to read about the great and mysterious Dr. Caster.

Brick Walls Leak - What Else is New?????

I'll bet you thought your brick home was waterproof. BWAHAHAHAHAHAHAAHAHAHAHAHAA.

Stop reading fables about the three little pigs. CLICK HERE instead to see what you need to do RIGHT NOW!

Paint Videos

Three days ago, Tristan and I taped two great videos about two paint products I'll bet you don't know about.

One of them is a spray paint that outperforms the top two brands you're familiar with. Let me tell you, advertising works. You probably feel the one big brand is awesome.

BWAHAHAHAHAHAHAHAAHA

Wait until you see the actual TEST PANELS I had in my hands from the TEST LAB!!!

When you see my video and you see the actual lab test panels, you'll NEVER AGAIN BUY that one big brand.

I'll be SHOCKED if you don't run out and immediately buy a can or two of the paint I used in the video.

I'm also going to show you a fantastic interior wall paint that's a dream to work with and it costs MUCH LESS than all the national brands.

I'm waiting for the company to approve the videos. Once they do, you're going to see them.

If all goes well, I'm going to have an exclusive coupon or promo code for you to save some sweet moola.

Next Sunday - Door Eye Candy

Next Sunday is a big day. You're going to see some spectacular door eye candy. Be on the lookout for that newsletter.

WOW!!!!!!!!

Have a great next few days. I'll have hike photos for you next newsletter.

Du kan köra, men du kan inte aldrig dölja.

Tim Carter
Founder - www.AsktheBuilder.com

Do It Right, Not Over!

How to Modify Wood and Attic Trusses

roof truss

Here I am alongside a truss being used over a giant garage. This truss has a special elevated bottom chord. Photo credit: Todd Fratzel

Modify Wood and Attic Trusses TIPS

Mike, from Cleveland, Ohio, wrote to me:

Tim, great reading your tips. I've got a question, I would like to convert the attic above my garage into a living space. Access is not an issue as it's also in front of another room upstairs that I can put a door in the wall.

There's plenty of room to make a 12 x 12 room with 10-foot ceiling at its peak.

Common Trusses

Unfortunately, my home builder had framed out the attic using a common truss system utilizing 2x4's (see attached picture of exact type, although my roof is much steeper, and no middle non bearing wall below).

roof truss

This is a graphic Mike supplied to me. I don't know if he drew it, but I sort of doubt it. Image credit: Unknown skilled person

There's enough space to switch the floor joists that are 2x4s with 2x10s or 8s, and/or sistering them. The main issue I have what to do about the truss itself (2x4 webs, 2x4 chords, etc.). From what I imagine larger rafters would need to be in place of those 2x4 top chords.

Is this possible, and how costly would a project like this be? (just the structural engineering and framing aspect to allow for live loads and support the roof). I'm trying to decide if it's all worth it."

Changing Trusses

You can modify the trusses, but it's an enormous amount of work. Also, if you decide to do this, you MUST work hand-in-hand with a licensed structural engineer that's familiar with wood trusses.

CLICK HERE to get FREE & FAST BIDS from local structural engineers who can help you modify your trusses.

Huge Challenges

Here's one challenge. If you feel you'll be sliding new larger common rafters up inside the attic alongside the existing trusses, you're dreaming.

You'll have shingle nails in your way that extend through the roof sheathing. You'll also be dealing with a low heel height on the existing trusses.

Heel Height

Most common trusses have a miserable heel height of just over four inches.

The heel height is the vertical distance up the truss face where it passes over the OUTER EDGE of the building line or supporting wall. This is typically where the face of the exterior wall sheathing is.

CLICK HERE to get FREE & FAST BIDS from local structural engineers who can help you modify your trusses.

Wood Truss Videos

Watch these two videos to see very unique things truss engineers can do to create higher ceilings and large overhangs.


Attic Trusses

The sad fact is your builder could have installed attic trusses over this garage for just slightly more than what the existing trusses cost. Attic trusses have a rectangular shape inside each truss.

If the roof slope is steeper than 9 inches in 12 inches of run, it doesn't take much width to end up with a nice room 12 feet wide with an 8-foot ceiling. I have this above my own garage.

Look at this photo of the space created by attic trusses at my home. You can't see the floor, but the window sill is just about 32 inches up off the floor. The flat ceiling that connects the two sloped parts of the truss is just out of the photo frame.

man cave

This is the end wall of the attic above my garage. The space is 12-feet wide and ceiling height is 8 feet. I didn't build this house, but the architect did everyone a favor by making the vast space above the 40-foot-long garage out of attic trusses. I took part of this giant room and made a cozy man cave ham-radio shack. © 2017 Tim Carter

Demo Roof

You may find it easier, as crazy as this sounds, to rip off the existing roof and start over. I guarantee you it would be FASTER.

You'd be able to use regular 2x10 or 2x12 rafters and create a gigantic room where now exists useless space.

If you have limited manpower, you'd do this in sections. I'd just rip off about six feet of existing roof at a time, set the new rafters, sheath them and cover them with tar paper.

You'd have a small gap between the new and old roof you'd need to weatherproof in case rain was in the forecast.

It would help TREMENDOUSLY if you increased the new roof pitch so the new roof ridge  board would rest on top of your existing trussed roof.

CLICK HERE to get FREE & FAST BIDS from local structural engineers who can help you modify your trusses.

Continental Glacier Soils

The following photo was taken in 1986 on or about June 24th.

The location of the photo was 3166 N. Farmcrest Drive, Amberley Village, Ohio.

You can clearly see two distinct soil profiles in the photo.

The light-brown clay soil that's about four feet thick was produced by the Wisconsin Continental glacier that was starting to recede back to the North Pole about 12,000 to 15,000 years ago.

Beneath it is a much darker soil that was created by the Illinoian Continental glacier that was in Cincinnati, Ohio about 600,000 years ago.

Continental Glacier Soils

You can see the two distinct glacial soils above the footing on the far wall. © 2017 Tim Carter - ALL RIGHTS RESERVED - DO NOT COPY or PIRATE this photo without permission.

You don't often get to see deep soil profile photos like this that have so much contrast.

I built the house at this location and I got my geology degree from the University of Cincinnati in 1974.

How to Garage Shelving Ideas

Garage Shelves

Garage shelving ideas: These are clever garage shelves loaded with countless wares! Thin plywood is supported by electrical cable staples of all things! © 2017 Tim Carter

"Yes, small shelves can go in between wall studs in a garage. You can stack small items, boxes of nails, aerosol cans, boxes of garden fertilizer, and many other things on these tiny shelves."

How To Garage Shelving Ideas

DEAR TIM: I need some creative garage shelving ideas. I’ve got a limited budget, bare stud walls with no insulation and I’ve accumulated countless small boxes of nails, screws, spray paint cans, boxes of fertilizer, etc.

Please save yourself the trouble telling me about all the fancy cabinets, shelving units, etc. I just don’t have the money. All I can afford is $30 at the most. Wave your magic wand so the clutter disappears off my garage floor! Mona G., Lost Creek, KY

DEAR MONA: I’ve just summoned my fellow New Hampshire wizards and we’re about to cast a protective spell on you, your garage clutter and all of your terrestrial allies.

In all seriousness, I’ve got great news for you. All of the things you need for a simple solution are aligned. This is indeed your lucky day.

CLICK HERE to get FREE & FAST BIDS from local handymen that can build these shelves in one day for you!

Can Garage Shelves Go Between Wall Studs?

Yes, small shelves can go in between wall studs in a garage. You can stack small items, boxes of nails, aerosol cans, boxes of garden fertilizer, and many other things on these tiny shelves.

Allow me to share a story with you. I’ve got a great friend who lives in southern California. I visit him on a fairly regular basis. He and his wife have a wonderful detached garage that’s just like yours. But what I'm about to share would work even if your garage walls were covered with drywall!

My friend's garage has a durable cement stucco outer covering, but the inside is just bare 2x4 walls. He’s accumulated all the things you’ve described and much more over the sixty-plus years he’s lived in this home.

Where is Wasted Space in a Garage?

There's wasted space over the hoods of cars. There's also wasted space along walls.

Several times my friend asked me about ways to try to tame the clutter and I mentioned putting up a shelf that overhung the hoods of the cars. Many garages have a vast amount of wasted space in the air and this shelf was perfect for his larger items.

But he had all sorts of small things covering the floor of the garage making it nearly impossible to find anything. I’ve have the same problem in my own garage.

What Can You Store in the Wall Stud Cavities?

You can store just about anything on thin shelves in wall stud cavities.

Two months ago, I visited him and he took me out to the garage. The floor was clean. I could see concrete everywhere! All of his cans, spray bottles, boxes of plant fertilizer, boxes of nails and screws, bottles of motor oil, paint roller covers, brushes, you-name-it were all organized nicely tucked inside the wall stud spaces!

What Material Should I Use For the Shelves?

He and his industrious wife had purchased one sheet of 1/4-inch plywood and had it ripped into 4-inch-wide strips. This yielded, are you sitting down, an astonishing 88 linear feet of shelving!

All he had to do was use a simple hand saw to cut the shelves to the width of the space in between the vertical wall studs. They maximized the storage space by doing their best to organize things that were related to one another and the same height.

Doing this allowed them to put as many shelves as possible in one wall cavity in between two wall studs.

CLICK HERE to get FREE & FAST BIDS from local handymen that can build these shelves in one day for you!

What are the Best Tiny Shelf Supports?

Electrical cable staples are perhaps the best shelf supports for these tiny shelves.

As if that weren’t clever enough, he and his wife came up with a simple, yet strong, way to support each shelf. They used electrical cable staples as tiny shelf cleats. It took just four, two to each side, to support each shelf.

cable staples

Simple cable staples like this will hold a tremendous amount of weight. CLICK THE IMAGE TO ORDER THEM NOW.

For shelves that would support fairly light-weight items, I told him he could have used small 6-penny finish nails. These are very inexpensive.

How Do You Install the Tiny Garage Shelves?

You don’t have to have a fancy tool to get the shelves level in both directions. A common torpedo level is all you need to get the shelf level side-to-side.

torpedo level

I own this torpedo level. It's my FAVORITE one. It's very accurate and it comes with magnets so it stores on metal peg board or two nails I drive into a stud. CLICK THE IMAGE NOW TO ORDER IT.

You can use a shelf panel that’s got a nice square cut on it to create the level line that becomes your guide for the cable staples or finish nails.

Close Up Garage Shelving

All you do is determine the height you want the shelf, press the shelf flat up against the side of a wall stud and trace a pencil line along the short edge of the shelf. Assuming the walls of the garage are plumb, this will automagically create a 90-degree level shelf.

Should I Tilt Some Shelves Backwards?

Yes, you want to tilt some shelves backwards so there's less of a chance the items will fall.

My friend decided some shelves that held liquids shouldn’t be level. He wanted a slight backwards tilt so the bottles and cans would lean back towards the wall. This is easy to do by just putting one cable staple above the pencil line and the other one below.

How Do I Install the Small Garage Shelves Over Drywall?

Guess what? Even if you had told me your garage walls were insulated and drywalled you can still do this! You’d have to spend a little more money to buy some 2x4s, but that money might be in your car cup holders or you’ll discover it when you burrow down into your couch cushions.

My garage is drywalled and as soon as it warms up I’m going to build a simple wall out of 2x4s. I’ll then use a few simple L brackets to secure the bare wall to the studs behind the drywall. Then I just have to do what I described above to organize all my small things.

Many garages have a foundation ledge that sticks up above the concrete floor and it’s the perfect spot to rest this bare wall. I can’t wait to get started here at my own home!

CLICK HERE to get FREE & FAST BIDS from local handymen that can build these shelves in one day for you!

Column 1181

Hot Water Recirculating Loop – How to Install

Hot Water Recirculating Loop TIPS

Gravity - It's Magic

When water is heated, it gets lighter. It wants to float to the top of cooler water.

Cool water is heavy and wants to fall. If you have a loop that projects upwards, the cool water wants to fall down the loop while the hot water goes up. Gravity fuels the motion.

Complete The Loop

It works in this fashion in your house. You already have half of a gravity loop in place. This is your hot water piping distribution system which begins at your water heater and ends at the farthest fixture which requires hot water.

If you were to install copper piping leading back from the farthest point and from other high points in the existing system, you'd have a loop. This return loop pipe connects into the bottom of the water heater.

You remove the drain valve and install a 3/4-inch nipple, a ball valve, a tee and a new boiler drain so you can drain the heater.

It's that simple.

CLICK HERE to get FREE & FAST BIDS from local plumbers who can install a hot water recirc system!

Slow Flow

The flow of water through the loop is very slow. It doesn't need to be fast.

The only thing that's important is hot water is near each fixture when you need hot water.

Without a loop there's no movement, so any movement is better than none!

Pumps for Slabs

If you live in a house on a slab or where a majority of the hot water lines drop below the water heater, you need to use a recirculating water pump. If you purchase a Grundfos recirculating pump like the one just below, you don't need to add any extra piping!

See that funny stubby U-shaped fitting under the pump? It connects between the hot and cold-water shut-off valves at the farthest sink away from the heater.

The pump uses the cold-water line to send water back to the water heater! Ingenious!

recirculating pump

This is a reliable recirculating pump you can install on top of your water heater. The weird threaded fitting goes under the sink that's farthest away from the pump. CLICK THE IMAGE NOW TO ORDER THIS PUMP.

Pump Location

These pumps are often located near the water heater, however, they can be anywhere in the loop. The pumps circulate water at low pressure and low speeds.

Once again, there's no need to have lots of water moving through the loop. It is just important that the water is hot near the fixtures.

If you install one of these pumps, remember that you need to install unions on either side of the pump.

Unions are special threaded fittings that contain an inner flared surface or flat surfaces with special washers that allow you to break into the piping system and reconnect without soldering.

Water meters are always installed using unions. Look at yours and you'll see what I mean.

Insulation

Once you decide to install a gravity recirculating loop, you need to be concerned with energy loss. A gravity loop will work fantastically without insulation. In fact, it works best without it!

But, this can also cause your water heater to cycle on and off more often. Remember, you are bleeding heat from the heater when the loop contains hot water.

Type of Insulation

There are numerous ways to insulate the pipe. Many insulating materials are made exclusively for water piping. They fit snugly over different sizes of pipe.

Some insulation, like the foam types, must be installed as you install the pipe, not after the loop is constructed. The foam slides over the pipe sections.

When you select your insulation material, ask how and when it should be installed.

CLICK HERE to get FREE & FAST BIDS from local plumbers who can install a hot water recirc system!

Hold Off Framing

Piping installation methods must also be altered. Some people attach water piping to the sides of floor joists. You can't do this with an insulated loop system. The pipe must stand away from floor joists so that the insulation is not crushed. Special inexpensive pipe hangers allow you to do this easily.

Save Energy

All of the hot water lines that lead from the heater must be insulated. They need to be insulated up to where the return loop lines connect and slightly beyond.

The return loop also needs to be  insulated except for a short distance before the loop connects to the bottom of the water heater. If you insulate the entire system too well, it may not work!

Remember, the water has to cool at some point for the loop to start its gentle movement. I suggest that you leave the final 15 feet of return loop uninsulated.

Water Heater Heat Traps

Modern water heaters have small rubber flapper check valves in the top of the heater. These need to be removed if you want a gravity loop to work. The check valves are mandated to preserve energy in non-insulated piping scenarios.

If you don't remove these flappers, the water can't move through the loop.

Cozy Up 

Houses that don't have a recirculating loop system have hot water pipes that branch off a main line and stretch to each fixture. An ideal loop system would have the loop run as close as practical to each fixture.

The closer the loop is to the fixture, the faster you'll get hot water when you open a faucet.

Air Locks - BIG PROBLEMS!!

As you construct your loop system, you must be concerned with air traps. What are these?

Think about the drain traps under your sinks. Imagine if you did this upside down with a water line in a loop system.

Air naturally bubbles out of pressurized water. Normally it makes it to the top-most fixture in your plumbing system.

If you, or your plumber, inadvertently creates a trap, the water will not move through the loop.

Mystery Air

Air can get into a plumbing system in any number of ways:

  • water main break
  • repair process in your own home
  • dissolved air within water

If you create a trap, the air will collect in the trap and BLOCK movement of water within the return loop. This happens because the air will not move down to the water heater.

Air is not a problem in the regular water piping system. The rapid movement of water through the pipes when you turn a faucet on pushes the air out of the way. Remember, water moves sloooowly through a gravity loop.

Check Valve

Just before the loop enters the bottom of the hot water heater you might need to install a simple check valve. These are one-way valves.

This valve will prohibit in-rushing cold water from the bottom of the hot water heater from flowing backwards through the loop when you open a hot water faucet somewhere within the system.

Check valves are not always necessary. Some systems need them because of friction loss and other obstructions that make it easier for the hot water to flow backwards through the loop rather than the correct direction - from the top of the heater!

Drill A Hole

These valves can be installed after the loop is completed. You can install this valve in the vertical - or horizontal - loop pipe just before it enters the water heater.

The valve should be within 5 feet of the water heater and it needs a 1/8-inch hole drilled in the flapper of the valve.

You might want to try installing the loop first without one and see what happens. If you begin to get cold water at a faucet when you should get hot, you know you need a check valve.

Final Connection

As the loop returns to the water heater it connects at the low point of the heater. This is always the location of the heater drain valve. This valve is simply screwed into the heater.

Attach a wrench to the valve and turn counterclockwise. It will come out.

Install an insulated nipple in place of the valve. This will minimize corrosion possibilities.

Then as soon as possible install a tee fitting with female threads at the tee. If you use the right one, the drain valve will screw right back into the tee. The other end of the fitting allows you to connect the loop to the heater.

Install a ball valve on the loop side of the tee so if you want to drain the water heater you can shut off the ball valve preventing all the water in the loop from coming out of the boiler drain

Shut-Off Valves

While on the subject of valves, let's talk about the shut off valves on top of water heaters. I've seen some aggressive homeowners install a shut off valve on both the hot and cold water line.

They thought this would help in the event they need to switch out the heater. Well it does help. It also creates a potential BOMB.

BOMB In Your Home

If some idiot turns off both valves (happens everyday somewhere), and the pressure relief valve malfunctions or was never installed, and the heater thermostat malfunctions, the heater will explode. It's happened more than once.

Only install a valve on the COLD water line, never on the hot line.

CLICK HERE to get FREE & FAST BIDS from local plumbers who can install a hot water recirc system!

Column B413