Brush Marks on Trim – How to Prevent

brush marks

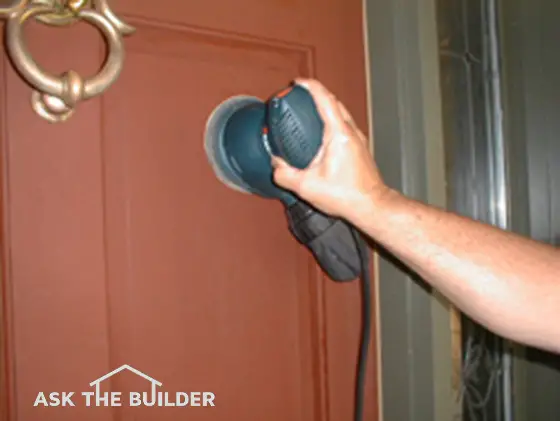
Sanding a painted surface is easy with handy palm or hand-held sander. © 2017 Tim Carter

Brush Mark Prevention TIPS

DEAR TIM: My son was visiting me and decided to do a good deed. With the help of my wife, he painted our front door. The color is a magnificent bright red but the finish has many brush strokes.

Up close, the door looks horrible. What's the best way to refinish the door? Can I simply sand the high spots or must I strip the paint from the door? My son and wife used a disposable brush.

Was that the problem? How can I avoid brush strokes in a newly painted finish? Renard I., Rochester, NY

DEAR RENARD: Ugh! I've seen my fair share of painted surfaces that look good except for the defect you describe. Other defects such as unfilled holes, un-sanded peeling-paint edges, un-caulked cracks, etc. can also ruin an otherwise great paint job.

Professional painters and those that sell paint sundry items constantly preach the mantra of using the best tools when painting, as well as doing all necessary preparation before paint is applied.

CLICK HERE to get FREE & FAST BIDS from local painters who'll redo your front door.

Your wife and son had the best of intentions, but possibly underestimated the required steps to achieve professional results.

Previous Poor Work

The actual technique of applying the paint may not have been a problem. It's entirely possible the previous coat of paint had the ugly brush marks and this new coat of paint could not hide them.

Gloss Paint Unforgiving

If your son used a high-gloss paint, this could be part of the problem. Let's assume the previous coat of paint was flat or an eggshell sheen and had brush strokes.

Flat or eggshell paints tend to do a great job of disguising surface imperfections, even some brush marks.

Gloss paint is the exact opposite. They amplify the smallest surface imperfections.

Gloss paints reflect much of the light rays that strike the surface of the painted object. The light rays bounce off at different angles when they strike imperfections, like a combed brush stroke.

This is why the brush marks stand out. You can see the tiny shadow lines from the light rays bouncing off at different angles.

You can see this in glossy car finishes when a car door or hood has the slightest ding or dent in it.

Start Smooth

Certain paints have more body to them and some can hide subtle surface defects by bridging over them. Even if such a paint was used, I'd never depend upon it to cure an obvious surface defect.

If the previous painter created the problem, the surface should have been sanded to remove the brush marks before the next coat of paint is applied.

Paint Needs To Cure

At this point the best thing to do is to wait until the new paint hardens, or cures, enough so it can be sanded. This curing process can take anywhere from ten to thirty days. In certain situations it may take longer.

Some paints may not cure for up t0 sixty days. The hotter it is the faster paint cures. If you try to sand uncured paint, it will rapidly clog the sandpaper.

Sheets Of Paint

Attempting to sand a paint finish less than five days old can lead to disastrous results as the film can actually tear apart. If you're so impatient that you can't wait, then chemical stripping is the path you must take.

Personally, I'd only strip the door as a last resort. Paint stripping can be a messy task to say the very least.

Sand To Smooth

I'd start sanding using a hand-held power sander that has an orbital sanding pattern. These power sanders do an excellent job of removing surface defects when equipped with the right paper.

Try using 120-grit aluminum-oxide sandpaper for the first sanding. Aluminum oxide is the light-brown sandpaper you see at paint stores or home centers. It's self-sharpening and affordable.

sandpaper

Here's an assorted pack of aluminum oxide sandpaper that will do a great job on soft wood. CLICK THE IMAGE TO ORDER IT NOW.

Look For Dust

You'll know the paint is hard enough to sand if the sander begins to produce dust from the paint film. If you don't see any dust and the paper has started to clog with paint, STOP.

Wait five to seven days and try to sand again.

CLICK HERE to get FREE & FAST BIDS from local painters who'll redo your front door.

Smooth Like Glass

Once you're able to successfully sand, the surface of the door should be very smooth to the touch after you run the sander over it several times. Before you begin to sand the offensive brush strokes, run your hand across them.

You should be able to feel the uneven surface unless you have very thick calluses on your fingertips. After sanding with 120 grit paper, you should be able to feel a much smoother surface.

Don't hesitate to change the sandpaper on a frequent basis. Fresh paper cuts faster.

Paint Horizontal

Once the door surface is smooth and dust-free, it is time to repaint. If you desire as smooth a finish as possible, I would absolutely remove the door from its hinges and paint the door while it is laying flat on two sawhorses or portable work stands.

This allows gravity to help flatten the paint after you apply it. Painting the door flat eliminates the possibility of runs.

Secret Paint Conditioner

The pros use a paint additive to get silky smooth finishes. This is one of their best-kept trade secrets. I've had stunning results using Floetrol. It comes for both latex and oil paint. CLICK HERE to get Floetrol for latex paint.

Floetrol latex paint conditioner bottle

This is a fantastic time-tested paint additive. It tames paint and makes it lay FLAT. CLICK THE IMAGE TO ORDER IT NOW.

The paint conditioners reduce the surface tension of the paint allowing the paint to spread out evenly under the force of gravity. When you combine a paint conditioner with laying the door flat, you'll get superior results.

Great Brushes

Be sure to use the most expensive brush you can buy and match it to the type of finish paint you choose to use.

China bristle is often preferred for oil paint and a polyester brush is usually the weapon of choice for latex based paints. A professional-grade brush will yield incredible results.

Purdy polyester brush

Here's a great Purdy polyester brush for latex paint. If you care for it, it will last for years. I have some Purdy brushes that are 20 years old. CLICK THE IMAGE TO ORDER NOW.

Let Dry

Once the paint is dry, you can put it back on the hinges making sure to remove any weatherstripping from the door jamb. If the uncured paint touches the weatherstripping, it can peel away from the door the next time you open it.

Leave the weatherstripping off the door jamb for about ten days.

CLICK HERE to get FREE & FAST BIDS from local painters who'll redo your front door.

Column 478

Chinese Drywall Causes

drywall

End view of drywall with factory label removed. © 2017 Roger R Henthorn

Chinese Drywall ALERT

SEVERE ISSUE!

The first thing everyone wants to know is, "What's causing the problem? What's in the drywall that's causing health deterioration and the corrosion of metal in homes?"

Fly Ash From Power Plants

The answer is simple: fly ash in the drywall from Chinese power plants. Fly ash is that part of the rock - coal is rock - that simply won't burn.

High-Sulfur Coal

The Chinese use poor quality high-sulfur coal to make electricity. This coal may contain other harmful chemical elements that, once mixed with gypsum in drywall, create toxic gas that's causing the issues in American homes.

Understand the fly ash is a waste by-product from the power plants that normally would be thrown away or put into a landfill.

Fly Ash Filler

However, for years fly ash has been used as a FILLER in both drywall and concrete.

Here is the USA, we use low-sulfur coal in our power plants. The resulting fly ash does not contain the high concentrations of sulfur and other possible elements that are contributing to both health issues of occupants who live in houses with the tainted drywall.

Corrosion Severe

The sulfur in the drywall is creating an offgas - hydrogen sulfide.

This gas reacts with metal objects causing corrosion. It targets:

  • electrical wiring
  • coils on air conditioners
  • copper plumbing
  • metal ductwork
  • joist hangers and structural connectors

It's interesting to note that many newer drywall manufacturing plants are built very close to coal-fired power plants so they have a cheap and readily available supply of fly ash.

We are currently researching ways to determine if you have Chinese Drywall and might have associated corrosion. We are posting additional information as we find it.

The U.S. Department of Housing and Urban Development has issued a press release titled HUD and CPSC Issue Guidance on Repairing Homes With Problem Drywall. This release  is an interim remediation guidance to help homeowners struggling to rid their properties of problem drywall linked to corrosion of metal in their homes such as electrical components.

drywall

Factory label on end of drywall. © 2017 Roger R Henthorn

A report from the Consumer Product Safety Commission (CPSC) provides some guidance for preliminary identification on Problem Drywall. Their report Interim Guidance - Identification of Homes with Corrosion from Problem Drywall can be read by clicking on the title. This report is in PDF format.

The CPSC report refers a guide issued by the state of Florida. Information on that report is shown below.

The state of Florida has posted a Self-Assessment Guide for signs that a home may be affected by drywall Associated Corrosion. The link to their site is http://doh.state.fl.us/environment/community/indoor-air/inspections.html

USAToday has an article relating to damages awarded to families for homes ruined by sulfur-emitting Chinese drywall. Click here to read the article titled "Judge awards families $2.6M over tainted Chinese drywall."

Check back later for updates. An update was provided in the April 11, 2010 and the  April 6, 2010 AsktheBuilder Newsletter

Brick Leaks

Brick Leaks

Can you see what I see? There's no visible flashing behind the brick, I don't see a water membrane covering the wood framing behind the brick! What's more, do you see any weep holes? I sure don't. © 2017 Tim Carter

Brick Leaks TIPS

DEAR TIM: Every time a wind-blown rain saturates our brick veneer home water streams into our home. I've noticed that the wood floors in our living room are warping as well.

The brick and mortar appear fine. What's causing the leaks? How should the brick have been installed? What, if anything, can be done to stop the water penetration? Brenda F., Brockton, MA


DEAR BRENDA: I hate to tell you this, but you've got some very serious problems. If they're not corrected, serious structural failure will be in your future.

I'm quite confident that if I did a post mortem examination of your brick walls, I would find serious workmanship errors.

CLICK HERE to get FREE & FAST BIDS from local painters that can spray on special silane-siloxane water repellents.

Brick Leaks Lots

Virtually every brick wall will allow water to penetrate. The water has three possible paths. It can enter directly through the brick, the mortar, and/or the contact zone between the brick and mortar.

Vertical Head Joints Worst

The primary path of water into brick walls is the contact zone between brick and mortar and mortar joints that are not filled completely.

Your wall leaks, I'll wager, are most likely originating at the vertical joints between many of the brick. Bricklayers call these head joints.

Because of the way bricklayers butter the one side of a brick, these head joints are susceptible to leaking. One side of every brick has got this weakness.

The bricklayers often cut away the bed, or horizontal, joint mortar as they set the brick to the string line. This mortar has already lost some of its valuable moisture from laying on the previous course.

The bricklayer then takes this scraped mortar and puts it on the end of the brick he just laid. He does it at an angle and only a small amount of the mortar contacts the side face of the brick. The mortar makes a less-than-desirable bond with the brick.

Mythical Mortar

The quality, type, and moisture content of the mortar is a critical factor in preventing brick veneer wall leaks. The mortar for a brick veneer house needs to have a high lime and low cement content.

Do you recall the great line written by J.R.R. Tolkien in his book The Fellowship of the Ring? It was said by the character Galadriel, 

And some things that should not have been forgotten were lost. History became legend. Legend became myth. And for two and a half thousand years, the ring passed out of all knowledge.

This applies directly to hydrated lime. It's rapidly becoming a myth in the building industry. Older brick buildings, those built prior to 1900, almost exclusively used hydrated lime mixed with sand instead of Portland cement.

hydrated lime

This is excellent hydrated lime. It's a fine white powder and it's going to look great on your home. CLICK THE IMAGE TO ORDER SOME RIGHT NOW.

The lime in the mortar, through the years, can actually heal tiny cracks that might develop between the brick and mortar. Hydrated lime is an amazing material to mix with sand to make mortar.

Mortar that is too wet or has too much cement can shrink as it dries. This shrinkage can produce tiny cracks that allow water to easily penetrate the wall.

Solid Masonry Construction

Older brick houses usually were never a brick veneer. Often the brick walls were two, three and sometimes four brick thick bonded with lower-strength, high-lime content mortar.

The inner courses of brick were very soft and absorbent. Rainwater would collect within the wall and then be released to the atmosphere once the storm passed.

Brick Veneer - Hidden Waterfalls

Modern single-thickness brick veneer walls deliver the wind-driven rain within a matter of minutes to the wood frame system just on the other side of the brick. This water needs to be collected and transported immediately to the exterior of the house.

CLICK HERE to get FREE & FAST BIDS from local painters that can spray on special silane-siloxane water repellents.

Flashings

This is accomplished by installing flashing materials at the base of the brick wall, above all doors and windows, and below all window and door sills. The flashing must be continuous and needs to be made from a material that allows joints to be permanently sealed.

High-quality brick-veneer flashings can be made from modified asphalt and high-quality polyethylene and copper/asphalt combinations. Do not use the low quality "garbage bag" or PVC type plastic. It's useless.

Cover All Wood

The exterior of your wood-framed walls should also have been covered with a water-resistant membrane. Overlapping horizontal pieces of time tested tar paper will work.

However, there are many air and moisture barriers that will do as good a job or better at preventing the leaking water from contacting your wood framing. These moisture barriers must be installed so they lap over the wall flashings.

Weep Holes

Weep holes at the bottom of all walls and at the top of windows and doors need to be no less than 4 feet on center. Two-feet on center is preferable.

The cavity behind the lowest courses of brick needs to be free and clear of mortar droppings. This allows leaking water to easily escape through the weep holes.

Mortar Catch

An ingenious saw-toothed plastic netting can accomplish this task easily. It fits behind the first few courses of brick.

Silane-Siloxane Water Repellents

Your leaks may be able to be stopped with the application of high-quality water repellents. These materials contain special chemicals called silanes, siloxanes, or a blend of the two. CLICK HERE to get a fantastic one that will do a great job.

silane - siloxane water repellent

This is a magnificent silane - siloxane water repellent that soaks into concrete. CLICK THIS IMAGE NOW TO ORDER IT.

Examine your brick walls. Look for tiny hairline cracks in the vertical joints. Remove and install new mortar if you find obvious water entry points. After the joints dry, apply the water repellents according to the manufacturer's instructions.

Leaf Blower Secret

A second application may be necessary and it usually needs to be applied within minutes of the first coat. It helps to use a backpack leaf blower operated by a helper while you apply the water repellents.

The blower drives the repellent deep into the brick and mortar. The blower blasts the wall immediately after you apply the liquid.

If this does not solve your leak problem, I'm afraid that your only solution might be to re-install the brickwork properly.

CLICK HERE to get FREE & FAST BIDS from local painters that can spray on special silane-siloxane water repellents.

Column 198

Column and Beam Construction

column and beam construction

Column and beam constructon is in a home I built in Amberley Village, Ohio. The columns are poured concrete with steel reinforcing. The beams are 10 inches tall and weigh 31 pounds per linear foot. You can span up to 14 feet with these! © 2018 Tim Carter

Column and beam construction is common in most homes. Beams can be as short as 3 feet or as long as 16 feet. Don't guess sizes. Consult with a professional engineer.

Revised February 2018

Column and Beam Construction TIPS

Week In Week Out

Every week I get an email from a homeowner who wants to tear down a wall or she/he's contemplating some other structural modification to their abode.

In every case they want me to wave my magic wand and size a beam for them. If they only knew how complex beams and columns were!

My answer is ALWAYS the same. Hire a local structural engineer. You do this to prevent a collapse!

Column And Beam Construction Video

Here's a great video showing decorative wood columns and beams. Simple ones are made with 2x4s and 2x12s!


Related Links

Removing a Load Bearing Wall - Check Plans First

Column to Beam Connection Is Important - Don't Rely on Nails

Beam Installation Basics

Headers, Beams and Wall Sensors


Complex Math

The reason for this is simple. For one thing, each situation is different. The loads above the beam location can be significant or there may be very little load. Just about every situation is different.

Structural engineers need to look at your home or plans and calculate all the loads that will be carried by the beams. Don't underestimate the complexity of this.

Then they have to decide what material to use that will support the loads. It's not easy.

You don't just email someone and expect an answer.

CLICK HERE to get FREE & FAST BIDS from local structural engineers.

Columns = Concentrated Loads

The column locations at each end and under the beam are critical as well. Columns concentrate beam loads. These concentrated loads must rest on solid materials.

A rookie homeowner often forgets this vital aspect of beam construction.

For example, a rookie may nail two or three studs together that support a giant double 2x12 header beam.

These vertical studs are nailed to a wall bottom plate but there's nothing but air under the OSB, plywood or 1x6 flooring.

Over time the bottom plate sags and can, in the worst cases, punch through the bottom plate and floor.

column and beam construction

Here's a great shot of a triple laminated beam. The columns supporting it are solid wood 2x6's. You can see them packed together on the far wall and the corner where the two exterior walls meet. What we can't see in the photo is if the carpenter put extra blocking under the exterior bottom wall plate so the load is transferred to the poured, or cast, concrete foundation wall. The floor joists for the second floor will hang off this beam using galvanized joist hangers. This photo also shows three other beams in the exterior walls. They're made from 2x10s and pieces of OSB. They're over each window or door opening in the photo. © 2018 Tim Carter

Continuous Load Path For Beams & Columns

Structural engineers and great builders know all about continuous load pathways. 

This is a fancy phrase for creating a solid bearing pathway from the bottom of the beam all the way down to the soil under the footing of the structure.

This pathway can be complex and circuitous where columns rest on top of beams below. Believe me, you never want to guess so always hire a structural engineer to create your structural drawing of what needs to happen so your home doesn't collapse.

Beams Galore

There are many different materials that can be used to create beams. Here are a just a few common ones:

  • solid wood 2x material
  • engineered lumber of all sorts
  • steel
  • steel sandwiched with wood 2X material
  • steel-reinforced concrete
  • brick and stone arches

Bearing Wall Video

This is a video I shot inside my New Hampshire home. I was lucky enough to have halfway-decent plans that the previous owner gave me at the closing.

I didn't build the house in New Hampshire. But watch this video to see how beams and columns can be hidden and partially exposed in a home.

Pay close attention to the blueprints part of the video. Count your lucky stars if you have pages like I did!!

Floor Joists

A simple beam that most people forget about is a traditional floor joist. The normal floor system you may have in your home is simply a collection of beams that span between two points.

Windows and Doors

Over each exterior window and door in your home you'll almost always have a beam. It might be as small as two 2x6s nailed together with a piece of 1/2-inch oriented strand board (OSB) or plywood in between them. Or, it could be three long 2x12s spanning 12, or more, feet!

Beam Span & Species Tables

Beams are complicated beasts. If you decide to use lumber, not all lumber will support the same weight for a given size and species of lumber.

Douglas Fir lumber is stronger than hemlock. There are vast beam sizing tables that allow you to size lumber according to its species and grade. Leave this to professionals. Don't try to do it yourself.

CLICK HERE to get FREE & FAST BIDS from local structural engineers.

Different Beams

The last home I built for my family contained three different types of beams.

It had:

  • 10-inch-high W10 x 31 steel basement I-beams
  • Laminated veneer engineered lumber beams
  • 2x sandwich beams over windows and doors

Laminated Lumber

Laminated lumber beams are made by gluing 2x material on top of one another. Imagine stacking 10 or more 2 x 6's on top of one another.

These beams can be made to enormous sizes and can often be seen as architectural beams in public buildings. St. Vincent Ferrer church in Cincinnati, Ohio had massive laminated beams that supported a massive roof.

Solid Timbers

You can also use a giant sawn timber as a beam. These are found in post and beam construction you'd see in old barns or a simple log home.

Lally Column Video

Here's a video I shot at a new home in New Hampshire. It shows a steel column supporting a wood beam.


My 10-Inch Beams

That is why I chose to use 10-inch-high steel beams in my basement. I don't have steel columns every nine feet in my basement. My steel beams span 15 feet or more without support.

To make sure I didn't hit my head in the basement, I also poured nine foot four inch high foundation walls. This gives me plenty of clearance under my steel beams.

Flitch Beams

Imagine taking a 1/2 inch steel plate and putting it between two 2x10's. This is a flitch beam. You get the benefit of working with wood but the strength of a steel I-beam.

The steel comes from the fabricator with 9/16th-inch holes punched in it. You trace the hole locations onto the 2x material that will be on either side of the steel.

Taking your time to drill countersink holes, you create pockets to install carriage bolts with washers and nuts. You make it all work so the bolt ends are flush with the surface of the 2x material.

Box Beams

You can make a simple box beam by taking plywood and nailing and gluing it to 2x4's or 2x6's. This is called a box beam. I don't like using these unless an engineer calls for it.

Steel is King for Columns & Beams

The strongest of all beam materials is steel. You can span greater distances given the same beam height using steel in lieu of any other material.

The taller the steel beam, the longer distance it can span between columns.

All too often I see small 8-inch-tall steel beams in the basement of homes with steel columns every 8 or 9 feet. This isn't necessary if you go with a taller beam.

CLICK HERE to get FREE & FAST BIDS from local structural engineers.

Column B224

Brick Water Repellents

Brick water repellents

Brick water repellents look like this just after applying. This shine goes away completely once the silane/siloxane water repellent dries.

"These houses and commercial buildings often were constructed using two or three layers of brick or block behind the face brick you'd see on the outside of the wall. The brick in each layer was different."

Brick Water Repellent Checklist

DEAR TIM: I have a problem with my brick veneer house. It develops leaks during wind-driven rains. I can't seem to locate the source of the leaks. I purchased a brick sealer to solve my problem.

I saw water repellents at the store, but the salesperson said they don't work as well. What do you think? B. N.

DEAR B. N.: Slow down! Do you still have the receipt for the sealer? You may need it.

The sealer you purchased may actually harm your brick house. A water repellent may be a better choice.

Are Brick Leaks Normal?

The leaks you're experiencing are normal. Brick walls leak water and are not waterproof. 

Unfortunately, many homeowners think brick walls are waterproof.

Can Brick Absorb Water?

Bricks and mortar have a great capacity to absorb water. Both contain tiny passageways that actually suck water into the wall. Water can also enter through tiny cracks between the bricks and mortar.

You can build a brick wall that does not transfer water to the inside of a home. The way to do this was discovered hundreds of years ago.

CLICK HERE to get FREE & FAST BIDS from local painters that can apply the special water repellents.

Did Old Brick Buildings Leak?

Old brick buildings did leak water, but the builders knew how to construct them so the water didn't damage the interior of the building.

Water leakage into older homes is rarely noticeable. I'm talking about old brick buildings built before 1900.

How Were the Old Brick Buildings Constructed?

These houses and commercial buildings often were constructed using two or three layers of brick or block behind the face brick you'd see on the outside of the wall. The brick in each layer was different.

The outer brick that was exposed to the weather was fired longer and hotter in the brick kiln. This created a hard brick that had a low water absorption rate.

Were the Hidden Inner Brick Softer?

The inner, hidden, courses of brick in the wall were softer. They were not left in the kiln as long and were not as hard. They soaked up water like a sponge.

When it storms and wind blows rain against the brick wall the water drops are driven into the wall by the weight of the water and the wind pressure. Usually the water passes where the vertical mortar touches the brick.

The soft brick could absorb lots of water.

What Happens to the Water After a Storm?

When the sun appears after the storm, the water is released back into the atmosphere the same way it came into the brick. The breeze and sun pull the water out of the brick like a tow truck pulls a car out of a ditch.

What is Brick Veneer?

Brick veneer is a non-structural layer of brick on the outside of a building. It's only one wythe thick which is why it's considered a veneer.

In your case, you only have one layer of brick. Once this layer has been breached, the water finds its way into your house.

How Bad is the Water Leakage on Brick Veneer?

If you could look behind a brick wall that's being lashed by a wind-driven rainstorm, you'd see water flowing down the backside of the wall. It's one of the downsides to having only one layer of brick.

Where Does Most Water Enter Brick Veneer?

Water may enter through cracks or small holes in the mortar. Pay particular attention to the small vertical (head) joints between each brick. This is the most likely place where water is entering.

The method most modern bricklayers use to butter the one edge of a brick is to cut off the mortar from the bed joint of the brick they just laid and use this to butter the end of the same brick.

This does not fill the vertical joint completely and the bond between the mortar and brick is very narrow because the moisture has already been sucked from the mortar after it was cut off the bed joint.

Are the Vertical Head Joints Filled Solid?

Rarely are these vertical joints filled solid with mortar. When the bricklayer spreads mortar over the tops of the course of brick to lay the next course the mortar often bridges the vertical head joint below. There's no guarantee the joint fills solid with mortar.

Are Horizontal Bed Joints in Brick Solid?

The horizontal joints (bed) in your brick wall are usually filled in solid and resist water penetration. If you find small holes or cracks, repair these before applying any coating.

mortar joint

This is a closeup photo of a horizontal mortar joint between two layers of brick. Note the tiny cracks where wind-driven water can seep into the wall. (C) Copyright 2018 Tim Carter

What are the Types of Brick Coatings?

There are two categories of clear brick coatings:

  • film-forming sealants
  • penetrating water repellents

Film forming sealants create a continuous barrier on the surface of the brick and mortar. They should be avoided if your brick experiences cold weather.

They block the tiny passageways in the brick and mortar. Not only will they stop water from getting into the brick, but they also stop water from getting out. These compounds frequently contain acrylics, mineral waxes (paraffin), urethanes, and silicone resins.

CLICK HERE to get FREE & FAST BIDS from local painters that can apply the special water repellents.

How Do Brick Sealer Water Repellents Work?

Brick sealer water repellents work in a different way. These products are designed to penetrate deeply into the brick and mortar. Some can reach as far as 3/8 inch past the surface of the brick.

They coat the insides of the tiny passageways in the brick and mortar. However, the passageways remain open allowing the brick and mortar to breathe. These water repellent contain silanes, siloxanes, or a blend of these chemicals.

What is the Best Brick Sealer?

You want a silane-siloxane water repellent brick sealer that's soaks into the brick and mortar. CLICK HERE to get a great one.

silane - siloxane water repellent

This is a magnificent silane - siloxane water repellent that soaks into concrete. CLICK THIS IMAGE NOW TO ORDER IT.

Film forming sealants can cloud and haze over. They can contribute to brick spalling (flaking) in colder climates. Water repellents rarely discolor brick.

Because they soak into the brick and mortar, sunlight has a tough time breaking them down. Check the label on your product to see what chemicals it contains. If it's a film-forming sealant, think long and hard before applying it to your brick.

What is the Best Way to Apply a Brick Sealer?

The best way to apply a brick sealer is with a helper and a backpack leaf blower.

Read the label on the water repellent as they often say once they cure you can't put on a second coat. Some can cure in as little as 15 or 20 minutes.

brick sealer

The brick sealer has been applied on the left side of the wall. You can clearly see the wet edge. Once the water repellent is applied and it dries, the brick look just like they did before you started.

How Many Coats of Brick Sealer Should be Applied?

Many of the products recommend two coats of repellent so you can't get too far ahead of yourself. If the first coat dries, or cures, it will not allow the second coat to penetrate into the mortar joint.

Why Should I Use a Backpack Leaf Blower?

You use the backpack leaf blower to simulate what a fierce storm does. The wind pressure forces rain into the brick. Allow the leaf blower to drive the silane-siloxane water repellent deep into the brick wall. As you spray, your helper blows the repellent into the wall right behind you.

CLICK HERE to get FREE & FAST BIDS from local painters that can apply the special water repellents.

Column 095

Stair Trim Molding

Stair Trim Molding

Look at this detail. This is my actual main staircase. The trim molding on the sloping stringer was cut off the top of a piece of baseboard. You can see how the stringer of the staircase appears to just bend over the front edge of the landing and continue as a piece of baseboard on the landing. © 2017 Tim Carter

Stair Trim Molding TIPS

DEAR TIM: I have wasted about 25 linear feet of solid-wood baseboard trying to get perfect cuts. The problem is not in the rooms, but as I try to extend the trim moldings up the stairs of my house.

No matter how I set my miter saw, the angles I cut do not work. Surely there must be an easy way to determine what the angle must be. How do you do install stair trim moldings? Brian K., Levittown, NY

DEAR BRIAN: With the current cost of solid-wood trim going up instead of down, your failed carpentry experiments are death on a stick. You simply can't afford to make mistakes when using expensive trim moldings.

The sad fact is the answer to your dilemma was staring right at you the entire time. Your first piece of scrap trim molding, a pencil and 15 seconds of time would have produced an exact template of the angles that needed to be cut.

CLICK HERE to get FREE & FAST BIDS from local finish carpenters that can show you how to do this.

No Need For Geometry

Cutting stair trim moldings at precise angles can, and does, bring back memories of failed high school geometry tests to many a homeowner who tackles difficult carpentry tasks on an irregular basis.

Perhaps the most frustrating thing is the mental picture one often has of how the trim looks like in another person's house, but not being able to determine just how those simple angles are duplicated.

If you go back to the stairs and look at the flat landing and the stair stringer along the wall, you'll note that the top edge of the sloping stair stringer and the horizontal floor meet at a point.

The bottom of each of the two pieces of trim will indeed meet at this precise point. But the meeting point of the top of the trim pieces is shrouded in mystery.

Custom Trim Moldings Video

You may not realize it, but you can get molding custom made. If you don't like the trim selections at the lumber yard, and big-box home centers have the WORST selection, then consider having custom trim milled for you home.

WATCH THIS VIDEO:

Trace the Trim

To determine where the tops of the two trim pieces meet up on the wall, you need to use a small piece of the wasted trim you generated. This stair trim molding can be as little as one-foot long to serve as the tool you need.

Sloping Steps Baseboard

I've already drawn the pencil line that is parallel with the landing using the piece of white sloping baseboard you see as the guide. The white baseboard is now in place on the stringer and you can see how the top crosses the horizontal pencil line. Trace the top edge of the baseboard now so the two pencil marks cross one another. Remove the baseboard and draw a line from the top intersection point of the two lines down to the point on the stair stringer where it transitions from flat to sloped. This line represents the miter joint between the two pieces of finished trim. © 2017 Tim Carter


Place the piece of trim on the flat landing and extend the bottom of the trim 3 inches over the point where the sloping stringer meets the landing. Use a very sharp pencil and trace a line along the top of the entire piece of scrap trim.

Now place the trim on the sloping stringer and slide it up so the bottom of the trim projects up past the flat landing. Do so until the top of the trim intersects the pencil line you just drew on the wall. Use your pencil to trace a second line along the top of the sloped piece of trim.

Draw the Miter

Because the top and bottom of the stair trim are parallel, the two pencil lines you created with the trim will be parallel with the sloping stringer and the flat landing.

Use a straightedge to connect the point where the two pencil lines meet to the point where the top of the sloped stringer meets the flat landing. This angled line represents the cut line you will create on both pieces of trim.

You don't need a fancy angle finder to determine the angle. I prefer to cut test pieces of trim and see how they fit before transferring the angles to long pieces of expensive trim.

Mark & Cut Test Pieces

Take two pieces of the scrap trim and cut each one about one-foot long. Place one piece on the sloped stringer and slide it up the stringer until the tip of the trim just touches the intersection of the two pencil lines.

Hold the trim piece in this position and carefully make a mark on the bottom of this piece of trim where the sloped stringer meets the landing.

Place the piece of trim flat on the floor and use the straightedge to create a line across the face of the trim from the tip of the trim to the mark you just made on the bottom of the trim.

Place the trim in your miter saw so it lays flat and rotate the blade until the blade is parallel with the pencil line. Turn on the saw and make a precise cut along this line.

CLICK HERE to get FREE & FAST BIDS from local finish carpenters that can show you how to do this.

Check out these obtuse angle cuts on the same stair trim molding at the bottom of the staircase where the stairs dive into the first floor. © 2017 Tim Carter

Do this exact same exercise with the other piece of scrap trim as it sits on the landing. Once these two pieces of trim are cut and placed in position, the two angled cuts should meet perfectly and no filler should be needed at the joint. If you do this successfully, consider yourself a journeyman carpenter!

Obtuse Too

This method of bisecting the angle works in just about any situation where two straight lines meet at any given angle. In the case of an ascending set of stairs and a landing, the intersection produces an obtuse angle that creates short cuts across the face of the trim molding.

But the opposite happens on the small triangular wall where the stairs dive into the first floor. In this situation the baseboard trim and the matching trim on the underside of the stringer, not the top, create an acute angle.

The method of determining the cut angle is exactly the same as you attempt to figure out on the wall where the tops of the two moldings intersect.

Long Cuts Work

The cut angle across the face of the trim molding can be very long and one would think the two pieces of trim would never meet precisely. But if the angle is calculated correctly, the cuts are perfect and the resulting cuts produce a tight fit. If you don't believe me, stop by for a visit and look at my entrance hall staircase.

CLICK HERE to get FREE & FAST BIDS from local finish carpenters that can show you how to do this.

Column 557

Removing Ceramic Tile

removing tile floor

Removing ceramic tile and removing tile floor is easy with the right tools. © 2018 Tim Carter

"The first thing to do is stop hitting the tile with a hammer... Each hammer strike creates conchoidal fractures in the tile. The resulting shards have smooth curved edges that are just like a chipped-flint arrowhead and come at you like a bullet."

Removing Ceramic Tile TIPS

  • Do NOT use a hammer removing tile floor
  • Chip off tile at a low angle
  • Stiff wide putty knife superb
  • WATCH Tile Removal VIDEOS Below
  • CLICK HERE to Get Tim's FREE & FUNNY Newsletter!

DEAR TIM: It's time to remove the 18-year-old ceramic tile in one of my bathrooms. The tile is a smaller octagonal tile that is adhered to a cement board which is nailed to my wood subfloors.  I need to know how to remove tile from a wall.

I tried breaking the tile with a hammer, but the tile shatters into what look to be pieces of glass.

Is there a way to easily remove the tile from the cement board? What is the fastest and easiest way to remove the ceramic tile? What about wall tile? Debbie P., Wilmington, NC

Related Links

Remove Grout from Ceramic Tile

Repair Wall After Tile Removal

DEAR DEBBIE: I don't know if there is a best way to remove the ceramic tile. Each tile reacts differently to force, and the different types of adhesive can make the chore difficult to nearly impossible.

Over the years, I have taken up more than my fair share of ceramic tile, and there are several tricks that I have learned. I've got two great wall-tile removal videos for you below!

Free & Fast Bids

CLICK HERE to get FREE & FAST BIDS from local handymen who can remove ceramic tile for you.

Should I Use A Hammer Removing Tile Floor?

No, don't use a hammer when removing the ceramic tile.

The first thing to do is stop hitting the tile with a hammer. Based upon your description of the tile, it sounds as if you are dealing with porcelain tile. Porcelain tile is extremely hard and has a very high quartz content. These characteristics cause it to react as if it were glass. Each hammer strike creates conchoidal fractures in the tile. The resulting shards have smooth curved edges that are just like a chipped-flint arrowhead and come at you like a bullet. These edges can be razor sharp, so be extremely careful.

What are Good Tile Removal Tools?

The following is a list of good tile removal tools:

Click the image below to BUY all, or some, of the tools in the above list.

Ceramic Tool List

CLICK THIS IMAGE NOW TO ORDER ALL THE TOOLS YOU NEED TO DO CERAMIC TILE.

How Do You Remove Tile From Cement Board?

There are a few ways to remove tile from cement board. Watch this video for an easy way.


You're in luck that your tile has adhered to cement board. This will make the job somewhat easy.

Many years ago, ceramic tile was commonly adhered to fresh concrete that was poured between the floor joists of houses.

The tiles were actually mortared to the concrete mix, and once cured, the tiles and concrete became one unit. The only way to remove this matrix of material is to use a four-pound hammer and lots of muscle power. It's miserable work.

How Do You Remove Cement Board?

You can use a flat spade to pry up cement board. You can also use a wicked tool that resembles a trident. Watch this video to see the technique of driving the tool under the cement board.


If you are trying to remove the tile so as to save the cement board, it is a waste of time in my opinion. It is grueling work to try to remove ceramic tile in an effort to salvage inexpensive cement board.

Get this Honey Badger Demolition Fork you see in the video above. CLICK or TAP the image below to have it delivered to your home.

honey badger demo fork

CLICK or TAP here or the image to have this Honey Badger delivered to your home. 

I feel it is a far better idea to remove the cement board and tile all at the same time. You want to start removing tile where the ceramic tile ends and a different flooring material, such as carpet or hardwood flooring, begins. Don't try to start this job in the middle of the ceramic tile floor.

How Do You Get the Tool Under the Cement Board?

To remove the cement board and tile at the same time, you may have to remove some of the tile and cement board separately at first. I use the small hammer and putty knife for this task. Individual ceramic tiles come off a floor or wall with less effort if you remove the grout surrounding the tile.

The edge of the stiff putty knife can be used to pulverize and remove the grout. You can also use small electric tools with special grinding wheels to do the same thing.

CLICK HERE to get FREE & FAST BIDS from local handymen who can remove ceramic tile for you.

What is the Best Angle When Removing Tile Floor?

It's best to drive a tool under the tile at a low angle.

Once the grout is removed from around a tile, try to pop the tile off the cement board by driving the stiff putty knife under the tile at a low angle. The blade of the putty knife should be nearly parallel with the floor. Strike the end of the putty knife gently with the hammer.

remove tile floor

This is an excellent bent-blade 3-inch putty knife. It's got a chiseled edge to get a bite right away. CLICK THE IMAGE NOW TO BUY IT.

The tile will either break in several pieces, or it may pop off all at once. Try to remove an area of tile from the floor that is about 8 inches wide and perhaps 2 inches from the flooring material that touches up against the tile.

How Do You Create A Hole in Cement Board?

Strike the cement board with your hammer to pulverize it. It will take a few hammer blows to achieve this, but the cement board will disintegrate. Remove the debris so the wood floor is exposed. I prefer to use a wet-dry vacuum to get up all of the small debris.

Removing Ceramic Tile With a Garden Spade

Take the flat garden spade and drive it between the wood subfloor and the cement board. Try to get about 6 inches of the spade under the cement board. Lift up on the handle to lift the cement board.

removing ceramic tile

You can't get a better garden spade. It's got an arched back so it won't bend. CLICK THE IMAGE NOW TO BUY IT.

Move the spade left or right if possible to start to pop up the cement board from the wood subfloor. Once you get the cement board to move up, it will readily detach from the wood subfloor as you drive the spade farther under the cement board and tile.

The roofing nails used to attach the cement board to the wood subfloor will be somewhat problematic. You will feel them as you try to move the spade under the cement board. When this happens, move the spade left or right to try to bypass the nails.

Are Cement Board Nails Easy to Remove?

Yes, cement board nails are easy to remove if the nails have a smooth shank.

They will offer little resistance to lifting forces. The trick is to create a gap between the cement board and the wood subfloor. Once you can get the cement board to lift up, it is only a matter of moving the spade farther under the cement board and then using the spade as a lever to pry the cement board off the wood subfloor.

If the tile contractor screwed down the cement board and used thinset under it to fill hollow spots, you're screwed. You'll be beating it all out with a 4-pound hammer.

Wall Tile Removal Videos


CLICK HERE to get FREE & FAST BIDS from local handymen who can remove ceramic tile for you.

Column 620

Tape Measure Markings


various tape measures

Here are several tape measures. You can see the vast difference in markings. Some are easier to read than others! Photo credit: Tim Carter

Tape measure markings are black lines that represent fractions of an inch. The length of the line gives you a clue as to the fraction. Special markings are for different on-center measurements.

Revised February 2018

Tape Measure Markings TIPS

DEAR TIM: I'm just starting to get into building and remodeling as a do-it-yourselfer. Now that I'm using a tape measure, I'm having some difficulty.

Perhaps I should have paid more attention in math class in school. Can you tell me about the markings on tape measures, what they mean and about all the special markings?

Also, every tape measure I have and see in the store seems to be defective. The hook on the end is loose on all the tapes. The manufacturer is not tightening the rivets enough. What other tips do you have about using tape measures? Craig S., Billings, MT

Related Links

Measuring Using a Builders Transit Level - Cool Tool VIDEO!

Laser Level Measures Automagically - One Person Is All You Need - GREAT VIDEO

Free & Fast Bids

CLICK HERE to get FREE & FAST BIDS from local carpenters if you still can't figure out a tape measure.

DEAR CRAIG: I've got some sobering news for you. As you delve deeper into building and remodeling, you're going to really regret not paying more attention in all your math classes, especially geometry.

Math skills are very important. Fortunately, it's never too late to master mathematics. If you possess the passion to build and remodel, you'll get up on the math learning curve very fast.

Tape Measures Look Alike But Differences

I've been using tape measures for so many years that I've had the great fortune to see some that are worthless and others that are marvelous tools.

The best thing is in the past few years I've seen more improvements in tape measures than I've seen in the previous thirty-five years combined! It's hard to believe you could improve a tape measure, but believe me a few companies have really done an amazing job.

Fractions And Line Length

First, let's discuss the common markings on a tape measure. Most tape measures I use in carpentry and building have black lines at a 90-degree angle to the edge of the tape measure in between each of the inch markings.

These lines are different lengths to help you differentiate between them and to help you understand what they mean.

Tape Measure Close-up

Look closely at the tape at the bottom. See the markings to the left of the 6-inch mark? Those are 32nds of an inch!

The longest of these black lines indicates the halfway point between each inch. It's the half-inch mark. So if you want to cut a board 3 and ½ inches wide, you'd make a crisp pencil mark on the board at the longest line in between the 3 and 4-inch markings on the tape measure.

Tape Measure Markings Video

Watch this video made around the year 2004, that's still relevant today! My voice has changed!!!

CLICK HERE to get FREE & FAST BIDS from local carpenters if you still can't figure out a tape measure.

1/4-Inch Mark

The next longest lines on the edge are the quarter-inch markings. Since the half-inch mark is longer than these, it overlaps one of these three markings in between each of the primary inch marks.

If you start at the 1-inch mark and count the quarter-inch markings, including the half-inch mark, you'll discover you get to four when you finally get to the 2-inch mark. Thus, these marking divide 1 inch of length into four equal parts, each one-quarter inch long.

klein-tools-tape

This is the great tape measure I have that has the fractions marked on it if you need help. It's VERY EASY on the eyes. CLICK THE IMAGE NOW TO ORDER ONE.

1/8-Inch Mark

The same is true for the next two smaller markings on the tape measure. The next smaller line below the quarter-inch mark is for one-eighth, and the shortest line represents the one-sixteenth-inch mark.

Friendly Tape Measure With Fractions Marked

I realize this may be confusing, but fractions are the standard we use here in the USA. To make this easy for you, some tape measures along one side of the tape measure have the actual measurement called out by each line. I have a tape measuretape measure marks on my desk that has 1/8, 1/4, 3/8, 1/2, 5/8, 3/4, and 7/8 fractions right above each line! You may want to invest in this tool.

tape measure markings

If you can't remember fractions, some tapes call them out for you.

Point Of No Return

Some tape measures have markings that divide each inch into 32nds of an inch. You'll discover the markings are so fine and close together that it's tough to determine where you are. Most tapes that have this only do it for the first few inches on the tool.

16-Inch Spacing

As you extend the tape measure, you'll probably see the numbers 16, 32, 48, 64, 80, 96, etc. in red. The red indicates 16-inch-on-center spacing.

This is a common framing spacing for wall studs, floor joists and common roof rafters. If you decide to space framing at 24-inch centers, the red marks will be at every other foot marking on the tape measure.

Tape Measure Markings Mystery Black Diamond  

Many people wonder about the mystical small black diamond markings or black triangles found at 19 and 3/8 intervals on the tape measure. These are handy markings if you want to achieve equal spacing for five framing members per every 8 feet.

If you decide to use 16-inch-on center spacing, you'll end up with six framing members for every 8 feet. If you space things at 24-inch centers, you'll have four framing members for each 8 feet. Some carpenters like to have five framing members per every 8 feet so the sheathing over the framing is less spongy and stiffer.

Hook Slop

The hook end of your tape measure is supposed to wiggle a little bit. That's not a defect. The amount of movement should equal the thickness of the hook end of the tape measure.

This is done so you get an accurate measurement when you're trying to determine the exact measurement in between two fixed objects.

When you get the measurement pushing the tape hard in between the objects and then take the tape and pull it across the board, the movement of the hook will produce the correct measurement. If the hook doesn't move, you'll discover your cut piece will always be too short.

IMPORTANT USE TIPS:

The top tips for tape measures are simple. Keep them clean and free of debris. When retracting a tape measure slow it down so the hook doesn't come to an abrupt stop.

Check the hook end of the tape measure before working to ensure it's at a 90-degree angle to the actual metal tape. If you drop the tape and the hook gets bent, you'll discover you'll be getting inaccurate cuts if someone else is giving you measurements!

What happens if the hook isn't kept clean? Well, errors happen! Read about my issue in the August 9, 2009 Newsletter! Oops!

CLICK HERE to get FREE & FAST BIDS from local carpenters if you still can't figure out a tape measure.

Column 1065


The above is an affiliate link. I get a tiny commission if you purchase this item from Amazon.

Featured: January 29, 2017 AsktheBuilder Newsletter.

Mold and Mildew on Lumber

mold and mildew

The horizontal collar tie under the roof rafters is black with mold and mildew. Stain Solver oxygen bleach will remove it with ease. CLICK THE PHOTO now to order Stain Solver. © 2017 Tim Carter

Mold & Mildew on Lumber TIPS

DEAR TIM: I'm having a new room addition built and while inspecting the framing lumber I noticed black mildew and mold on different pieces of wood. One joist is totally black with it. Is the structural integrity of the wood compromised? Should the lumber be replaced? What causes this to happen as some of the lumber looks perfect? What's a sensible course of action at this point? Tracy K., Chicago, IL

DEAR TRACY: You're not alone. Many homeowners experience mold and mildew on their lumber as houses are built or room additions are constructed. The good news is the lumber is going to be fine and there's rarely any damage to the wood. If it's just surface mildew, it will clean off using a certified organic oxygen bleach like Stain Solver.

Wood rot can weaken wood, but it's easy to tell if wood is rotten. What's more, wood will not rot in the short time it takes to build a new home or room addition. It typically takes years for wood rot to advance.

CLICK HERE to get FREE & FAST BIDS from local cleaning companies that can remove mold and mildew.

Any Lumber Anytime

There are many reasons why the black mildew and mold appeared on the lumber. Understand that it can happen to just about any lumber any time.

Lumber that's treated with chemicals that contain copper or borates are less susceptible to mold and mildew growth because these elements and chemical compounds are natural biocides. But mold and mildew can, and does, grow on treated lumber.

Spores Everywhere

The mold and mildew spores are just about everywhere. They're on the wood surfaces or can be transported there by wind and rain. Once in place, all they need is water to start growing and flourishing.

Sugar aerosols broadcast by trees and bushes is food for mildew. Dust is also a food. It's nearly impossible to keep the lumber clean as you build. Some lumber provides plenty of food for the mold and mildew to grow rapidly.

Mildew Within 48 Hours

When you see the black mold cover wide areas of lumber, usually this happens because the wood got wet and stayed wet while it was being stored. If it's warm and humid, the growth of the mold and mildew can be rapid.

Mildew can start to grow in as little as 48 hours if conditions are favorable.

Construction Food & Drink

Spotty outbreaks can sometimes be traced to food or liquids that are food for mildew or mold. For instance, if you shake up a bottle of soda containing sugar or high fructose corn syrup and spray it randomly on the lumber, you'll probably see black spots appear in short order wherever the liquid contacted the lumber and dried.

CLICK HERE to get FREE & FAST BIDS from local cleaning companies that can remove mold and mildew.

Test For Rot

You can test for structural integrity yourself. First make sure the lumber is dry. Once the room addition is under roof, the wood should dry pretty rapidly unless you're in a very long damp spell.

Take an 8-penny nail with a sharp tip and see if you can push it into the wood with just your hand. If you meet immediate resistance, the wood is fine. If the nail, using hand pressure, penetrates deeper than one-quarter inch, then you could have wood rot.

Stain Solver Cleaner

Oxygen Bleach

Stain Solver is MADE in the USA with USA ingredients that are food-grade quality. CLICK THE IMAGE to order some NOW.

Cleaning the mildew and mold from the wood is a good idea. You don't want it covered up. Cleaning can be accomplished in several ways.

I recommend you use Stain Solver certified organic oxygen bleach mixed with a little bit of liquid dish soap

The Stain Solver is a pure powder Made in the USA with USA ingredients. It dissolves in warm or hot tap water with a little bit of stirring.

Once mixed and all the powder is dissolved, just pour the solution into a garden hand-pump sprayer and squirt it on all the lumber that's got mildew and mold on it.

Allow it to soak for about 15 minutes keeping the lumber wet with the solution the entire time.

Don't worry, the water is not going to harm the wood since it's able to dry rapidly.

Toxic Chlorine Bleach

Chlorine bleach is also very effective at cleaning up the mold and mildew. You can mix a 50-50 solution with regular chlorine bleach and water.

Some people don't do well with the fumes, so be careful. Wear old clothes as the chlorine bleach will ruin dyed fabrics. Wear goggles and gloves when using chlorine bleach or any chemical.

The other issue with chlorine bleach is that any solution that gets on, or near, trees, flowers, grass, bushes, etc. will kill it. Chlorine bleach is very toxic.

Don't Cover It

You do not want to cover up this contaminated wood. It needs to be cleaned before any insulation is installed. Never cover this stained wood with drywall or paneling. Anyone with asthma or other respiratory challenges could suffer from the hidden spores.

If you're building during a wet spell and the builder is trying to move the job along, never allow him to cover up the wood if it's still wet. Trapping water and moisture in wood will cause mold and mildew to grow.

Air Dry Is Fast

It doesn't take long for wood to air dry, especially once the roof is on and there are high-performance vapor barriers in place in crawlspaces and under concrete slabs. Don't be fooled by a builder that says the wood will dry out on it's own in the wall.

IMPORTANT TIP:  Don't allow a builder to apply a vapor barrier on wet lumber. This will trap moisture and mold and mildew will become a huge issue. A vapor barrier traps the moisture in the wall cavity.

CLICK HERE to get FREE & FAST BIDS from local cleaning companies that can remove mold and mildew.

Column 947

Bathroom Remodeling Sequence

Bathroom Remodeling

Bathroom remodeling Project © 2017 Tim Carter

Bathroom Remodeling Steps TIPS

DEAR TIM: I'm adding a bathroom in my house. The framing is complete and I am a little confused as to the order of the rest of the tasks. When do I install the plumbing pipes? Do I tile before or after the tub is installed? When are the vanity and the toilet installed? When do I drywall? Mark O., Chicago, IL

DEAR MARK: Adding a bathroom is tough enough, but the job can be even harder if you goof up the sequence of events from start to finish. Not only can you make things more difficult, there is a chance of ruining completed work that is already in place. As you might expect, there is a logical order that professionals follow to maximize profits and minimize the amount of time spent working.

CLICK HERE to get FREE & FAST BIDS from local bathroom remodeling contractors.

Overall Size

One of the first things that should be done is to determine the proper placement of the bathroom walls. This requires precise planning as many model building codes dictate minimum clearance requirements in and around toilets and bathroom sinks. I hope you have your walls in the right place, if not, you may have to start over.

Toilet Space

For example, a toilet must be centered in a space no less than 30 inches wide. The actual space can be larger, but in no instance can another fixture be closer than 15 inches from the centerline of the toilet.

The minimum distance from the front edge of the toilet bowl to the wall you face while resting on the toilet must be 18 inches or 24 inches depending upon your local code. This same minimum distance requirement applies to the front edge of the sink countertop as well.

Bathroom Remodeling

This is the toilet in my own 1/2 bath powder room. There's plenty of room because the distance between the two side walls is 54 inches. That leaves about 19 inches of space from the edge of the toilet bowl to either wall. © 2017 Tim Carter

Always check your local codes as you create your plans. Apply for your building permit as soon as your plans are complete.

Walls Before Plumbing

If the floor to this new bathroom is constructed with wood floors joists and a wood sub-floor, the walls should be constructed before plumbing drain lines are installed. The opposite is true if the bathroom will be located on a concrete floor.

Slabs and Plumbing

In this case, all below-floor-drain lines need to be installed first. Triple check the pipe placement before you pour the new concrete floor.

The best way to ensure the plumbing pipes are installed in the correct location is to stake out the bathroom wall plates and suspend them in the work area with wood stakes. Be sure this frame is in the right location so the actual walls will be right where the bottom plates of your frame are after the slab is poured.

I'd always drill the holes in these temporary wall plates for the plumbing drains and vent lines that would extend up through the slab after the concrete is dry.

This trick was taught to me by an old master plumber named Ralph Vilardo. It allows you to get the drain and vent pipes perfectly centered on the walls. 

The rough carpenters will hug you!

Keep in mind that some states and local governments only allow licensed plumbers to install drain and water supply pipes. Check your building department to see if you are permitted to do your own plumbing work.

Frame the Walls

The day after the concrete is poured, the walls can be framed. Keep in mind the location of the tub and shower faucet. The center line of the tub or shower should be the center of the space between two wall studs on this wall.

This allows you to install the faucet without cutting a wall stud. When all of the walls and ceiling studs are in place, install the remaining above grade plumbing drain lines and vent pipes.

CLICK HERE to get FREE & FAST BIDS from local bathroom remodeling contractors.

Tub and Shower

It's now time to install the tub or shower. After the tub is in place, keep it covered with heavy drop cloths to prevent scratches and nicks. With the tub in place, complete the installation of all of the water supply lines.

Heating Hardest

The next step is to rough in any heating and cooling ducts, heat piping, and ventilation piping for fans. Realize that HVAC ducts are big. This subcontractor has the hardest time making things work out in tight spaces. After he's done, then all the above rough plumbing pipes should be installed.

Electric Rough Last

Once this is complete, install all of the rough electrical wiring. Make sure that wall-mounted light fixtures don't interfere with medicine cabinets, mirrors, or side walls. This is a common mistake.

Wall sconce fixtures hang out beyond the small rough-in boxes. Be sure the final fixture doesn't cause a conflict with a mirror or swinging door.

Magic Floor Heat!

You've got a one-time chance to make your new bathroom floor toasty warm in the winter. Install an electric radiant floor mat on top of the subfloor.

radiant floor mat

This is the electric radiant floor mat that's heating my man cave ham radio shack. It's a great DIY project. CLICK the IMAGE NOW to order your own NuHeat Electric Floor Heat Mat.

I've got one in my man cave ham-radio shack and it heats the entire room. You'll never have cold feet from icy ceramic tile! 

It's easy to install this mat. Please watch the three videos of me installing the mat in my man cave:


Insulation

Insulate all exterior walls for energy savings and consider insulating all interior walls for sound control.

SECRET TIP: It's a great idea to pack insulation around the underside voids of the tub as well. This will keep bath water nice and warm for extended periods of time.

Cement or Waterproof Board

It's now time to install cement board on any walls around the tub that will be covered with ceramic tile. Consider installing moisture-resistant drywall on all walls. If you never want any problems with this drywall failing, then coat it with clear urethane - two coats - before it's finished.

clear water-based urethane

I've had excellent results with this clear water-based urethane. It dries FAST. CLICK THE IMAGE TO ORDER SOME NOW.

Normal Drywall

Regular drywall can be used for the ceiling. Finish and sand the drywall.

Watch this video to see a few drywall finishing tips. I have MANY OTHER drywall videos here at AsktheBuilder.com. Just type: drywall videos into the search engine here on any page to view them.


If you have a wood floor system, it's now time to install cement board on the floor to support the ceramic tile. You can skip this step if you installed the electric floor mat. You covered the floor mat with thinset to create the solid surface for the tile.

Ceramic Tile

The tile in the tub and shower area should be installed and finished first. Follow that with the floor tile. Tile the entire floor in case someone decides to install a pedestal sink.

Finish Carpentry

When the floor tile grout is dry, install the bathroom door and trim.

Paint Now

Consider painting the room at this point. It's easier to paint with no toilet or vanity cabinet and top in the way.

Install Fixtures

After the paint is dry, carefully install the toilet and sink. Cover the floor with drop cloths during this process to avoid hurting the new tile. Complete the job by installing mirrors, towel bars, and accessories.

CLICK HERE to get FREE & FAST BIDS from local bathroom remodeling contractors.

Column 287