Repair Concrete Cracks

crack repair products epoxy caulk and foam

Repair Concrete Cracks - Which of these products is the best way to patch a crack in a concrete wall? The answer might surprise you. CLICK HERE if you are impatient. Copyright 2024 Tim Carter

Repair Concrete Cracks - Many Bad Options

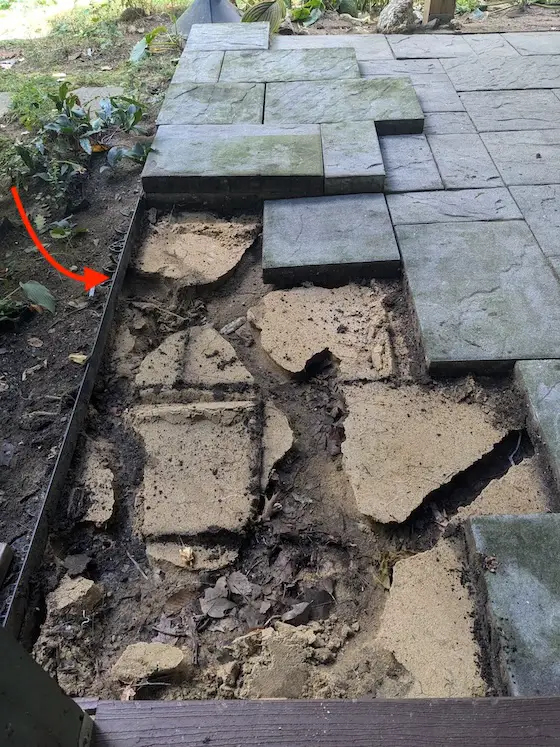
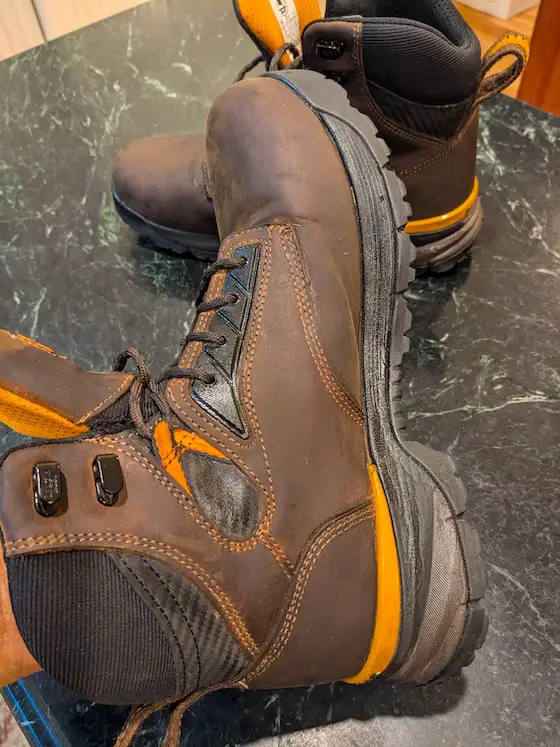
Several days ago I had a texting exchange with a very smart single woman who attends my church. She reached out to me the day before with a photo of water inside her garage and another showing a crack in the garage foundation wall near the water puddle. A rain shower happened the day before after weeks of no rain.

My wife and I have become friends with her. We go out to dinner with this woman every now and then. I’ve done some emergency repair work for her at her condominium. Understand this woman is fearless and possesses a will stronger than titanium. I admire all of these qualities. They come in handy when you have to deal with contractors.

It’s important to realize this woman’s job is reading contracts to discover loopholes that could cost her company money. She’s an expert at making sure contracts are crystal clear. The young lady also helps craft specifications included in these contracts.

I, on the other hand, have thirty years of experience listening to the sorrowful lamentations from homeowners just like you who hired a contractor hoping he would do the right thing. I’ve received tens of thousands of emails from homeowners sharing their dissatisfaction with the work done at their homes. Your local BBB office will confirm that contractor complaints are at the top of their list.

I made the mistake of sending extra information to this busy woman. All she asked me when she sent me the photos was, “What trade do I hire to fix this problem?” I replied, “a handyman.” I should have stopped there. I thought giving her more information would ensure the repair would be done right.

Very early the next morning I decided to write up a short step-by-step summary describing how the crack should be repaired. If you have a crack at your home that does leak water, I feel you should follow my AsktheBuilder.com motto: “Do it Right, Not Over! In her case, I doubted the water entered through the crack. I know the grading around her garage sends water away from the foundation.

This thought went through my head the day before when I saw the crack photo, “Well, most of the handymen she’ll hire will probably not fix the crack the correct way. Redoing the work will be that much harder and cost three times what it should have cost in the first place. I’ll send an email sharing how the crack should be repaired and give her links to the best products.”

She thanked me for sharing it and as we texted back and forth before the workday began for both of us she said, “I just want to hire a reliable person.”

Reliable means the person will show up. Reliable doesn’t mean the person is qualified to make the repair. Those two things were swirling in my head based on the thousands of email exchanges and phone calls I’ve had with other homeowners

The email I sent contained not only the concise and simple step-by-step repair guidelines, but also links to the right products. I felt armed with this knowledge, she’d cut to the chase when interviewing contractors to see if they knew the best way to patch the crack.

Moments later she told me she had no intention of interviewing anyone. She was going to base her hiring decision on reviews in an effort to locate a reliable person.

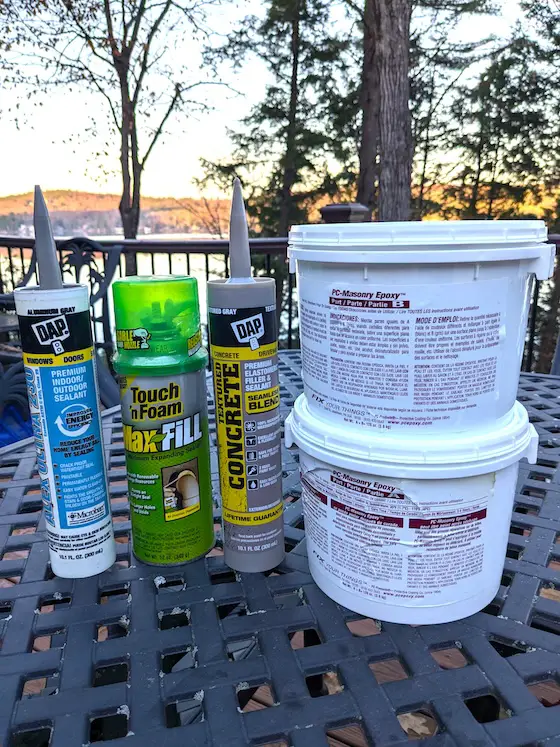
Tell me, how many ways can you think of to patch a foundation crack? Here are a few:

  • get a tube of concrete crack caulk at a local hardware store
  • purchase a small tub of pre-mixed concrete patch material and trowel it in and over the crack
  • slather on roofing cement
  • gorder some magic sticky material hawked by a carnival barker
  • guse concrete epoxy with fiberglass tape

I could imagine all of these possible methods, and a few more, being proposed by the reliable people the woman might hire. I can see most of those methods failing and the crack reopen. My money was on a handyman buying a tube of caulk. Caulk will fill a crack, of that there's no doubt. But there's a much better product.

caulk for repairing concrete

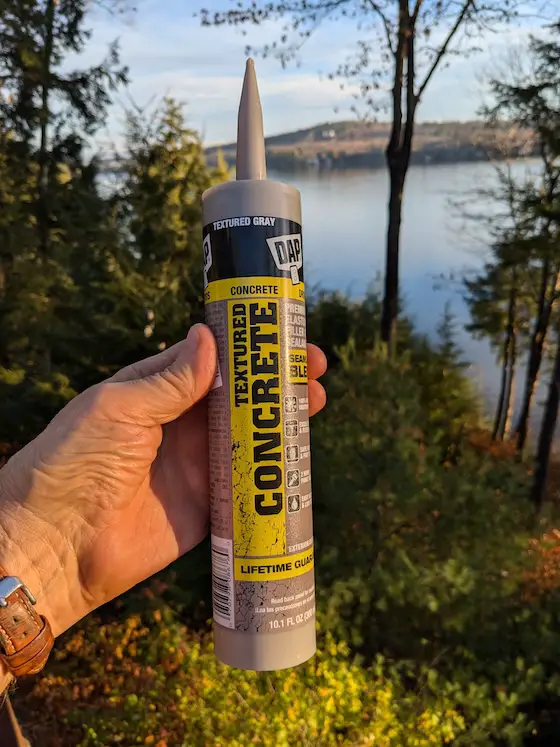
Don't be fooled by the label. This will fill a crack in the concrete. Make sure your child buys it so you get the longest warranty. Photo credit: Tim Carter Copyright 2024

The text conversation started to get a little contentious. At that point, I decided to end the conversation for fear of blowing up the relationship.

Here’s the kicker. Hours later she called me on the phone as if nothing happened. She told me, “Guess what? I found what caused the leak. A gallon jug of drinking water up on a shelf sprung a leak! It had nothing to do with the crack at all!”

Are you like this woman? Do you trust everything is going to be done right? Don’t hope. Use the concrete epoxy with fiberglass tape. The epoxy has a 2,900-pounds-per-square-inch tensile strength. That’s over seven times the tensile strength of the concrete. CLICK HERE to get the best epoxy.

Column 1586

Clean Inside of Toilet Tank

clean inside toilet tank

Clean Inside of Toilet Tank - A standard toilet tank has many parts. They can make cleaning difficult. There’s a better way. Copyright 2024 Tim Carter

Clean Inside of a Toilet Tank - Two Ways, One is Best

Ed subscribes to my free weekly newsletter. He lives in western North Carolina as does his son. His son’s house was not flooded by a portion of the trillions of gallons of water Hurricane Helene unleashed on the interior of the Southeastern USA. That said, his municipal water system was ruined, and the water in the water mains was polluted. Ed's son wants to clean and sanitize the inside of his toilet tank.

Ed’s son thought he was doing the right thing by asking one of the artificial intelligence (AI) engines the best way to clean and sanitize the inside of his toilet tank. Ed sent me the computer-generated answer and it made me grimace.

How Not to Bake a Cake

The best analogy I can offer up is how to bake a cake. Turn on your oven. Mix some flour with sugar and a few eggs. Stir these up and pour into a pan or two. Bake until the a toothpick doesn’t have batter on it when you pierce the center of one of the pans. Remove from the oven, let cool, and slather on some icing.

If you’re a pastry chef or know a thing or two about baking cakes from scratch, my step-by-step instructions above would lead to a culinary disaster. So too the AI instructions about cleaning and sanitizing the inside of a toilet tank.

Vinegar is Not a Sanitizer

Ed’s son was most interested in sanitizing the toilet tank. Flood water is almost always polluted. The AI instructions said to use vinegar to sanitize the tank. The US EPA doesn’t recognize vinegar as a household disinfectant. Chlorine bleach is a powerful sanitizer and disinfectant. The chlorine ions can kill 99 percent of the bacteria in less than 60 seconds. You must use a 50/50 mix of water and chlorine bleach.

Toilet Tank Parts Get in the Way

The parts inside a standard toilet tank make it difficult to clean. The fill valve, overflow tube, flapper valve, and flushing handle can get in the way of your cleaning efforts. My recommendation is to remove and discard the fill valve and flapper valve as part of this cleaning and sanitizing project. Both are very easy to replace.

Before you take everything apart, the first thing to do is to fill several five-gallon buckets with clean water. Do this if you only have one toilet in the house. You can use this water to flush the toilet should you have to use it as you work on the tank. If you only have one bucket, you can refill it with water from your tub spigot, shower head, or garden hose.

Method One - Easy But Not Perfect

I’ve cleaned and sanitized my own toilet tanks in the past without removing the parts. I turn off the water supply to the tank and then flush the toilet holding down on the handle. This keeps the flapper valve up and gets most of the water out of the tank. Let go of the handle once the water has drained from the tank.

I then fill up a bucket with very hot water. I fill the toilet tank up to the top of the overflow tube in the center of the tank. The next step is to add two cups of powdered oxygen bleach to the water in the tank. It should immediately begin to bubble. The oxygen ions are starting to clean the tank and all the parts without your help.

High-quality oxygen bleach is also a great sanitizer. It’s not on the official EPA list because it can’t get the 99% bacterial kill as fast as the standard requires. That said, if you let the oxygen ions bubble in the tank for 45 minutes, you’ll get the desired 99% kill rate.

You can flush the toilet after an hour. The tank will fill with clean water. You may want to flush it a second time. The inside of the tank may be stained from years of bacteria growth, iron stains, etc.

Method Two - The Best Way

To get the inside tank surface as clean as the day it was installed, it’s best to remove the fill valve, the flapper valve, and the flushing handle arm. It’s very simple to do this. There are many online videos showing you how this is accomplished.

The cleaning process is now easy because you can get your hands and different brushes into the tank with minimal interference. Liquid dish soap should do a great job at getting most of the stains off the china.

Oxalic Acid Removes Rust and Iron Stains

Iron staining can be cleaned by spritzing the inside of the tank with an oxalic acid solution. Discover the magic of oxalic acid here. Oxalic acid is a dry powder you can purchase online. You can also fill the tank with water and add the powder.

Install the new flapper valve making sure the valve seat that’s part of the overflow tube is clean. With the flapper valve in place, you can fill the tank again with clear cold water. Add a cup of oxalic acid powder, stir it up, and let it sit for hours. You’ll be stunned at how the rust stains disappear with no scrubbing.

Neutralize the oxalic acid with baking soda before you flush the toilet. You don’t want an acid solution harming your septic system or creating havoc in your city sewer system.

Safety WARNING

When working with any chemicals, stop and read all the safety instructions that come with the product. Wear goggles, gloves, be sure the room is well-ventilated, and by all means don’t mix two chemicals together! For example, never mix chlorine bleach with ammonia.

You’ll undoubtedly have to scrub the inside of the tank to get the best results. It’s no different than taking a shower. Your hands rubbing your skin are the primary reason you get clean. Cleaning requires mechanical agitation for the best results.

Column 1585

Concrete Patching Compound

concrete patching compound botched job

Concrete Patching Compound - This botched concrete repair might be traced to poor eyesight, poor skills, and/or an I-don’t-care attitude. The truck keys, fob, and Mike Mulligan charm are for scale. Copyright 2024 Tim Carter

Concrete Patching Compound - Sand and Cement is Best

Every seven weeks I sit in my barber’s chair and say to Mikayla, “Take no prisoners. Cut each and every one of them.” She giggles to humor me.

ricks barbershop nh

This is where Mikayla works. Her chair and station is on the far right. Photo Credit: Rick's Barbershop NH

I have to step up from the asphalt parking lot to a concrete sidewalk to get to the shop door. Someone tried to patch a crack or a spalled area in front of the barbershop a few years ago. Spalling happens when the top surface of the concrete pops off. The best analogy I can offer is peeling paint.

Concrete Patching Compound Nightmare

My eye was drawn to this botched repair job days ago. I noticed this spot was repaired at least two times. The color of the repair attempts was different.

Hairline cracks crisscrossed the most recent concrete patching compound repair. The surface of the repair was not even. An amateur performed the repair was my first thought. I would get the same result if I attempted to apply icing to a wedding cake. That said, if the wedding cake needed a sand and cement finish, I’d make the bride happy.

The original concrete sidewalk had a sandy finish. This promotes excellent traction which is desired in snowy and icy New Hampshire. A sand finish on concrete works well in any climate because when it’s wet, it provides great slip resistance.

Inferior Pre-mixed Patching Compound

I was convinced the repair was made using a premixed concrete patching compound. These are commodity items found at any home center or hardware store. They come in small buckets. The label says they’ll work well if the area to be repaired is 1/4-inch or less in depth. I have no idea how deep the hole was that was repaired.

The repair stood out like a large scar you might see on a person’s face. I grimaced peering at it. If only the person had read some of my past columns, the sidewalk would have looked so much better.

Stones and Rock Make Concrete Durable

Have you ever thought about the durability of concrete? Concrete that’s been mixed, placed, finished, and cured with care can last for decades. After all, it’s artificial rock. My college degree is in geology. I find it fascinating that concrete is just reconstituted rock!

Basic concrete has but four ingredients:

  • stones or aggregate
  • sand
  • Portland cement
  • water

Portland cement is made from limestone and shale. Sand, for the most part, is just tiny pieces of rock of different types and sizes. Every ingredient in concrete is rock except for the water!

Stop and think how strong Portland cement is. Once mixed with water, a chemical reaction begins. Countless crystals start to form. They’re not unlike the hook-and-loop Velcro™. The crystals bind the sand and stones together to make a hard durable material.

Knowing this, why wouldn’t you just use inexpensive Portland cement and sand to make the repair? You already know that the cement will bond to the existing concrete.

Cover the Entire Block

I would have repaired the damaged concrete by making sure my repair would cover an entire block of the sidewalk. This sidewalk had tooled crack control joints every five feet and the sidewalk was five feet wide. I’d just have to cover 25 square feet with an 1/8 inch of fine sand mixed with Portland cement to achieve a professional repair. Fine sand can be compared to grains of table salt. It’s that small.

Let’s assume the spalled area was about 1/2-inch deep. I would have gathered some coarse sand to use in that deep area. The sand particles could be up to 1/8-inch in diameter. This larger sand makes the repair mix stronger in that deeper hole.

Step one of the repair process is to remove all loose and flaking material. I might tap the area with a hammer to ensure the concrete is solid. I’d then broom away all dust and even scrub it with clear water and a brush.

The weather is very important. You might think a sunny breezy day is the best time to work. It’s not. The sun and wind cause the repair compound to dry too fast. I’d want to do the repair when it was overcast and calm. An air temperature of 60F would be ideal.

I’d mix two measures of sand with one measure of Portland cement. Blend these together dry until the color is uniform. I’d then add just enough water to make the patching mix the consistency of firm applesauce.

I’d then mix up the secret ingredient, cement paint. Cement paint is made by mixing pure Portland cement with clear cold water. Add enough water to make a mix that has the consistency of warm gravy.

If the area to be patched had dried, I’d spritz it with a water mist. It’s important to realize you don’t want the concrete to be wet. You just want it damp. Brush on a thin layer of the magic cement paint and then immediately cover it with the sand and cement mixture.

Use a straightedge to get the patching compound even. Then wait a few minutes and swirl a magnesium or wood float over the compound to produce a professional sand finish. An hour after finishing is complete, cover the patched area with plastic and weigh it down so it can’t blow away. Keep it covered for 48 hours.

Column 1584

Patio and Deck Sizing Secrets

outdoor patio with hot tub fire pit and kitchen

Patio Deck Sizing - This new patio looks perfect but it might be a little cramped when it’s time for a big family get-together. Copyright 2024 Tim Carter

Patio Deck Sizing Secrets

Are you planning a new deck or patio soon? There’s a very good chance you’re going to make it too small. I know this based on the thousands of complaints I’ve received over the years from homeowners just like you.

Most people don’t have the ability to look at a plan drawn by an architect or design contractor and then visualize that actual patio or deck in their minds. The sad thing is most people know how big these outdoor rooms should be based on the rooms in their own homes.

I built a patio for my future mother-in-law. She was smart and sized it perfectly so she could drink hot coffee under the shade of the ash trees in 95 F weather.

The First Ask the Builder Video

I’ll never forget the first video I recorded thirty years ago. The topic was Sizing a Deck. The video was recorded at the producer’s house. She had a tiny 10-foot by 10-foot deck. She told me it looked huge when the builder was putting the railing on, but after he left and they put the table and chairs on it they realized how small it was.

The small deck made it hard for someone to get around the 4-foot-diameter table to get to an empty chair. There was no room on the deck for the BBQ grill. The homeowner was not happy about the situation as you might expect.

I showed in the video how to make scale cutouts of the furniture using graph paper. It turns out that’s too much work. This spring I’m going to re-shot the video. I’m going to go inside my house and show my dining and living rooms. After all, most patios and decks are just carbon copies of rooms in your home.

Study Existing Rooms in Your Home

Think of how you intend to use your patio or deck. Is there a room in your home now that you gather in? Is the room too small? What happens when you have a party? Where do the overflow people end up? I realize you won’t have parties each weekend, but try to imagine what you’ll have to do to seat more than your immediate family and a small handful of friends.

Dining rooms that have a standard table are almost always 12 feet wide. Fourteen feet is ideal. A 12-foot-wide dining room with a 4-foot-wide table provides 4 feet of space on either side of the table. The back of a chair when someone is sitting at a table is at least 2 feet away from the edge of the table. A 12-foot-wide room allows for two feet of space for a person to walk behind someone seated at the table.

Do you have a delightful great room or living room? Does it work well for conversations with a group of people? Measure the size of the room and add two feet minimum to each dimension to create a spacious patio or deck.

Fire Pit Areas Must be Big

Firepits on patios or decks can create headaches if you’re not familiar with these delightful accents. I recently saw a new patio built with a lower area that has a fire pit. When the fire pit and chairs were set on the pad, there was only 16 inches of space from the front edge of the chair to the outer surface of the fire pit.

outdoor patio with fire pit and hot tub

This is the same patio as above but from a different angle. Copyright 2024 Tim Carter

I guarantee people will have to scoot back and put their chairs on the grass when a good-sized fire is burning. This mistake can be avoided by looking at how architects design a fire pit or outdoor fire-ring area for a hotel. Each fire pit I’ve ever sat around has a minimum of 4 feet of space from the front of a chair to the fire pit or ring. If a person wants to scoot closer, they can.

Stage Furniture on Your Lawn

Are you planning to put a BBQ grill, accessory table, water feature, etc. on your new patio or deck? You can avoid planning oversights by laying out all you plan to put on your patio or deck on your lawn early in the planning process. You don’t have to buy everything to do this.

Pick out what you want and get the sizes of everything. Take large pieces of cardboard and create the footprint of the item. Lay the cardboard pieces on the lawn in the exact place you think they’ll be on the patio or deck.

Create enough space around each one so you can walk around everything. Make sure the BBQ grill is not too close to the table where people will be seated. Once you think you have all the pieces set at the correct distance from one another, surround all of them with string to create the outer edges of the deck or patio.

This method takes a small amount of time, but it will pay off in spades once the deck or patio is built. You won’t be a sad sack like my video producer. She ended up having to rebuild that deck by the way!

I used this same staging trick to show how to size a shed. Watch this video:

Column 1583

Fix Pavers Uneven

chipmunk nest under concrete paver patio blocks

Fix Pavers Uneven - This chipmunk cafeteria is now closed for business. The little demons rolled 30-50 acorns through a labyrinth of tunnels under the concrete paver stones to stock the cafeteria pantry. Copyright 2024 Tim Carter

Author Note: The patio featured in this column was a rush job for my wife. I feel the best way to install a patio is to mortar brick to a 5-inch-thick steel-reinforced concrete slab. You can read about this method in my past columns:

Concrete Patio with Brick

My Mother-in-Law's Patio Before I was a Builder

My Son's Deluxe Brick Patio

Fix Pavers Uneven - Chipmunk Tunnels Cause Pavers to Drop

I installed an attractive concrete paver patio for my wife seven years ago. I knew it would fail, but didn’t know when. She wanted the patio completed as soon as possible. This tight deadline requirement dictated I had to set the patio stones on sand instead of mortaring them to a steel-reinforced concrete slab.

My new flat patio soon was not so flat. It's now time to fix the pavers that are uneven. The sand beneath the pavers was being transported away grain-by-grain by union members of chipmunk miners local 104. They found the sand easier to dig through than the sandy soil under my lawn. The concrete pavers provided a sturdy roof to keep their nests dry.

Frost Heave Can Cause Uneven Pavers

I live in central New Hampshire. The winters bring cold weather. Frost heave is a reality. The up and down seasonal movement wreaks havoc on things that rest on the soil. Ancient stone walls built two hundred years ago to outline livestock pastures tolerate this movement to a great extent. Flat patio and sidewalk stones not so much.

Chipmunk Miners

The greater threat is burrowing mammals like chipmunks, mice, and who-knows-what. In my case, it’s chipmunks. These cute furry demons are as prolific in my neighborhood as vacationers who overrun my state year-round.

Chipmunks tunnel through the soil like you might dig in a huge pile of styrofoam packing peanuts. It’s child’s play for the tiny creatures to create an extensive labyrinth of interconnecting tunnels. They do this for survival, and it’s baked into their DNA.

chipmunk tunnel maze under patio pavers

The red arrow points to one of the tunnel entrances. The chipmunks have no less than three ways in and out from beneath the concrete pavers. Seven years ago all you would have seen is the light-colored sand. At least 40% of it has been removed by the wretched mammals. Copyright 2024 Tim Carter ALL RIGHTS RESERVED

My large-format concrete pavers range in size from 8x16 inches all the way up to 16 by 24 inches. The pavers are 2.5 inches thick. They’re heavy. The chipmunks can’t move the pavers but they can make them drop an inch or more by removing the dry sand beneath them.

My wife asked me to repair the uneven patio a month ago. Some small and medium pavers would tip back and forth as you walked on them. The last thing I want is for my bride of fifty years to fall and break her hip.

Plan A: Sand and Cement

I didn’t know the extent of the damage when I came up with my repair plan. I thought, at first, that just a few stones needed to be lifted back up. I purchased a few bags of dry sand and a bag of pure Portland cement. I was going to mix 3 parts sand to 1 part cement and place it under the sunken pavers.

My plan was to start at one corner of the patio and work a rectangle that was about 5 feet wide and 12 feet long. I was stunned when I lifted up the first paver. Fifty percent of the sand was gone. A small maze of tunnels was under this large paver. The interconnecting tunnel system grew as I pulled up more and more stones.

Three pavers in the center of the patio required emergency repair. I pried up a small 8x16-inch paver and lifted two adjacent larger pavers. I stood back in awe, shaking my head, looking down at the local chipmunk cafeteria.

Packed dried oak leaves were brought from outdoors. The chipmunks used these to create a nest. Next to this was a pile of 30-50 fresh acorns. The chipmunks, no doubt, were none too happy about me discovering their lair.

I made a temporary repair using just sand. I’d perform a permanent repair on this section in the spring. Sand and cement was not going to do the job. I had to come up with a permanent fix.

Plan B: A 2-inch Thick Concrete Slab with Steel

I purchased twenty-five 60-pound bags of dry concrete mix. I also purchased 3/8-inch steel reinforcing rods. These rods are often called pencil rods because they're just about the same diameter as a pencil. My new plan was to install a thin flat concrete slab the pavers would rest upon. The chipmunks would never harm this new 2-inch concrete slab.

The steel rods laid 16 inches on center both directions would ensure the concrete would stay in the same plane over time. The chipmunks might re-create their tunnel maze in the gravel and soil under the slab, but the concrete will span the 2-inch-wide tunnels and not drop.

Look at this photo. This is the BEST way to install a brick paver patio. CLICK HERE to watch me lay two bricks.

I removed all the old sand. The hole was now 4.5 inches deep below the top of the patio. My plan is to install the dry concrete mix in two 1-inch lifts. The first lift will be compacted and I’ll lay the steel rods on the mix. I’ll then install the second inch of dry concrete.

I’ll take great care in getting this second concrete mix layer flat to resemble the surface of the sand as I installed it seven years ago. I’ll then mist the concrete with water to start the hydration chemical reaction that transforms the concrete into artificial stone.

A day later I’ll lay the concrete pavers on the hard concrete. They’ll be installed in the exact same interlocking pattern as I did seven years ago. The chipmunks delight my wife, but for me they’ve become my back’s nemesis.

Your takeaway should be this. If you have tunneling mammals where you live, don’t use sand. Install dry concrete mix in place of the sand. Don’t forget to put in the steel rods.

Column 1582

Best Stair Layout

finished interior stairs steps

Best Stair Layout - The building code determines how carpenters should build stairs and steps, but the history of how it all came to be is fascinating. Copyright 2024 Tim Carter

Best Stair Layout - It's All About Human Stride

You probably give little thought to why the stairs in your home are built the way they are. I’m talking about how high you need to lift your foot to get up to the next step and how deep the flat tread is when your foot falls. The vertical face of a stair is called a riser, and the flat step is a tread.

I’ve built many staircases in my career. I also had the good fortune to go up and down many steep ship ladders (stairs) on the USS George Washington (CVN 73). I was on board for an in-depth 24-hour media tour as she carved crescent-shaped courses 200 miles off the North Carolina coast. New young naval aviators were doing their daytime and nighttime qualification tail hooks for the first time. The only elevators on this huge aircraft carrier are for airplanes, not sailors.

Purchase my Building Simple Stairs Ebook HERE.

I’ve also climbed up and down staircases in very old New England houses. These staircases are very steep and were built before building codes existed. You may have had the same experience and held on to the handrail for dear life as did I!

It’s important to realize that the building code we use in the USA is in flux. The code is revised every three years. Some things in the code stay the same, and some things change. The section dealing with stairs and steps has changed over the fifty years I’ve been in the building trades.

Decades ago, I felt the code had the best solution for the formula carpenters use to construct staircases in homes. The code contained a simple formula that stated code-compliant steps would be ones where the sum of two risers and one tread had to fall between 24 and 26 inches.

If you remember your high school math classes, you realize this formula gives a carpenter like me about 20 or 30 combinations to fit the ceiling height and floor space a staircase consumes in a house. Sixteenths of an inch is the limiting factor. Expensive cutting equipment is required to cut risers and treads in dimensions less than a sixteenth of an inch.

7.5-Inch Risers & 10-Inch Treads = Magic

The formula's sweet spot is 25 inches. Stairs that have a 7.5 inch riser and a 10-inch tread are perhaps the most comfortable and safest set of steps you can build and use. I always did everything possible to make sure the steps in the houses I built used this combination.

François Blondel - The Father of Safe Stairs

It turns out this formula was discovered by François Blondel, a famous French architect and civil engineer. He lived in the 1600s.

I decided to dig deeper into this fascinating topic. Two websites bubbled to the top of my Internet search. Practical Architecture and Hopific contain facts that shed light on how Blondel came to develop his stair-building formula. Today’s building codes use Blondel’s formula to create the safest and best staircases.

Stride Studies Held the Answer

Blondel published a book titled Cours d’Architecture in 1675. He focused first on the length of the average stride a person did when walking on level ground. His data at the time showed it to be 24 inches.

Ladders used by workers and soldiers were the next thing to study. Back then it turns out the average distance between ladder rungs was 12 inches. That holds true to this day. Go check your ladders and step ladders.

Blondel applied his findings to regular and shallow step and staircases. You’ll often find these shallow steps on a gentle slope in a garden. For example, if a riser is just one or two inches, the tread is going the be deeper. The tread keeps getting shallower as the riser height increases.

Ladder Rungs Haven't Changed in Hundreds of Years

You can see how this theory and formula translates to ladders and step ladders. Both are staircases that have a very shallow tread, and a much higher riser of one foot. It’s all math and rarely does math lead us astray. I think it’s remarkable François discovered this important relationship with crude measuring tools, no electronic calculators, or the Internet.

Keep in mind it’s very important that the riser height in a set of steps remains constant. The building code allows for a minor discrepancy, but it’s dangerous to introduce different riser heights or tread depths. Both create a severe trip or fall hazard. Do whatever is necessary to ensure the risers and treads remain the same from top to bottom.

Winder stairs and steps use the same formula in the winder section.

Factor in Finished Flooring

A common mistake rookies make when laying out a staircase is to forget about the finished flooring surface thickness at the top and bottom of a set of steps. It’s best to make a simple drawing showing exactly what happens where the staircase contacts the subfloor surfaces and at any intermediary landings.

You must give serious thought to all this math when drawing plans for a home. It’s vital you provide enough horizontal space for the total run of a set of steps. Another tip is to make your stairs at least 42 inches wide. The building code minimum is 36 inches which is quite comfortable for hobbits. Larger humans appreciate the extra six inches, believe me!

Column 1581

Install New Outlet

electrical outlet switch box rough construction

Install New Outlet - These wires will power a simple light fixture. It looks complex, but it’s not. The wires are color-coded to help you! Copyright 2024 Tim Carter

Install New Outlet and Switch - It's Easy

Electrical Phone Coaching HELP: If you need a voice or video coaching call to help you install an electrical outlet or switch, you can talk to Ask the Builder founder Tim Carter. CLICK HERE NOW to get help.

Are you aware how expensive it is to hire a professional to do simple jobs around your home? I know they’re worth the price in many cases because I used to do that work day-in day-out. You may be on a fixed income and simply can’t afford to hire a pro. Thank your lucky stars there are thousands of great videos to help you and keep in mind I’m just a phone call away if you get in a bind.

Inflation is still raging out of control. I don’t care what the news says. Just days ago I had to purchase small plastic 90-degree bends for 1/2-inch PEX tubing. Each one of these small plastic fittings was $2.00. A sheet of 4x8x1/2-inch drywall is $15.00. These are 2024 prices.

Electricians Charge You BIG Money

A friend of mine had to hire an electrician not too long ago. There were several very simple basic electrical jobs to do at my friend’s home. The total bill for the four hours of labor including $125.00 worth of materials was $1,100.00 (2024 price).

My friend reached out to me in shock. I replied, “I wish you would have called me before you hired him. You and I could have done that work in the same time and you would have saved over $900.00.” My friend has done favors for me and I owed him a half-days work.

Residential Electric is Easy - Just Exercise Caution

I can’t begin to tell you how easy it is to do most of the electrical work inside your home. You may be terrified of electricity because you can’t see it and it can and will bite you if you’re not careful. Fires caused by faulty electrical wiring happen each day. The truth is it’s very simple to install residential cables and wires safely so there is no fire risk.

My baptism as an apprentice electrician came just about fifty years ago. Just before my 23rd birthday, I purchased a repossessed FHA house in a very nice Cincinnati, Ohio neighborhood. I was the only bidder and paid $8,500 for the three bedroom wood-frame house.

I gutted the second floor and put in new wiring. A retired electrical engineer was a close friend of my father-in-law. In just hours he taught me all I needed to know to wire all the new outlets and light switches. He even taught me how to install two magic three-way switches to control a hallway light from two different switches. I’ll never forget the simple drawing he made for me.

Wire Size and Amps

Here are a few common-sense things you can file away that should start to build your confidence. The duplex receptacles in your home are probably wired using 14-gauge copper wire. This is the size wire you’d connect to a 15-amp circuit breaker in your electrical control panel.

The next wire size up is thicker 12-gauge wire. This is rated for 20 amps. It’s best to use this size wire for outlets in kitchens and bathrooms. Kitchen appliances, hair dryers, curling irons, etc. can draw well over 1,000 watts. It’s wise to have multiple separate 20-amp circuits in your kitchen. The National Electrical Code (NEC) tells you exactly what size wire to use to power the circuits in these rooms.

Never Mix Wire Gauges - Pay Attention to Color

It’s important to realize you never ever mix wire sizes on the same circuit. The cables are now color-coded so it’s easy to avoid mistakes. White outer insulation is used on cables that contain two 14-gauge wires plus a ground wire. Yellow outer insulation is used on cables that contain two 12-gauge wires plus a ground wire.

When you strip off the insulation on one of these cables, you’ll see a wire covered in white insulation and a separate wire covered with black insulation. You’ll also see the bare copper ground wire. It’s normally wrapped in thin brown paper. It has no plastic insulation on it.

The black wire is considered the hot wire. This is the wire that connects to the circuit breaker in the electrical panel. The white wire is called the neutral. It attaches to a grounded bar inside the electrical panel. The ground wire attaches to a separate bar in the panel.

Black to Brass on Outlets

Look at a standard duplex receptacle, and you’ll see on one side brass screws and the other side silver screws. You attach the black wires to the brass screws and the neutral wires to the silver screws. There will be a green screw on the receptacle. Attach the ground wire to this one.

CLICK HERE to see how to switch one half of an outlet.

Light switches only have brass screws unless it’s a fancy 3-way switch. Most switches in your house are single pole. This means one switch controls a light or several lights. You’ll just see two brass screws on the single-pole switch plus the green grounding screw. One black wire that is hot all the time attaches to one screw and the other black wire going up to the light attaches to the other brass screw. The two white wires, one from each cable, get wire-nutted together to send the neutral wire up to the light. See how simple this is?

There are hundreds of great videos on YouTube that show you the fine points of just about every job you need to do at your home. You can see how to run the cable safely and how to secure it to meet the NEC requirements. Watch enough videos and you’ll soon be able to tackle very simple electrical jobs saving yourself hundreds of dollars.

Column 1580

Leather Honey Review

leather honey cleaning and conditioning kit

Leather Honey - This is the kit I used to clean and revitalize my work boots. Photo credit: Tim Carter Copyright 2024

Leather Honey Review - It's Sticky, and It Works

I tested Leather Honey cleaner and conditioner on my dirty Georgia Boot leather work boots. The results were astounding. These boots are some of the best I've ever worn and I want to keep them in perfect condition.

The public relations firm that represents Leather Honey sent the kit to me after pitching the product.

CLICK HERE to order the SAME KIT I used.

It's important to realize I watched the video below to achieve the best results. Watch it:

Brush Off Mud, Dirt, and Dust


dirty georgia boot work boots

These were my boots before I started the cleaning and conditioning process. I used a stiff nylon scrub brush with short bristles to remove all the dried mud and dirt. Photo credit: Tim Carter Copyright 2024

clean georgia boot boots leather honey

This is the AFTER photo. As each day goes by after applying the conditioner, the boots achieve a DEEPER AND DARKER brown. They look BETTER each day. I did NOT apply a polish after the conditioner. Look below at the step-by-step process to witness the transformation. Photo credit: Tim Carter Copyright 2024

Apply the Leather Honey Cleaner

The Leather Honey Cleaner is like water. I applied it as they said in the directions on the bottle. I also used a toothbrush to get the cleaner applied to seams and the contact edges of the boot soles. It's easy to waste the cleaner because of its viscosity. A little goes a long way!

cleaning a leather boot with a toothbrush

A used toothbrush is very handy to get the cleaner into tight spaces. Photo credit: Tim Carter Copyright 2024

Let Leather Honey Cleaner Dry Overnight

I decided to let my boots dry overnight once I had applied the cleaner. The rag I used was filthy after cleaning. I was sure my boots were ready for the next step.

Here's what my boots looked like after I had cleaned them and before applying the Leather Honey conditioner:

clean leather boot using leather honey cleaner

These are my clean boots. I allowed the cleaner to dry overnight. Photo credit: Tim Carter Copyright 2024

The Conditioner is Like Honey

I applied the leather conditioner from the kit the next morning. I now know why they call it honey. It's similar to honey in consistency and it is sticky. You may not like working with it. It's not hard to apply and it does soak in. Here are my boots just minutes after the Leather Honey conditioner was applied.

leather boot after leather honey conditioner

This is the finished boot. It looks almost brand new. Photo credit: Tim Carter Copyright 2024

leather work boot after leather honey conditioner

This is just another view. The boots look great. With boots costing close to $200 (2024 prices), you really want to protect yours. Photo credit: Tim Carter Copyright 2024