Painting Around Woodwork
 Painting Around Woodwork
DEAR TIM: I have stained oak trim in my home and want to paint the walls an off-white. I have tried using the special blue masking tape to keep the paint off the natural wood trim. No matter what I do, the paint job looks as if an amateur did it. What does one have to do to get crisp paint lines against natural wood trim or even different colored trim? There must be a way! Arthur B., Dearborn Heights, MI
DEAR ARTHUR: You bet there is a way. You need to know a few painting trade secrets, have a special high-quality paintbrush, and possess some decent hand-eye coordination. My guess is that the average person who drinks less than four cups of coffee a day will have a steady enough hand to control the paintbrush.
I have never been a big fan of using masking tape to create a crisp paint line. I have personally seen it used to create the color patterns found on NASCAR race car paint jobs and in the hobby industry, but in residential work many painters simply use skill.
The first thing you need to do is to caulk any small cracks that exist between the back edge of the oak trim and the wall. I prefer to use a siliconized acrylic caulk that is water washable. Take your time and cut the tip of the caulk tube so that the hole through which the caulk flows equals the diameter of a round toothpick. This small hole will allow you to deliver small amounts of caulk into these small cracks.
Is it time to paint your walls? Find the professional painters by using my Interior Painting & Staining Checklist. I offer a 100% Money Back Guarantee.
Apply the caulk in two-foot increments. Once it is applied, strike the fresh caulk with your finger to smooth it out, and immediately wipe the caulked area with a damp sponge to remove excess from the oak trim and the wall surface. It may take repeated strokes with the sponge to achieve this goal. Rinse the sponge as necessary to minimize streaks on the oak woodwork. When you are finished, there should be no caulk on the face or side of the oak trim.
Once the caulk dries you finish the job with a super high-quality paintbrush. Just about every full-service paint store, hardware store, or home center carries deluxe paintbrushes. The paint brushes that professional painters use have the ability to pick up and hold large amounts of paint. The brushes then release this paint in a steady flow. High-quality brushes are usually the most expensive ones you can buy. They are worth every penny.
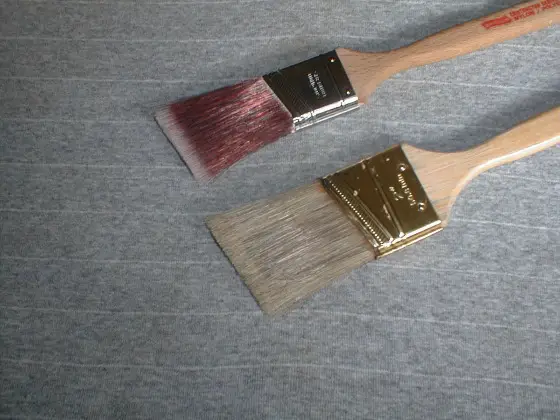
The most important part of a paintbrush is the stock. All of the bristles in the brush make up the stock. They can be natural bristle or synthetic fibers. The best natural bristle comes from hogs that are raised in China. The color of these bristles is either black, yellow, or gray. Synthetic nylon or polyester fibers come in a range of colors. China bristle brushes are used almost exclusively for oil paints. Synthetic bristles can be used to apply just about any paint.
High-quality brushes have a natural taper when you look at them from the side. The longest bristles will be at the central core of the brush. The shortest bristle in the brush should never end less than one half inch from the tip of the stock. This is very important with respect to paint release and cutting in, the task you are about to do.

This is the exact high-quality paint brush I used in the video I did about staining Mexican pavers. The video is just below. Be sure to clean it out frequently and it will last for years. CLICK THE BRUSH NOW to have one delivered to your home.
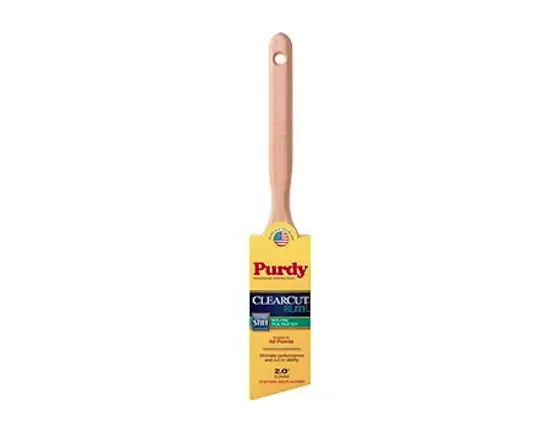
You also need to purchase a brush that is no wider than 1.5 inches and whose stock has been angle cut at the factory. These brushes are often referred to as sash brushes. The angle-cut sash brush gives you a tremendous advantage when you glide it up next to the oak trim.
Dip the paintbrush into the paint can about one-half inch. There is no need to saturate all of the bristles to cut in against the trim. Gently wipe off the excess paint on both sides of the brush. Make the brush touch the wall one-half inch away from the oak trim. Apply light pressure so the bristles bend slightly and make a gentle curving stroke towards the edge of the oak trim. As you approach the oak, make sure just a few of the bristles in the top half of the brush actually glide up next to the trim. Carefully guide the brush down the edge of the trim for two or three inches and start the process over again to continue. With some practice, you will do just fine.
Column 325