Part I – How To Build a Screen Porch – Frame and Square the Floor

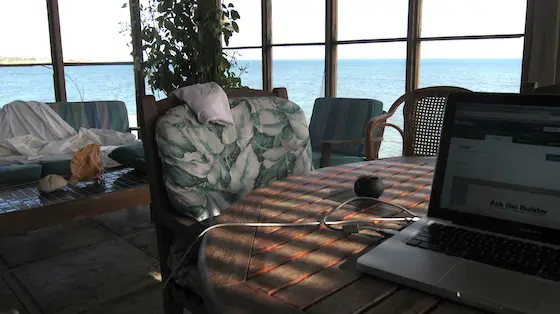
You're looking at Hodges Bay through the screened porch where I spent lots of time working and sleeping! It was so glorious to be right next to the water. Photo credit: sleepy Tim Carter
Let's Go! It's Time to Work!
So - you made it through the building department maze. I know you are tired and your enthusiasm has been dampened, but let's get going. Now, before you get too far ahead, you need to realize that some things are going to be done out of order. In other words, you really have to think ahead. For example: we are going to partially frame the porch floor BEFORE we dig the foundation piers. We are going to possibly run some electric wiring BEFORE we even install the porch floor. We are definitely going to paint many pieces of wood an all sides and edges BEFORE we install them. I know this may slow down your momentum, but you will actually save time and money by doing these things.
A Simple Square or Rectangle
I sure hope you are going to design a screened porch that is somewhat easy to build. Squares and rectangles are the way to go for the DIY'r. Building the screened porch will be so easy if you just get the porch floor level and square. Both are easy to accomplish.
I assume that you are going to build a simple screened porch using a wood flooring assembly resembling a regular deck. This is the best way to go for a DIY'r. The first thing to do is to attach the band board or ledger board to the house. This board will support the floor joists (using joist hangers) as they project away from the house. Your local building code will likely address the attachment method. Here in Cincinnati, we have to use threaded through bolts. These are bolts that have a nut and washer on one end. Lag bolts, which are just giant screws, and simple nails can actually fail. A band board can pull away from the house if the nails loosen or the lag bolts gets over tightened and strips out. Through bolts require more work to put in but they are worth it. Be sure you layout on the band board BEFORE you attach it to the house where your floor joists are going to be! Otherwise, you may have a joist land on top of or next to a bolt head. If you really want to do the job right, determine where the interior floor joists are. Make your floor joist become extensions of the interior joists. This way the bolts can fall in between the centers of the joists on both sides of the wall.
Now, you must attach the two end floor joists to the band board. This will require you to hammer flat one side of a joist hanger. This flattened edge is nailed to the side or end of the band board. Be sure to use the proper joist hanger nails! Do not use roofing nails. Attach your outer rim joist or band board to complete your square or rectangle. To support the box in mid air, simply tack on some 2x4's to the joists. These 2x4's drop to the ground and can be placed on top of some scraps of wood so they do not sink into the soil. Try to get the box as level as possible.
Making it Square
If you want the roof, walls, and everything else to work out just fine, the floor of your porch had better be square. Square to a builder means that each corner is a 90 degree angle.
It is easy to square something. As long as the wood floor joists of your square or rectangle are straight (no bows), it will be easy to square. In addition, the opposing sides of the square or rectangle must be the exact same length. In other words a square box already has equal sides (10 x 10 x 10 x 10 feet). A rectangle would be say 12 feet on two sides and the other two would be 16 feet.
If you have accomplished this, take a tape measure and see what the diagonals measure. In other words, stretch a tape across the box corners to make two triangles. When the two diagonals equal one another, your box or rectangle is perfectly square. Brace the box to keep it square. You can figure out the diagonals mathematically if you choose. Just use the Pythagorean theorem (a2 + b2 = c2). The first way I mentioned works great. That is how we would square up walls we built every day in the field.
Read on to "Part II - How to Build a Screen Porch", where we tackle the "bones" of your structure.
Column B412