Podcast 3
Ask the Builder Podcast 3 Highlights:
- Vic has a gorgeous patio on the back of his house. (photo below) One part has sunken down. I've got the fix.
- Tracey is installing a new staircase and wants to know if traditional stair parts are available.
- Paint peels constantly from Sandy's brick home. She wants to know if whitewash will solve her problem
- Tim shares a story about what can happen 20 feet in the air while standing up on pipe scaffolding - NOTE: Transcript of this story, including VIDEOS, below
Podcast Sponsor: L. J. Smith Stair Systems
Home Improvement and Home Construction Podcast
Photos, Links and Great Stuff:
CALL 1: Vic's Concrete Overlay Job:
Concrete Overlays - They Work, They Last and Save You LOTS OF MONEY
Nasty Spalled Concrete Photos - Perfect Candidate for Concrete Overlay
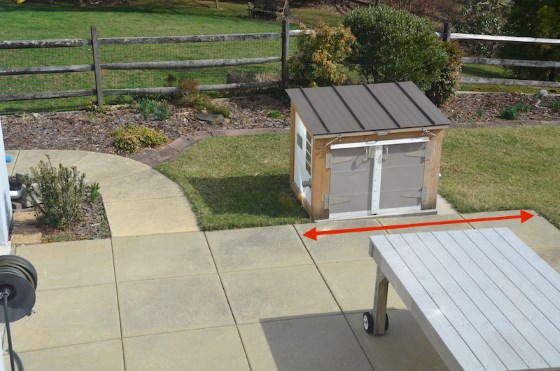
Here's Vic's patio. See the red arrows line between the rolling table and the shed? This is the half of the slab that's dropped. The slab is tilting too much to the right towards the lawn. You can see how much it's tilting by looking at the small shed slab. See how much is exposed on the right side? Copyright 2018 Tim Carter
Call 2: Tracey's Staircase
Related Links:
Assembling Stair Parts - Experienced Finish Carpenters Need Only Apply
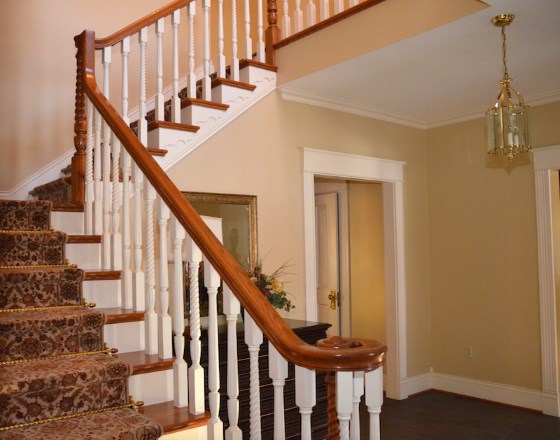
I installed this handrail system in my Cincinnati Queen Anne Victorian home. Copyright 2018 Tim Carter
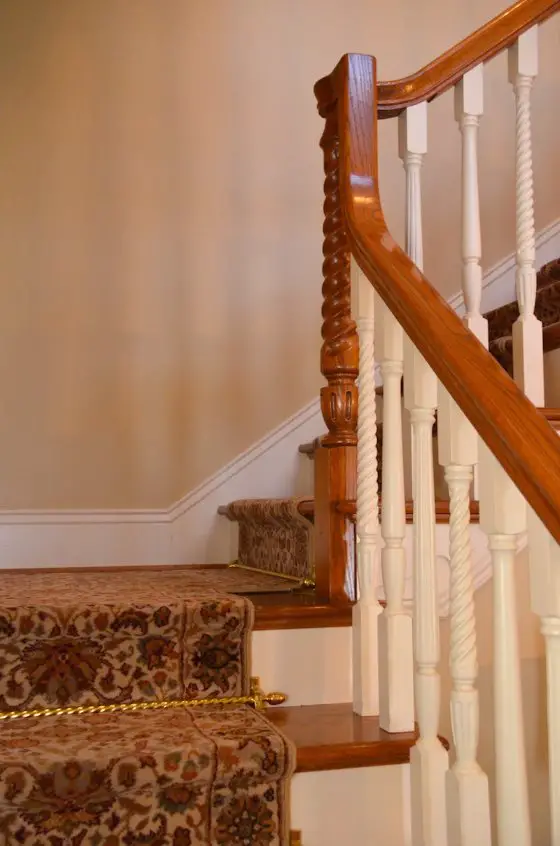
This is a closeup shot of the landing newel post. Copyright 2018 Tim Carter
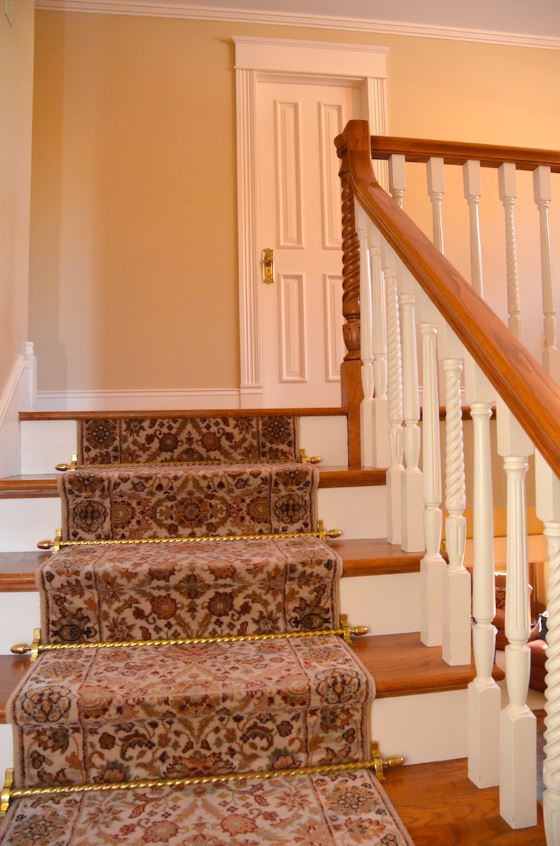
The railing goes up the final flight and turns the corner to run down the hallway. Copyright 2018 Tim Carter
Call 3: Sandy's Peeling Paint
Related Links:
Never Paint Again! Whitewash Application Tips - Colorize Whitewash!
SECRET Whitewash Recipe of Tim Carter
Whitewash an Interior Fireplace - Maggie and Her Daughter ROCK IT!
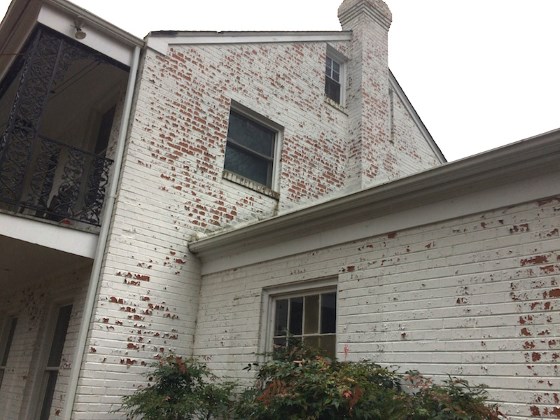
Here's Sandy's peeling brick home. Copyright 2018 Tim Carter
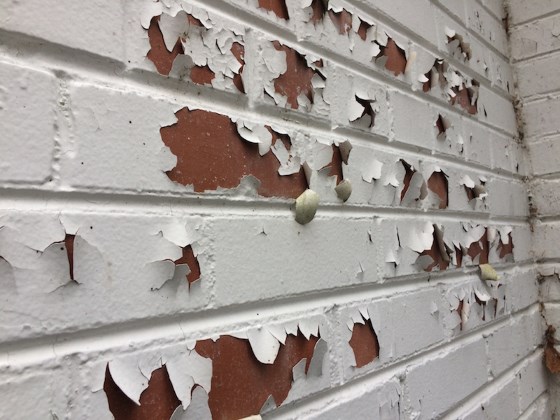
Here's Sandy's brick home. That paint is really peeling!
Pipe Scaffolding Scare Story
Now it’s time to share a tale from years ago when I was oh so young. If you asked me to title it I think I’d say: Pipe Scaffolding - Inspect It Or Else
Kathy and I were 24 years old when we bought our second house. It was a sturdy 5-bedroom, three-story house on Robison Road in the Pleasant Ridge suburb of Cincinnati, Ohio.
The year before we had flipped our first house in east Hyde Park on Minto Avenue. That cute three-bedroom house was built probably in the 1920s is my best guess. I loved the giant octopus gravity furnace that was in the basement of that place!
The Robison Road house was larger, taller and older. As best as I could tell, it was probably built right around 1900. I never went to the courthouse to look that up, but I’m pretty certain you’d be able to determine its age.
This stately wood-framed house sported a distinctive limestone foundation and a slate roof. While the slate roof wasn’t in terrible shape, it was somewhat obvious that 75 years of exposure to the elements had taken a toll on the thin pieces of natural rock.
Even though I’d only been working as a remodeler and contractor for just two years, I made the decision to rip off the slate and put on new asphalt shingles. Looking back now, it might have been a better idea to discover how to repair a slate roof.
That’s but another lesson life’s journey teaches one, but I digress!
I started to work outdoors on homes just five years before buying the house on Robison Road. My good friend John and I had started a summer business painting homes when I was a sophomore in college. We had some ladders and I had purchased a 12-inch wide by 20-foot-long aluminum pic. A pic is a platform you suspend in between two ladders. It provides a wide platform from which to scrape and paint a house.
The first thing to remember is a pic is fine for painters, but not so good for roofing work. You don’t want to have lots of weight on pics and ladders.
I was lucky enough to meet Frank Albanese a few years before buying the Robison Road house. I worked with his son Tony at Skyline Chili in Clifton on Sundays. Tony was about five years younger than me. Frank was a masonry contractor and owned lots of pipe scaffolding. Well-used pipe scaffolding I might add.
Pipe scaffolding fits together much like the parts in a child’s erector set or modern Legos. The primary component of pipe scaffolding is a metal rectangle that often measures about 5 feet square. It’s made from hollow steel pipe that’s welded together.
Bricklayers called these sections a buck. One half of each buck had two or three smaller horizontal metal tubes that created a handy ladder allowing you to climb up the scaffolding. The tubes allowed one to place 2 x 10’s at convenient heights so brick, block and mortar would be at the perfect height as a mason laid course after course of masonry.
A point often overlooked is how fast two people can set up a tower of this scaffolding that might rise 20 or 30 feet up into the air. Once two bucks and their cross braces are are put together and leveled, you can add the next stage in just a minute or two.
One Sunday Frank stopped by Skyline Chili to visit Tony and to pick up dinner for the rest of the family. I went outside to say hello. During the conversation he said, “Hey Tim, why don’t you just use my scaffolding to paint that house and redo the roof?”
I immediately accepted knowing the scaffolding was safer and would save us lots of time. A few days later I stopped by his house with my two-year-old Ford F-100 half-ton pickup truck. In no time it was squatting on its springs with all the bucks, cross braces, pins and planks I had carefully stacked in the bed of the truck.
We decided to replace the roof before we painted the house. It’s usually much smarter to work from top to bottom on an exterior so you don’t mess up finishes by dropping something from above.
Bob Cunningham was a friend of Tony’s and he also worked at Skyline Chili. He was the same age as Tony. He volunteered one day to help me move the scaffolding from the west side of the house to the east side.
The safest planks to use with Frank’s pipe scaffolding were ten feet long. You could use 8-foot lengths, but you’d only have about 6 inches of overhang at each end of the scaffolding.
We needed to stack five sections of scaffolding on top of one another to get above the box gutter on the east side of the house. Up we went erecting section after section. I discovered it’s faster and easier to use 8-foot-long planks to build a scaffolding. Once you started to work, you’d replace those with 10 footers.
Within ten minutes or so, we were 20 or 22 feet up in the air. The view was pretty nice, but there were no planks under us at all on the lower levels. It was straight down to the ground.
Bob and I were standing on one of these shorter planks taking a very short break and all of a sudden one end of the plank fell. Its edge was the next lower horizontal tube.
One of the welds on the horizontal tubes had failed. Bob and I were shaken and we didn’t tumble off the board.
We immediately looked at one another with our eyes as wide as silver dollars. After catching our breath, we looked at the low end of the plank we were standing on. Just one-half inch of it was hanging over the metal support pipe.
We gasped and each grabbed for the buck on either side in case the plank slipped off.
Had that board not caught, no doubt broken bones or worse would have resulted. Construction workers are routinely taken to the county morgue after falls from that height. Permanent disability from survivable injuries is commonplace
Bob and I dodged the bullet that sunny day. Neither of us got hurt, but it was too close for comfort.
I made two mistakes looking back. I should have never used that 8-foot 2 x 10. That was a lazy shortcut as 10-foot boards were stacked in my driveway.
The second mistake was one that only comes after an accident like this. I never ever gave it a thought at my young age to inspect the welds on the pipe scaffolding. After we composed ourselves, Bob and I could clearly see the weld had rusted and just the smallest amount of steel had been holding us for those few seconds we were both on the plank.
If you’re going to be up in the air on anything, take the time to do a thorough inspection to ensure everything is in great condition and you’ll not fall.
Never forget - Do It Right, Not Over!
Subscribe to the AsktheBuilder Podcast
In Tim's March 17, 2018 AsktheBuilder Newsletter, he and Dan ponder the use of the term Podcast vs Radio Show.
