Tips for Patio Pavers
DEAR TIM: This year a precast concrete paver patio is in my future. I'd like to know any tips you can share about this project. How much dirt do I need to remove? Do the pavers just go on the dirt? How do the pavers stay in place? What can I do to ensure the color of the pavers stays as good looking as the day they're installed? What else can you tell me about the colorized concrete pavers? Christina M., Southington, CT
DEAR CHRISTINA: I can't begin to tell you how many good times I've had with my family on my patios. I say patios, because at my last home, we had two. My wife's favorite was a smaller one nestled under a large maple tree that allowed her to look out across a 30-inch-tall serpentine brick wall I had built. Countless shade plants were at the base and on top of this wall that helped decorate the patio.
I say all this because there's so much you can get out of an outdoor patio if you plan ahead and really visualize what things might look like if you add some other features to the project. At the house before the one I'm describing, I had built a similar patio that had a smaller straight wall with a tiny waterfall and pond. The cascading water sound was so peaceful that I used to fall asleep on a recliner in that magical oasis. Those were the days!
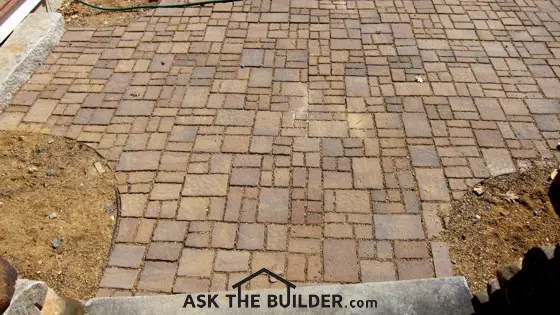
Let's talk about the digging. You'll only need to take out about 5 inches of soil for the patio. That's the total thickness of the concrete paver stone, the bedding sand the stones rest in and the crushed gravel base beneath the sand.
I highly recommend that the finished top surface of the patio is at least 1 inch higher than any surrounding soil or ground. You really want water to flow off the patio and never pond on it. In fact, you want to design the patio so that it has a very slight slope to it so that it does drain. My last large patio had about 2 inches of fall on it across 20 feet. When you sat or walked on that patio, you would swear it was dead level.
Let's talk just for a moment about your different choices. I know you're looking at precast colorized concrete pavers for your patio. You can use traditional clay paving brick as well as other natural stones. Highly uniform clay paving brick can be installed in the same manner as the precast concrete paving brick, but natural stone would require much more labor to get the random pieces to fit nicely, unless you were using high-grade granite cobblestones.
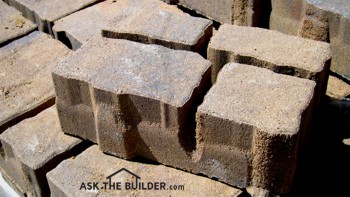
The individual paver stones stay in place because of friction with the bedding sand and the fact that they are in contact with the other stones that make up the patio. At the edge of the patio, it's a good idea to install metal or plastic retention material so the stones at the edge don't wander into the grass or garden.
The color of your precast concrete paver patio stones is going to change over time. They look fantastic when they're installed because the cement paste that coats the sand and gravel in the mix contains the colored earthtone pigments. But Mother Nature and any foot traffic you apply to the stones will wear off the top layer of colored pigment from the top of each stone. This happens slowly, and you really don't notice it.
But over a few years, you'll start to notice the dull color of the stones and sand that was used to make each stone. Save one or two of the original pavers in your garage and take them out on your patio in five years. That's when you'll really see the difference.
If you use traditional clay paving brick or a natural stone product, you'll not ever have a color fade issue. Clay bricks have the same color throughout the product. The same is true for granite, flagstone, slate or other natural stone that's used for patios.
One thing I do love about the concrete paver stones is how they interlock and how they can be removed, if necessary, to do repairs to the patio, sidewalk or driveway. It's not too hard to remove one or two stones to gain access to the soil beneath the surface.
What's more, if one or more of the pavers gets cracked or damaged by a stain, you can remove it and replace it. If the surrounding stones are faded, you'll need to age the new paver to match what's around it.
Another benefit of the interlocking pavers is they are DIY friendly. If you're going to install a square or rectangular patio, you may not need to cut one stone! You'll have the patio installed in hours if it's small or you have lots of help. Believe it or not, it's possible to have a completed patio from start to finish in one day.
You can watch an informative video that shows a concrete paver patio and individual paver stones at www.AsktheBuilder.com. Just type “paver patio tips video” into the AsktheBuilder.com search engine.
Column 931

