Tips on How to Sand Wood

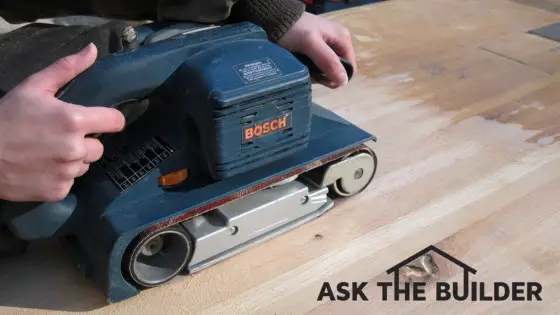
This belt sander does a great job on sanding larger pieces of wood. Photo Credit: Tim Carter
DEAR TIM: I've got several projects facing me and some involve sanding large areas of wood. I don't have lots of experience doing this and wonder if you can minimize mistakes I might unknowingly make. I see all the different sandpapers and then there are the sanding power tools that one can use. It's all very confusing. - Steve L., Alta Dena, CA
DEAR STEVE: It's really interesting how your dilemma put me into a time machine and sent me back about forty-five years. I can clearly remember similar confusion when I looked at the different colored sandpapers and wondered which one to use for what job.
Now add to that decades of improvements in abrasives, new sanding tools that didn't exist years ago and I absolutely can understand why you and others might be overwhelmed.
Let me first say that entire books can be written about the topic of sanding wood. There's simply so much to discuss. For example, a technique used to sand one species of wood will produce vastly different results on a different species. The relative hardness of each wood species can determine how you get the best results when sanding.
That's the first thing to realize. Not all wood is the same. Some wood is extremely hard, and that wood can be tough to sand. The level of grain of wood is not all the same across different species. Some species of wood have very little visible grain, while others have vivid grain patterns. You have to be very careful about sanding across the grain as that can drastically affect your final results.
Usually you get superior results when you sand in the same direction of the grain. The best way to think about this is the orientation of the tree when it was still in the forest. If you sand up and down the tree trunk, you'll get pretty nice results. Sanding sideways across the trunk of the tree, while it's still standing, would be sanding across the grain.
The sandpaper you'll end up buying is not all the same. The tiny pieces of abrasive used as the grit are made from different minerals or compounds and the grit comes in different sizes. Typically, the smaller the number of the grit, the larger the particle size is. You use coarse grit to cut through finishes and smooth wood, and then you use fine grit to polish wood until it's almost as smooth as glass.
As for abrasive types, you may see an orange sandpaper that's made from garnets. As you use this paper, the tiny particles of garnet actually loose some of their sharpness and start to be come more rounded. This rounded abrasive can produce a lovely burnishing effect.
But if you choose the brown sandpapers that are often made with aluminum oxide particles, these actually self sharpen as you use them. I was astonished to discover a sandpaper actually could do this and not wear out as fast.
You then have to discover how to use powered sanding machines. Small electric palm sanders are pretty harmless, but do a great job. These tools oscillate quickly and you just rub the tool across the wood to sand it. They're made for smaller jobs.
The pad sanders can tackle slightly bigger surfaces, but they typically oscillate too. When you advance to a belt sander, you need to practice. Belt sanders are impressive tools that can do lots of work fast. That means they can quickly harm a piece of wood if you put in the wrong sandpaper or don't use the tool the right way.
Belt sanders tend to work well if you constantly move the tool with the grain and also in a slightly oval or circular motion never leaving the moving belt in one spot for any length of time. Doing this can cause the machine to dig into the wood at that spot.
There are other sanding tools that work wonders in tight places. The newer multi-tools that oscillate have all sorts of small sanding attachments that allow you to get into very tight spots. Rotary sanders or grinders equipped with sanding pads or drums should only be used with some training. You can really damage a piece of wood quickly if you don't know how to use a rotary sanding drum or disc!
Sanding wood is a great alternative to using chemical strippers to remove finishes. But you must be careful. Older painted surfaces, ones painted before 1978, can absolutely contain lead in the paint. The same is true for varnish. Lead was even put in clear finishes prior to 1978.
If you sand finishes that contain lead, you can put lead dust into the air, on your clothes, in the soil, and inside your body. Lead is highly hazardous to your health. Ingest enough of it, and you will die. Ingesting small amount can cause serious health issues, some of them long-term.
You can test paint or clear finishes for lead content using simple lead test kits. But you must use them correctly. Don't fall into the trap thinking a painted surface is lead-free when, in fact, there is lead below the surface.
You must chip off some of the paint down to bare wood and test the paint that was first put onto the wood. Don't test the layer that's on top as there could be several layers of paint applied after 1978 when lead was no longer allowed to be used in residential paint.
You can watch a video that shows tips on using a belt sander to remove the finish over a table. Simply click on this link "belt sander tips video".
Column 962
One Response to Tips on How to Sand Wood