Workshop Storage – Start On Your Walls

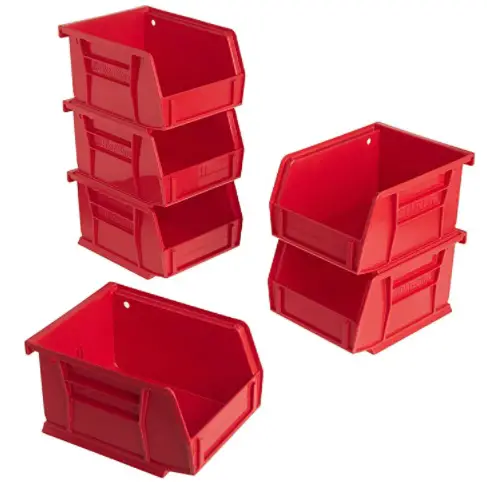
Workshop Storage - These bins come in many different colors. They last for decades. You can purchase them right here.
Workshop Storage Solutions - Get Akro Bins
DEAR TIM: Now that I’m retired, it’s time to trick out my workshop. One thing that’s always been a problem is decent workshop storage. I’ve seen different solutions, but am still pondering what’s best for me. What about workshop storage shelves? To cut to the chase, I’m open to any and all workshop storage ideas you may have. Hank M., Lewiston, ID
DEAR HANK: You have a boatload of storage options. I’ll do my best to describe what’s worked well for me, but I’m sure there are others who’ve got excellent ideas and workshop storage solutions that will keep you highly organized.
Declutter With Great Shelves
For starters, I often see clutter happen because there’s not an efficient use of space on walls. Visit a home center store and you can see how they take advantage of space up in the air. That, in my opinion, is the key to maximizing storage. Get things off the floor and up in the air.
You’ll probably agree that you need two types of shelves in your workshop. The most basic one would be simple horizontal arms at the same level that support long lengths of lumber. There’s no need for a horizontal shelf as the lumber creates the shelf.

These workshop storage bins are perfect for screws, nails, small parts, etc. PHOTO CREDIT: Tim Carter
I’ve had great luck using simple angle iron that has holes punched in it. You commonly see this product used to support your garage door track and powered garage-door openers. You may be able to purchase this angle iron from a garage door installation company for far less than you might at a hardware store.
I assemble this material with nuts and bolts and firmly attach it to wall studs with long lag bolts to ensure the entire system will not pull away from the wall. A good-sized system might have well over 1,000 pounds of lumber on it, so be sure you don’t overtighten the lag bolts that hold the vertical standards to the wall studs.
For lightweight storage, you can make some dandy storage shelves using 2x2 pieces of lumber for the vertical standards and 3/8-inch plywood as the shelves. Additional 2x2s can be used as the horizontal supports that cradle the pieces of plywood. Once again, this is for lightweight items like sandpaper, some hand tools, glue, etc. Design the horizontal spacing of the shelves so there is minimal wasted space between each shelf. Allow at least two inches of clearance space between the top of the highest item and the bottom of the support of the next highest shelf.
I always have workshop storage cabinets in my mix. I was lucky to be able to salvage cabinets from jobs I was working on. They’re very hard to find, unless you have access to homes built in the 1950s, but try to get some excellent metal kitchen cabinets. I have several that lasted for 50 years in a kitchen before being drafted for use as part of my garage workshop storage team.

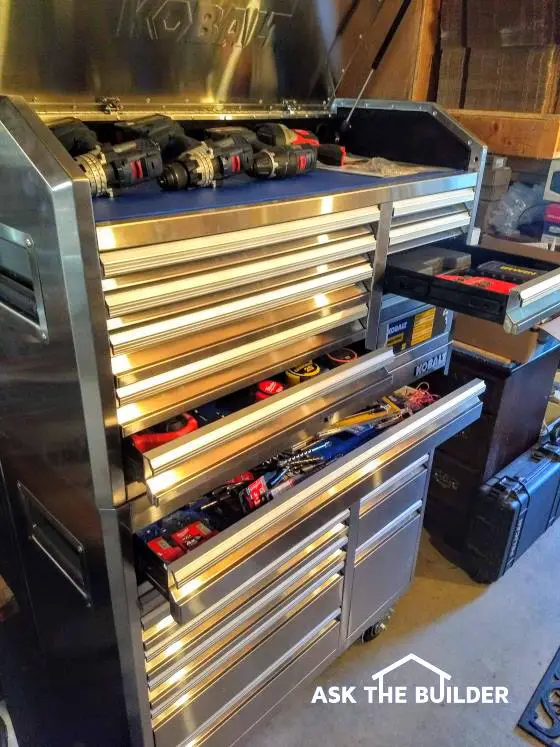
Borrow a tip from an auto mechanic. Get these amazing tool cabinets to store hundreds of tools in one place. I LOVE MINE that you see above. This stainless-steel tool cabinet should have been bought 30 years ago! (C) Copyright 2022 Tim Carter
Regular wood cabinets will work just fine if that’s all you have access to. If you use base cabinets, try to outfit them with rollout shelves instead of fixed shelving that requires you to bend over and move things to get access to what you want. You’ll discover quickly that rollout shelves are magical and allow you to clearly see what you have and get it with minimal effort.
Stackable Akro Bins are Best
I use stackable workshop storage bins for all of my fasteners and small hardware. These handy items come in a variety of colors, sizes and shapes. You can use the colors to help you keep groups of things separate. For example, you may decide that blue bins are for screws of any type, while red bins are for tacks, nails and other steel fasteners.

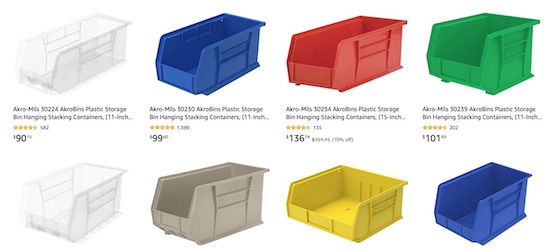
You can get CLEAR, and all these colors and even more. To see all the Akro bins I have, you should click or tap here.
Certain bins are made with a built-in french cleat. If you have a thin metal strip that protrudes slightly from your metal pegboard, the bins hang on it perfectly. Purchase the right bins and you can stack them four or five high and still be able to see what’s inside each one. The good ones have a slot that allows you to install a label telling you what’s in the bin.
Visit many retailers and you’ll probably see workshop storage units. Some may dazzle you at the store, but when you get them home you may discover they’re too small and impractical.
Before you buy a unit that’s made at a factory, take a scrap piece of salvaged kitchen countertop, or a piece of plywood, and make a test work surface. Place on the top what you think you want and need in your workshop. Determine what the minimum width is that will work for you.
Be sure that the top of your workbench is no deeper than 26 inches. If you go wider, you’ll quickly discover that it’s hard to reach any storage that you have above the workbench. This is true for pegboard, shelves or traditional wall cabinets. A deep workbench simply puts you too far away.
Column 835
One Response to Workshop Storage – Start On Your Walls